
Rasmus Fridlund
Hi, I'm Rasmus. I have a bachelors degree as a Technical Artist, and a passion for creativity and problem solving.
I have a broad skill set stretching from modelling, rigging and animating 3D models, to programming websites, games and game engines. I also dabble in game and level design from time to time.
Highlights
My favorite pieces of work.
Games
A collection of games I have made, either alone or as part of a group.
Projects
Pieces of work I have made that show off
individual skills.
Thesis
My bachelor thesis written together with
Erika Gustafsson.
Highlights
Damned Soul
An award winning game made as a collaboration between 14 people over 15 weeks.
Maya Scripting
Scripts made for Maya.
DirectX11 Project
A project that displays several rendering techniques using DirectX11.
Particle Handler
A system for handling particles in a game engine.
Level design
Levels I have made.
Games
Damned Soul
An award winning game made as a collaboration between 14 people over 15 weeks.
The Lair
A game made as a collaboration between 6 people over 6 weeks.
Pac-Man Recreation
A game made with JavaScript that recreates Pac-Man with few changes.
Damned Soul
Damned Soul is a Rogue-Like Action RPG that takes place in a rendition of hell. Loosely inspired by Dante Alighieri's "Inferno", the player has to battle their way through 9 different levels with increasing difficulty to beat the game, facing off against seven different types of enemies. Two of the enemy types are bosses, and three of the "normal" enemy types have empowered versions that appear in the latter parts of the game. The levels get progressively warmer during the first half of the game, and then slowly transitions into a colder climate, ending the game in an environment completely covered in ice. Between each level, the player can purchase upgrades with souls they've collected from killing enemies.
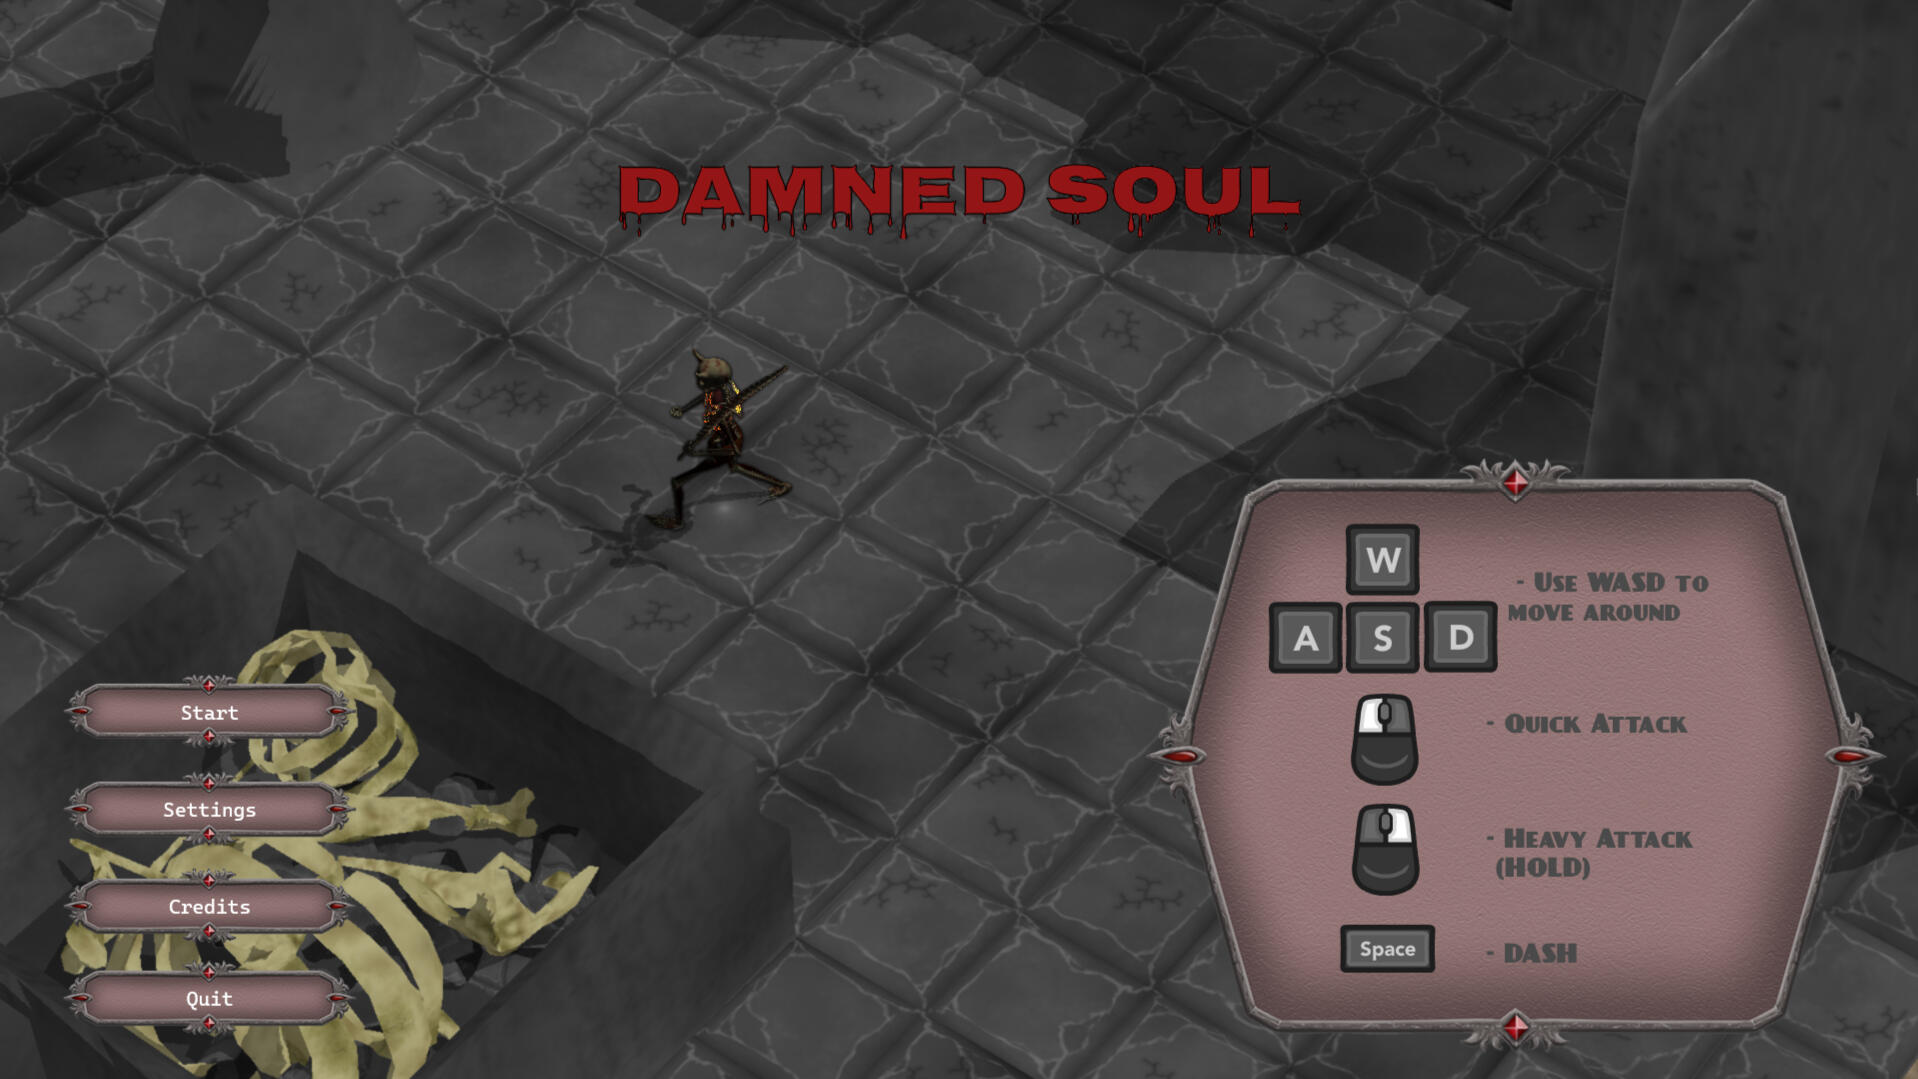
An example of the front page as the background is a random camera on a random level
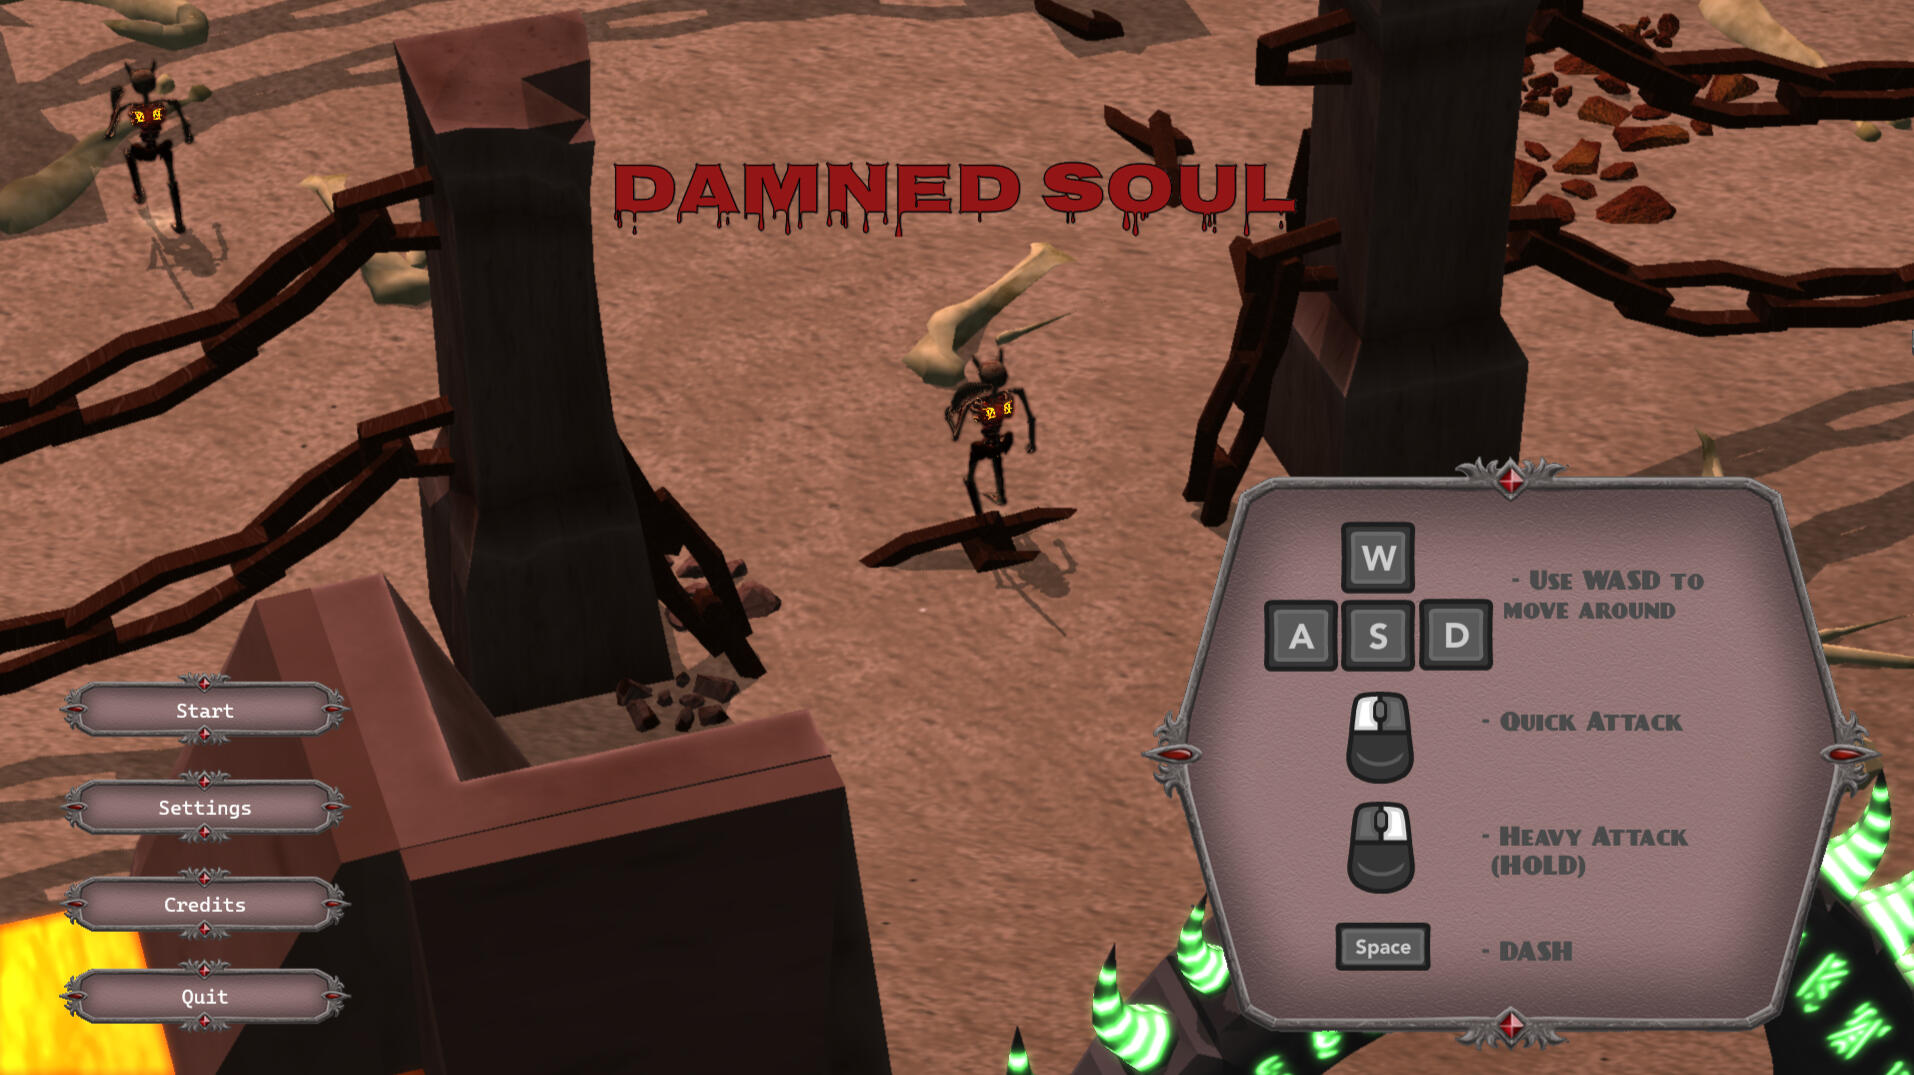
Another example of the front page
The game was made in 15 weeks by 14 people as part of a course on Blekinge Institute of Technology (BTH), during which the entire team used SCRUM and daily stand-up meetings. The time spent working was divided into seven sprints of two weeks, with some exceptions. At the beginning of each sprint, planning of tasks and sprint goals were done, and at the end of each sprint a Sprint Review was done to show off what everyone had done during the sprint, and keep the teachers in the loop. During each sprint, we also had a Scrum Master that kept track of a Burn-up chart, a Burn-down chart, Total time spent working as a team, and average time spent per team member. The time worked could be measured as each team member logged the time they worked each day before going home. This was done by filling in a google form with who it is, and how much time was worked.After the completion of the course, Damned Soul was entered into the Game Concept Challenge and won 25 000 SEK to be used for continued development.
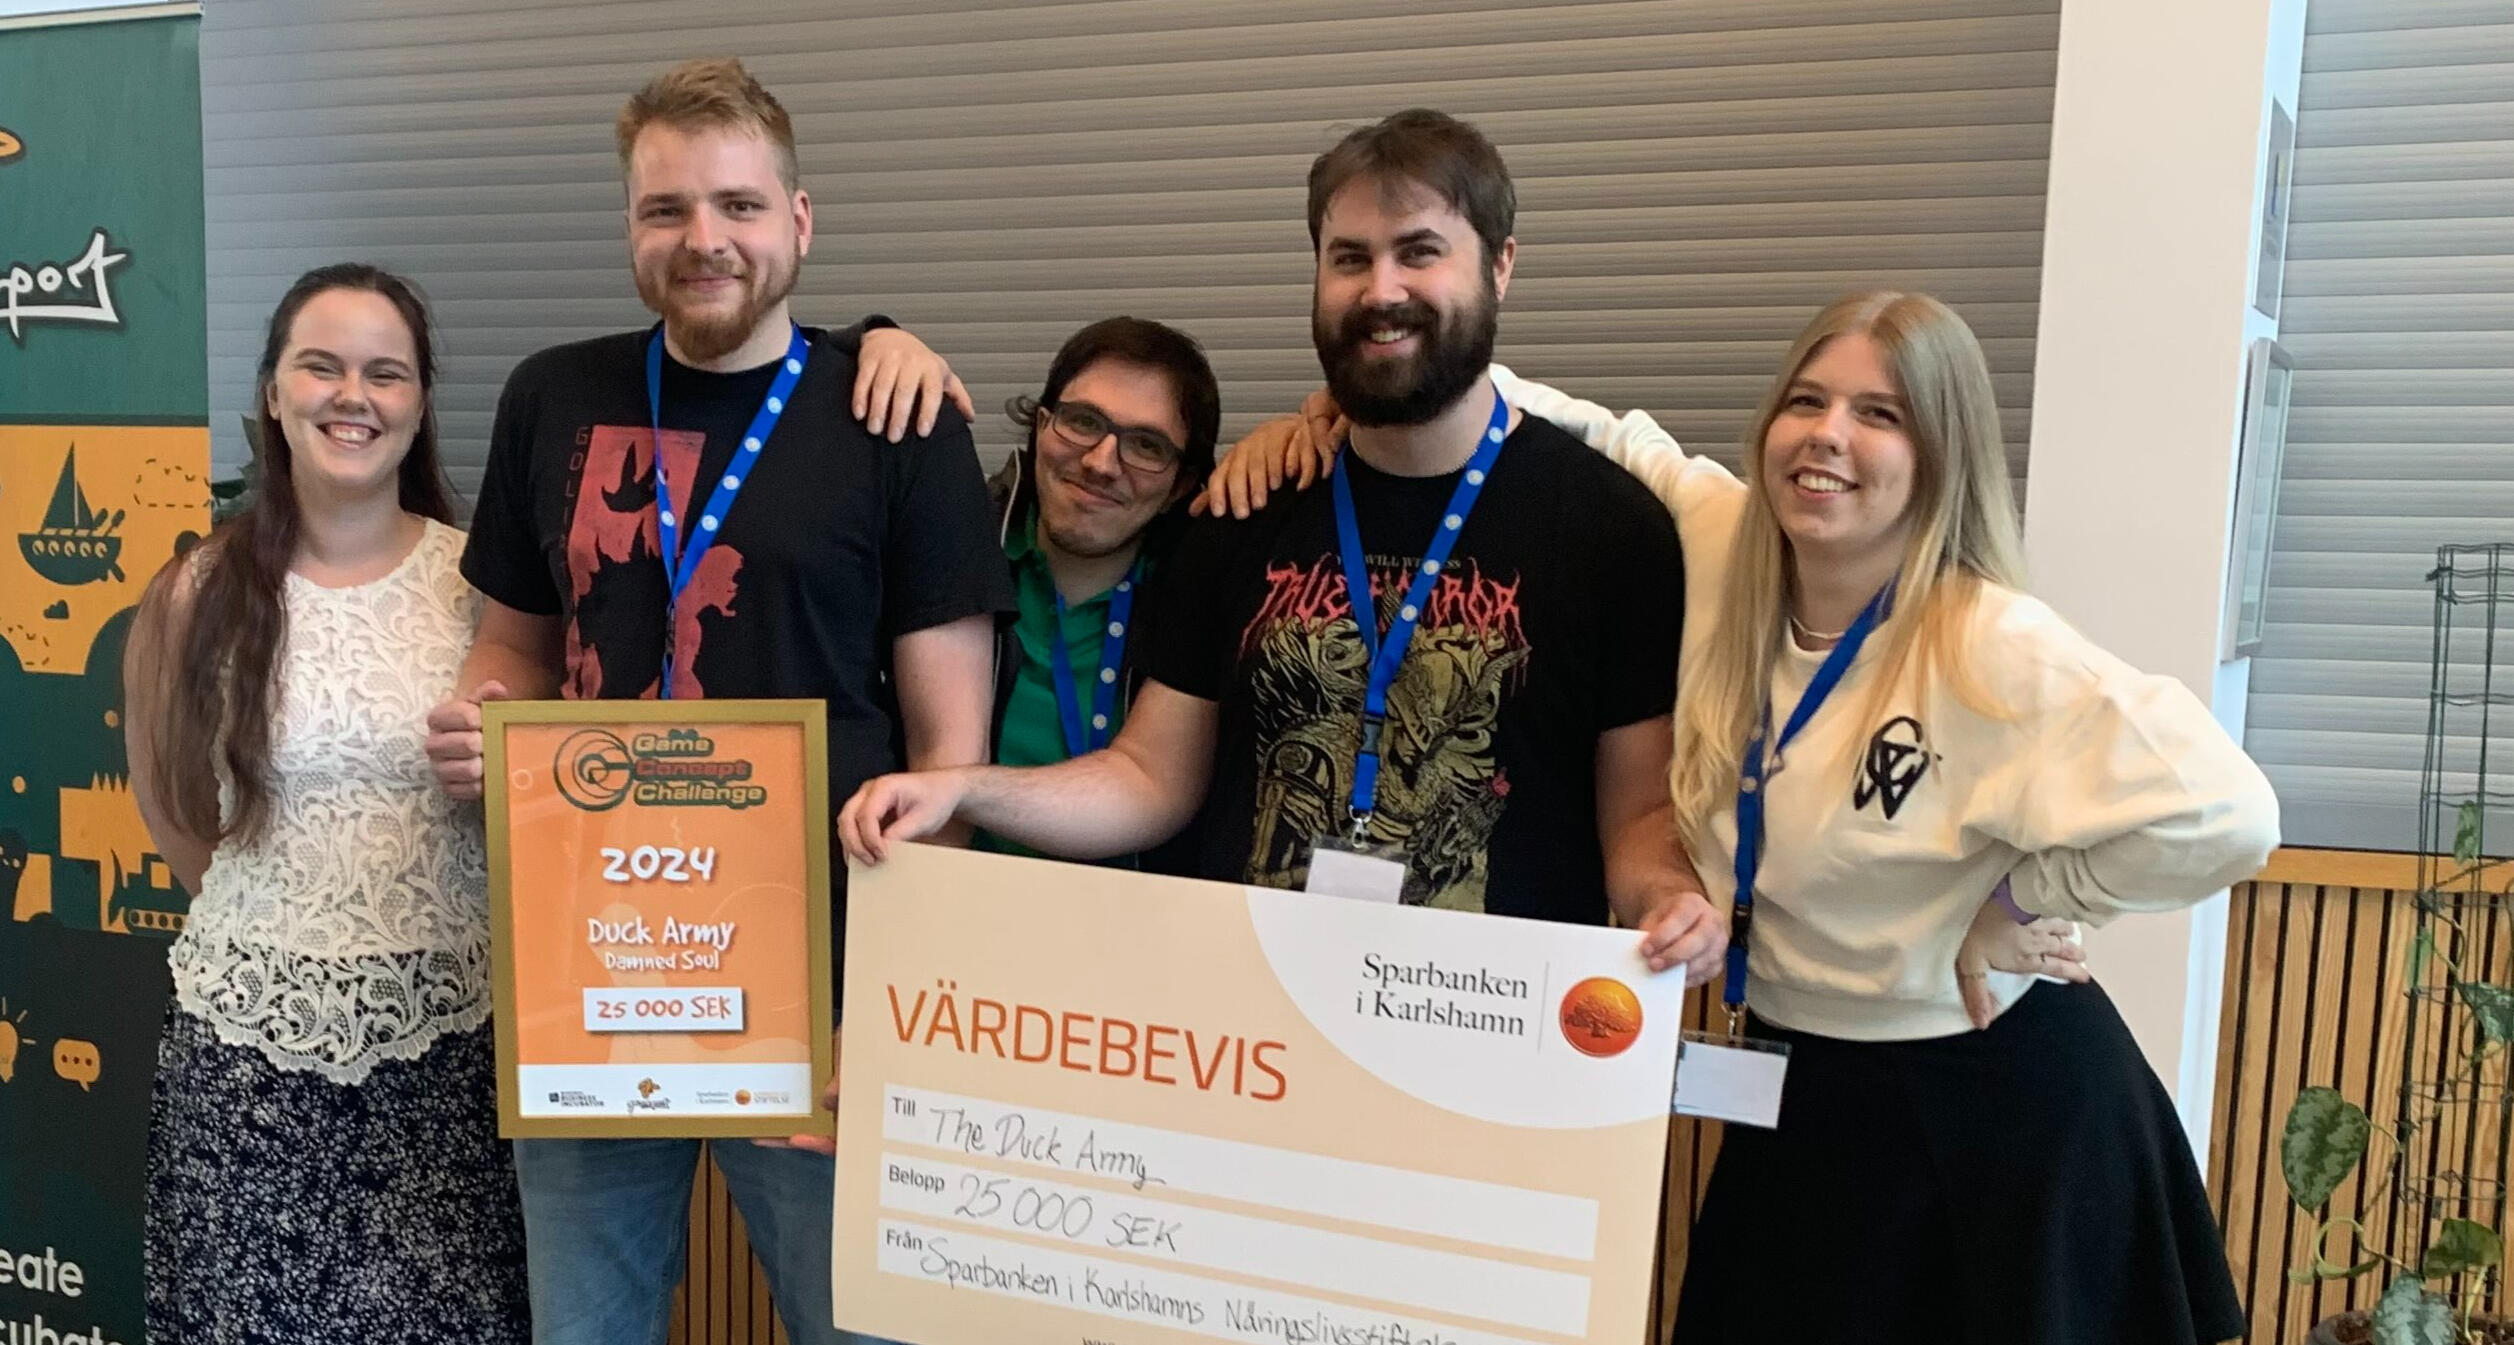
Image taken after winning GCC
My roles when creating Damned Soul was:
- Product Owner
- Lead Game Designer
- Graphical Artist
- Only Technical Artist
- Only Level DesignerA lot of my work on this game can be found under Projects->Maya
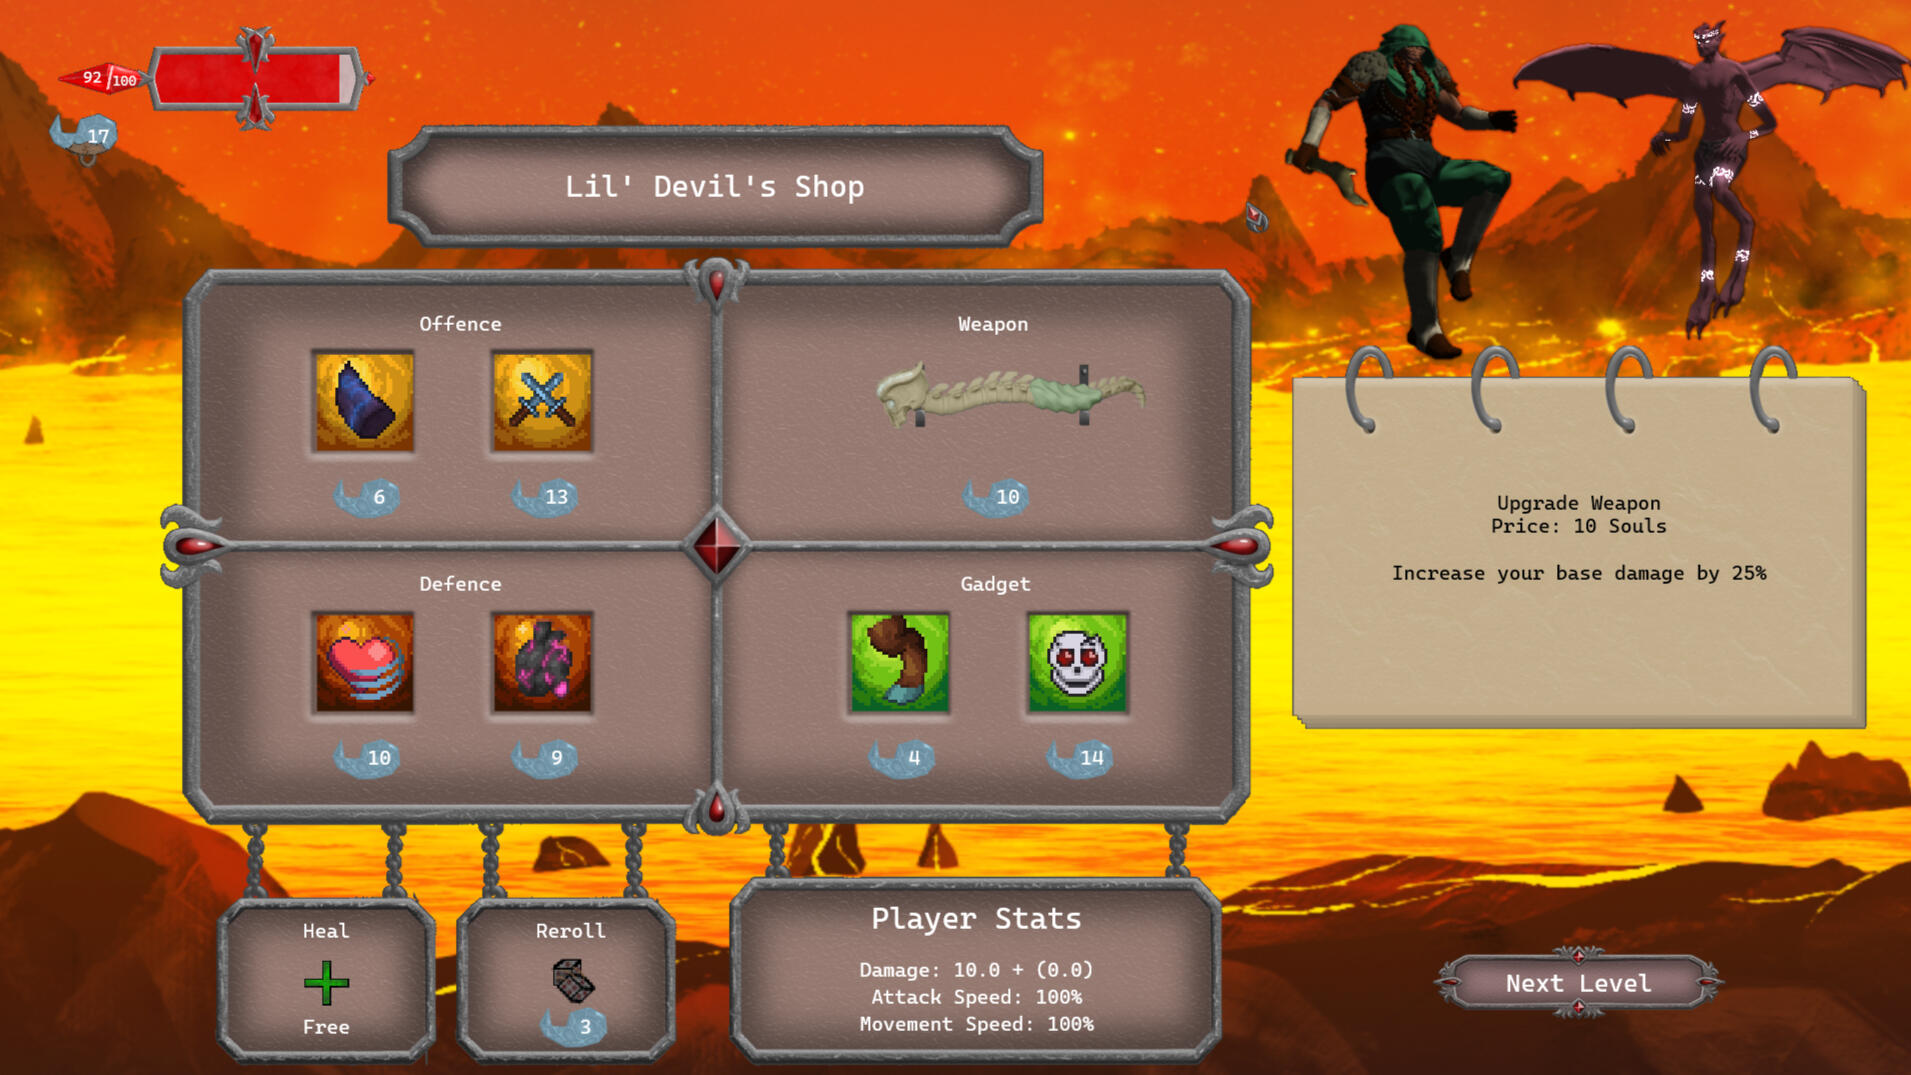
An example of what the shop looks like
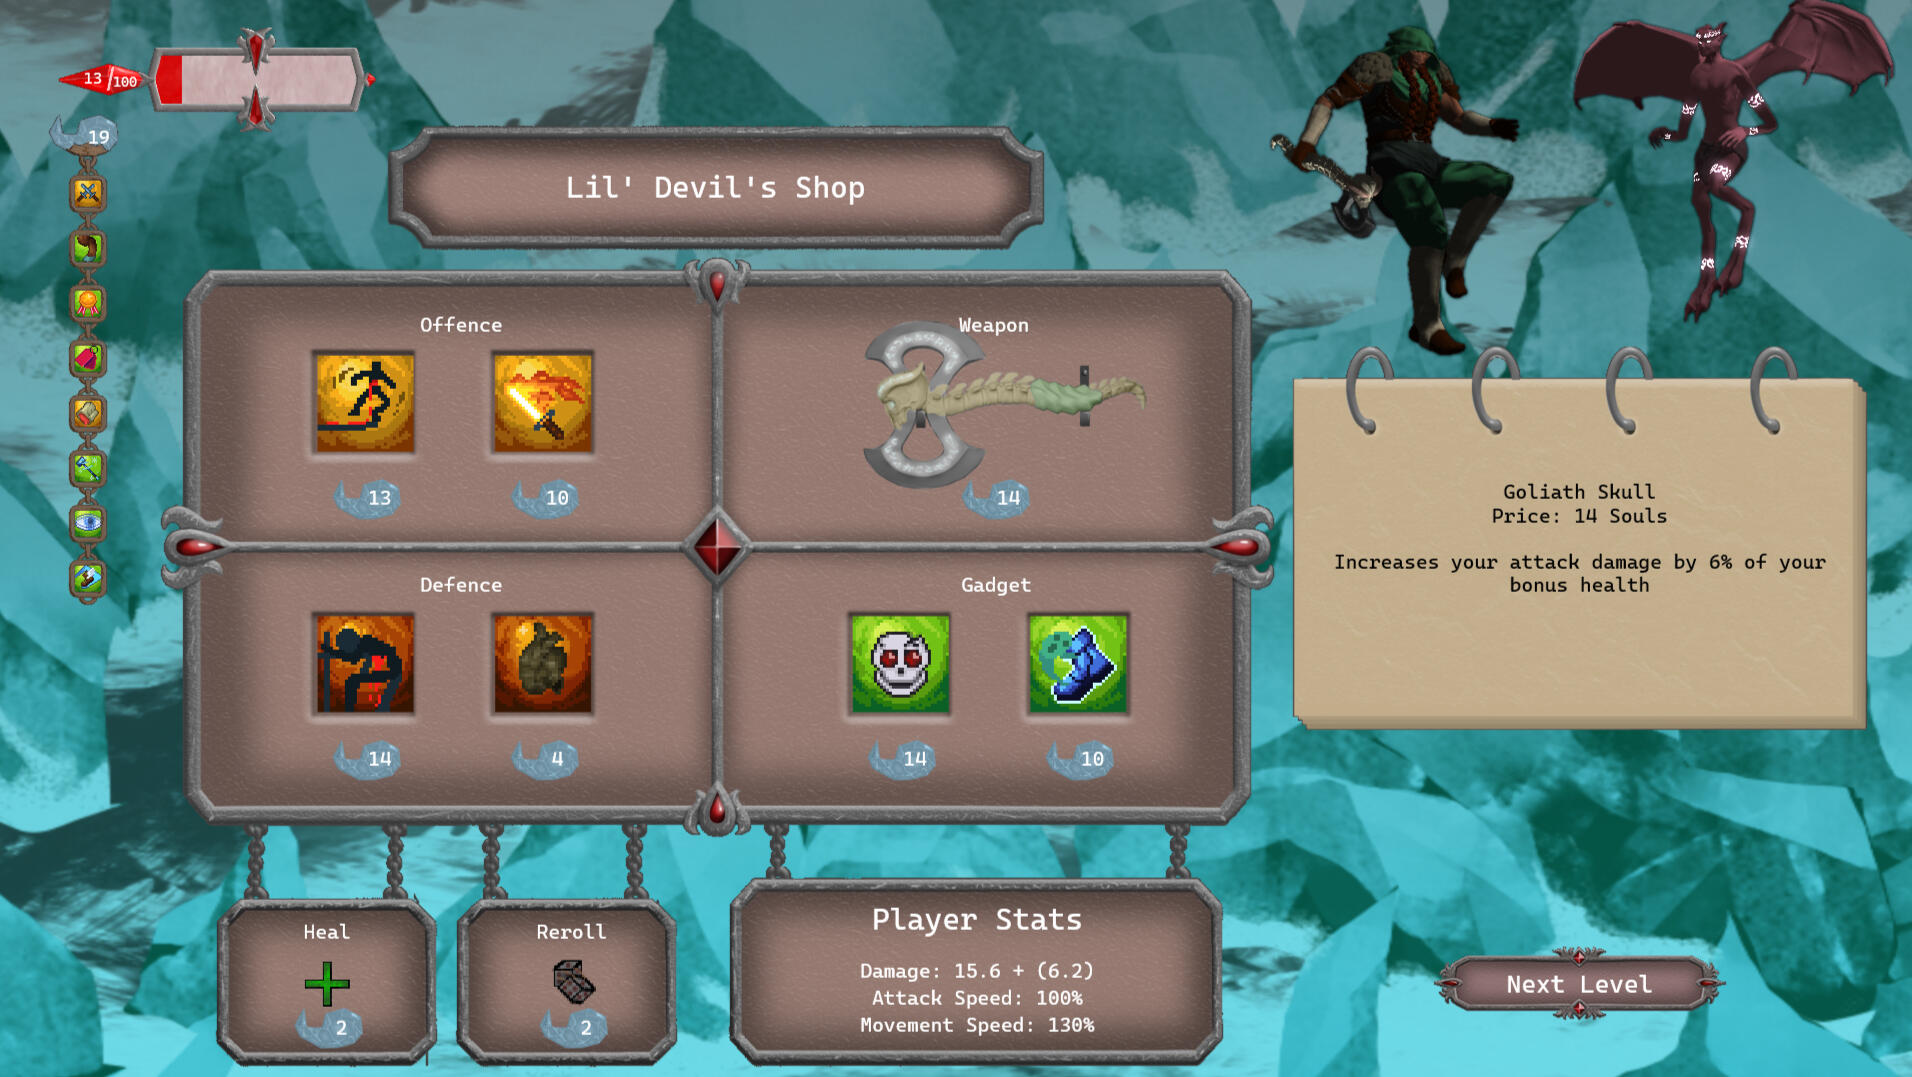
Another example of what the shop looks like
Product Owner
For this project, it was a requirement to have a "Product Owner". After three weeks of development, the previous Product Owner decided they did no longer want the role. As such, I was instead appointed as Product Owner, through a vote in the group. As Product Owner, I had the additional responsibilities in the group to lead Sprint Reviews, and keep track of the combined vision and progress for the game. To achieve this, I regularly checked in with each group member what they were doing, and how it was going. If any concerns came up, I brought them up during the stand-up meeting the following day so the group could discuss a solution.
Lead Game Designer
As Lead Game Designer I designed the game together with three other people. Due to several lengthy discussions around how the game should work, with few decisions being made, it was decided that someone should have a veto in such circumstances. I took on the role of having that veto, and that role eventually also led to many elements of the game being designed by me before being brought before other team members for tweaks to save time, as everyone had responsibilities in several areas.
Graphical Artist
Due to the game requiring models for a lot of different enemies, I took part in both modelling, rigging and animating enemy models. I modelled, rigged and animated the Minotaur, I rigged and animated the Watcher, and I rigged the Imp.
Technical Artist
As a Technical Artist I aided Graphical Artists, including myself, with rigging characters by creating a script that does a lot of work with creating controllers for you. I also worked with the game programmers to work out how we should load the levels into the engine in the smartest way, and developed scripts for aiding in that.
Level Designer
During the development of the game, I took on the role of creating the levels for the game. This worked out well as I also created the general outline of what order the types of enemies should be introduced in as a Game Designer, somewhat blending the two roles when designing the levels.
Level 1
As this is the first level, it had to act as an introduction of the game to any new players. As such the player starts out with no immediate enemies, giving the player some room to explore the controls. Moving on, the level is quite small, and only featuring a few skeletons as enemies, as skeletons are the most basic enemy in the game, only being able to walk up to the player and hit them. This makes it so a new player isn't overwhelmed, and experienced players can clear the level quickly.
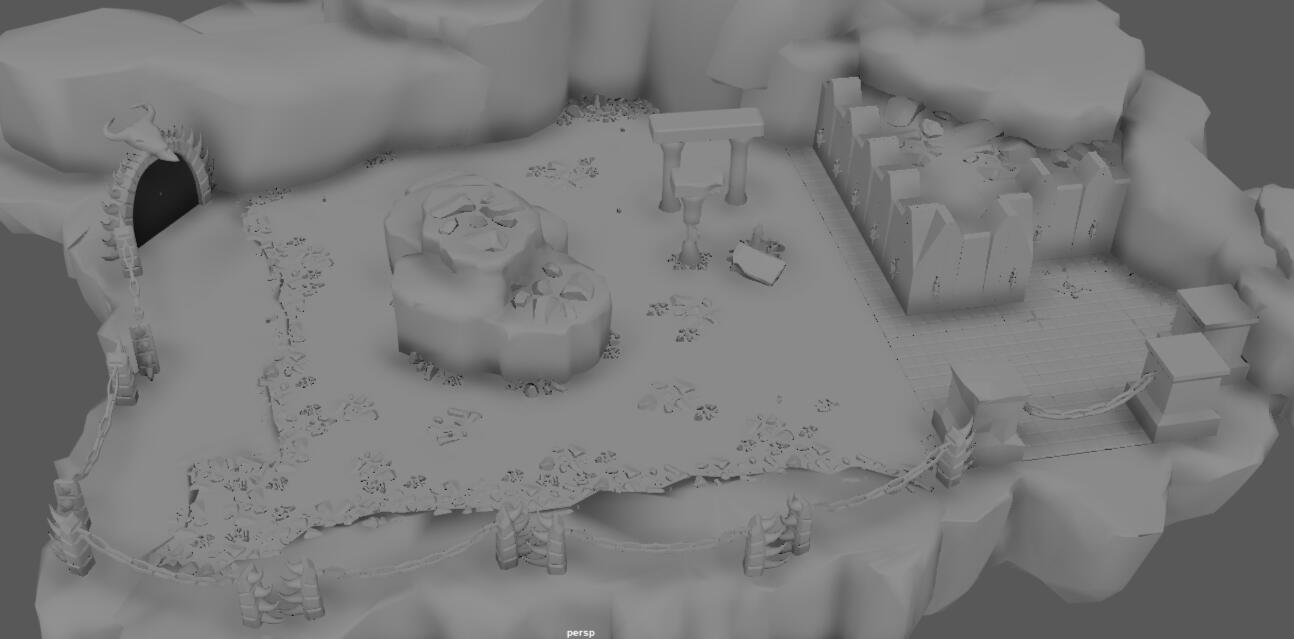
The geometry of level 1
Level 2
With the second level, I decided to introduce Imps, as they are able to teleport and shoot balls of fire towards the player. This introduces the concept of projectiles and enemies that don't try to approach the player. With these new enemies, the level is also expanded in order to still give inexperienced players some breathing room.
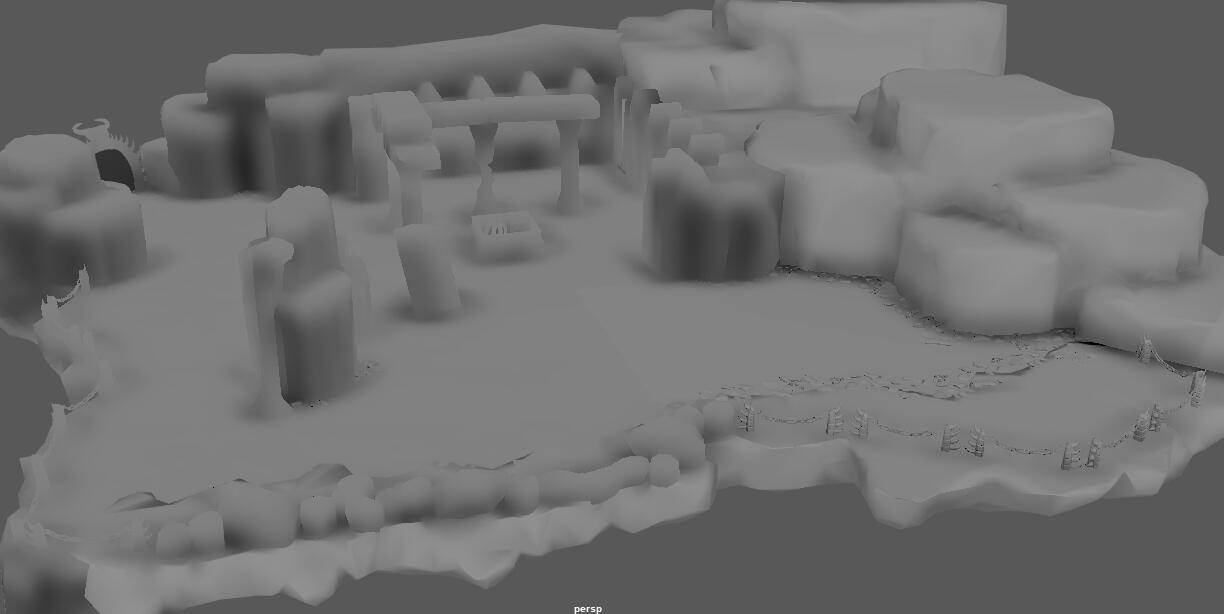
The geometry of level 2
Level 3
The third level introduces hellhounds, being able to spew fire and headbutt the player. This level ramps up the difficulty, as the level barely increases in size, but doubles the amount of enemies. This level also introduces hazards in the form of lava, which the player takes damage from by standing on.
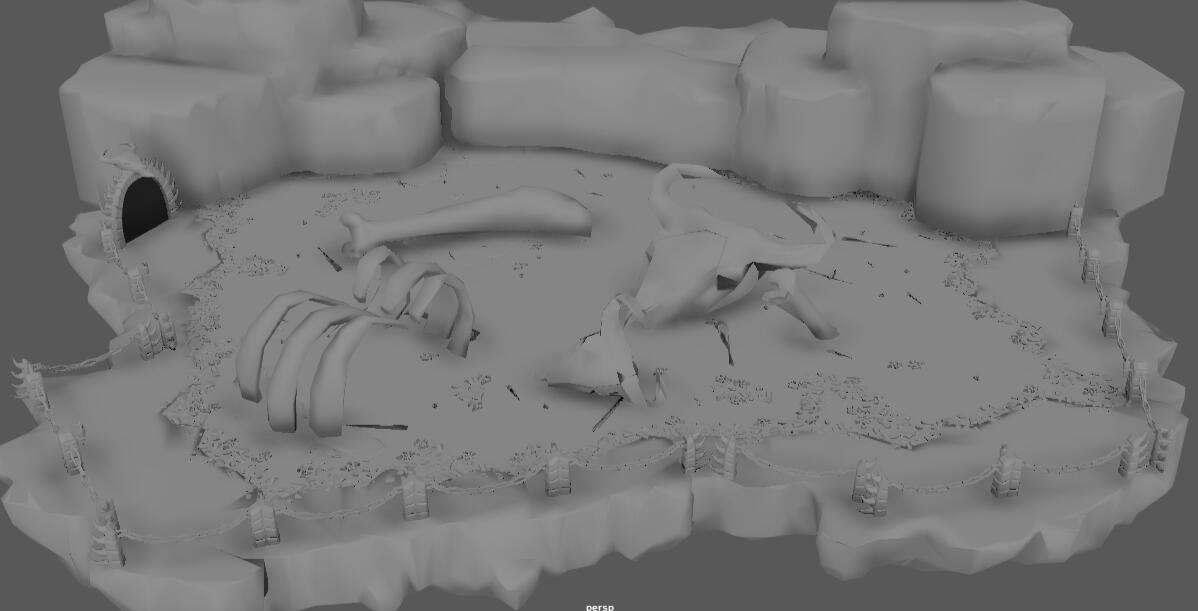
The geometry of level 3
Level 4
The fourth level features the game's first boss. The player is placed in a small arena with only the boss and is, through the boss, introduced to the concept of shockwaves that damage the player.
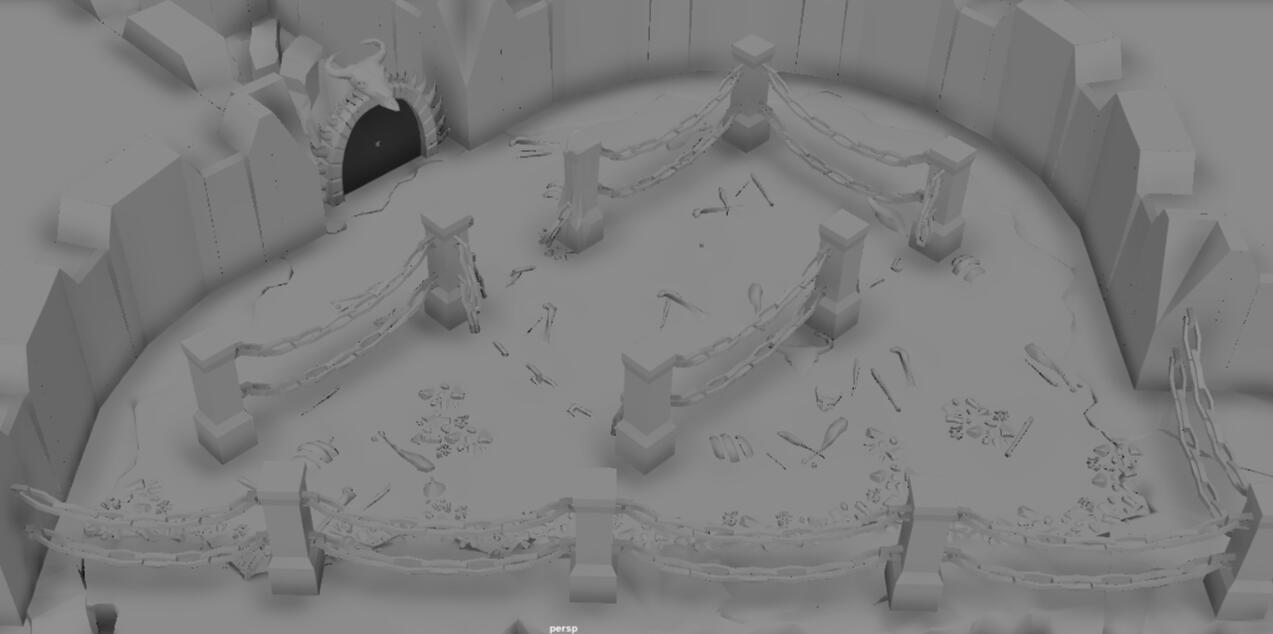
The geometry of level 4
Level 5
Level five marks the point where the game increases a lot in difficulty, as players that have beaten the first boss have shown that they know the game well enough that they can handle the increasing difficulty. The level is larger than any level before it, but is very linear and spaced out to allow players to adapt to the harder enemies.The level introduces the Watcher, a flying enemy that actively avoids the player and shoots projectiles that create temporary hazards that damage the player if walked on. To give the Watcher some room as the only projectile shooter on the level, the Imp does not appear here. On top of the Watcher's introduction, the empowered skeleton is introduced, replacing the normal skeleton. Empowered enemies are faster, have more health, and do more damage.
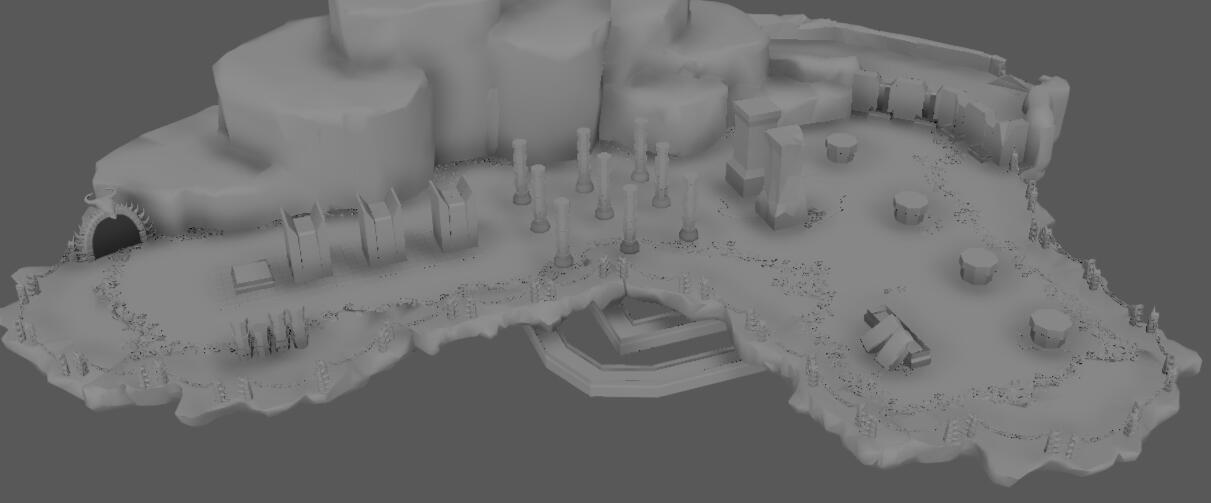
The geometry of level 5
Level 6
Except for the final boss and some empowered enemies, level six is the last level a new enemy is introduced. That enemy is the Minotaur, an enemy that tries to ram the player and makes giant leaps that send out shockwaves when it lands. This level also introduces the empowered Imps.This level is divided into two parts. The first part is a room with only one Minotaur, giving the player a chance to understand its behavior. The second part is a large area with several different enemies, including more Minotaurs.Two types of hazards are also introduced on this level. The first one is acid, which replaces lava as the levels are thematically starting to freeze. Acid works the same as lava, but deals more damage. The second hazard is ice. Ice doesn't damage the player, but instead makes it harder to move as the player will start to slide, and can't dash. The ice on this level is placed over the exit of the level to show to the player that it is fine to move across without taking damage.
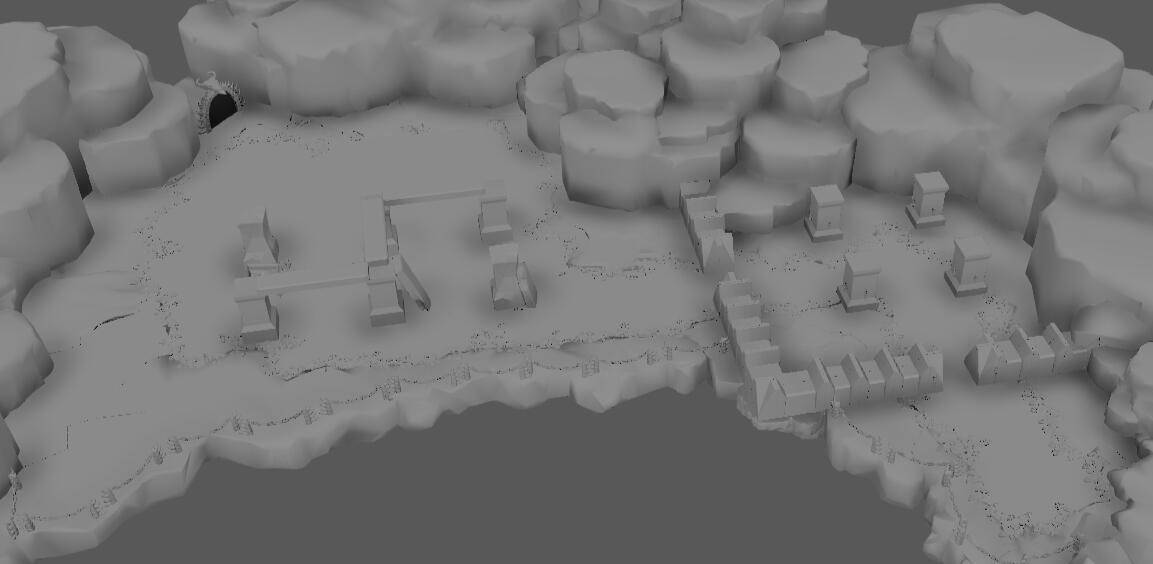
The geometry of level 6
Level 7
This level mirrors level three, having a similar theme, but instead of everything being warm, everything is frozen. As such, the level only features the same enemies that level three has, except those enemies are empowered, which means it is the first time the player faces an empowered Hellhound.
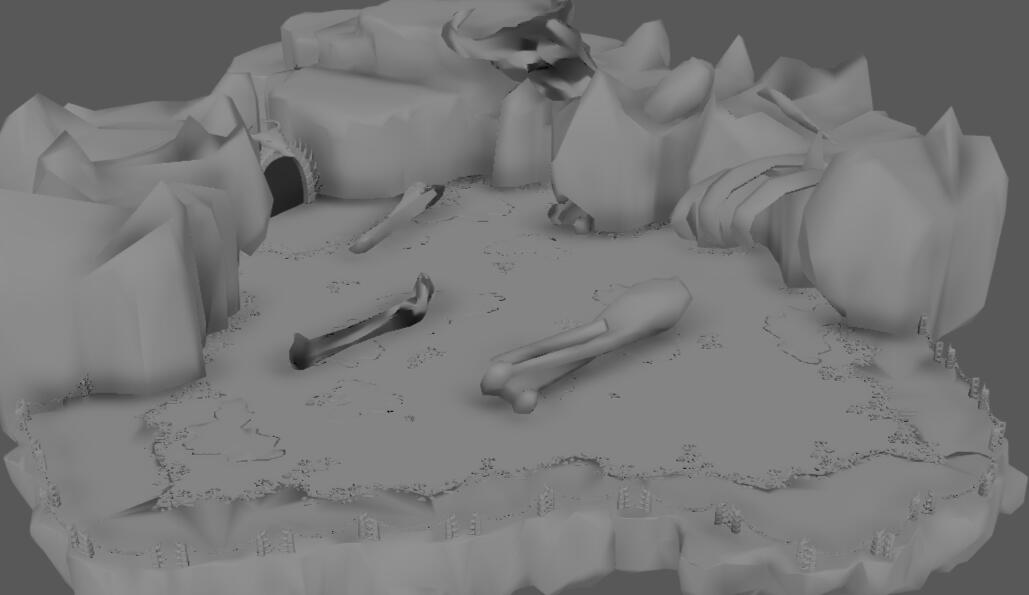
The geometry of level 7
Level 8
This is the final level before the final boss. As such it felt fitting to throw everything the player has yet faced, on the player. The level mainly features two rooms. In one room several enemies will use projectiles in combination with enemies that will charge you. In the other room, a copy of the first boss is placed, together with some empowered Imps. The rooms can be taken in either order the player prefers, and by the exit three frozen enemies are placed to prepare the player for the final boss.
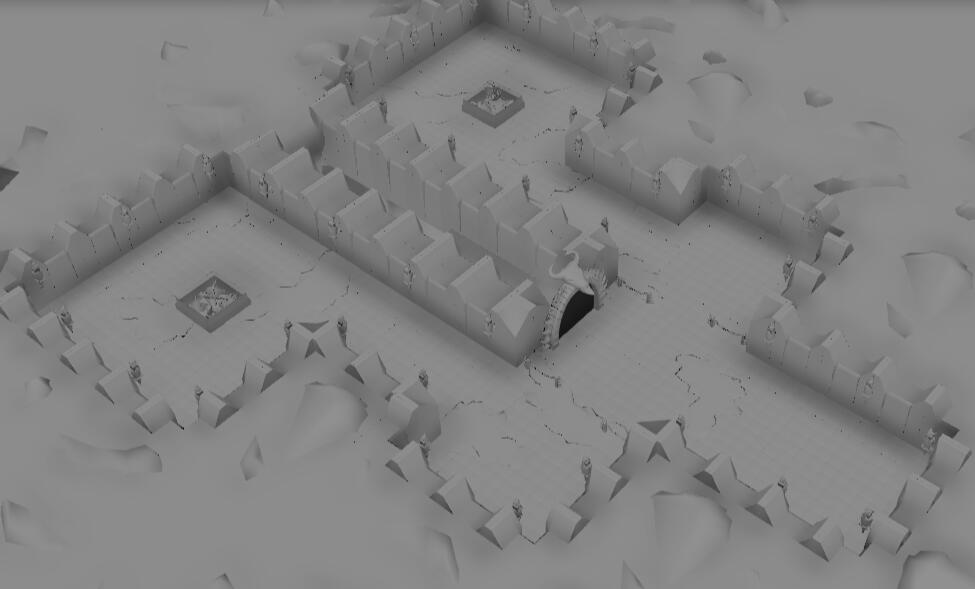
The geometry of level 8
Level 9
The final level of the game features a large arena with one singular enemy, the final boss. The boss has three different modes.The first mode has the boss following the player, trying to hit them with a large hammer. In the second mode, the boss makes a giant leap, sending out a powerful shockwave upon landing. Lastly, the third mode summons one Watcher, one empowered Hellhound, and one empowered Imp. As the boss loses health, it will summon two, and later three of each type of enemy. Enemies spawned are frozen for a few seconds and can be killed with one hit before thawing and becoming normal enemies.
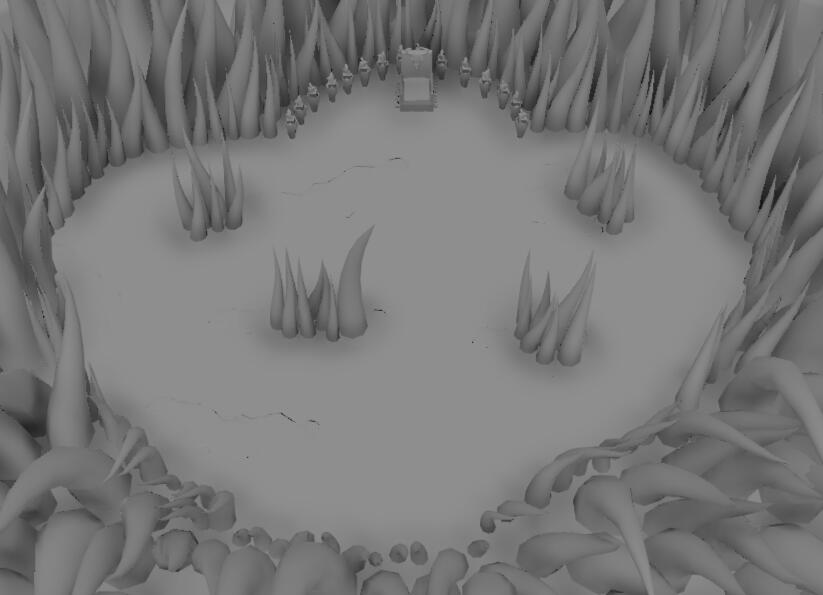
The geometry of level 9
The Lair
The Lair is a dungeon crawler where the player has to clear several rooms of enemies, and sometimes solve some simple puzzles to progress. The layout of the rooms that have to be cleared are randomized, while the rooms themselves are randomly chosen from a static list of options. In the final room the player has to fight a boss.
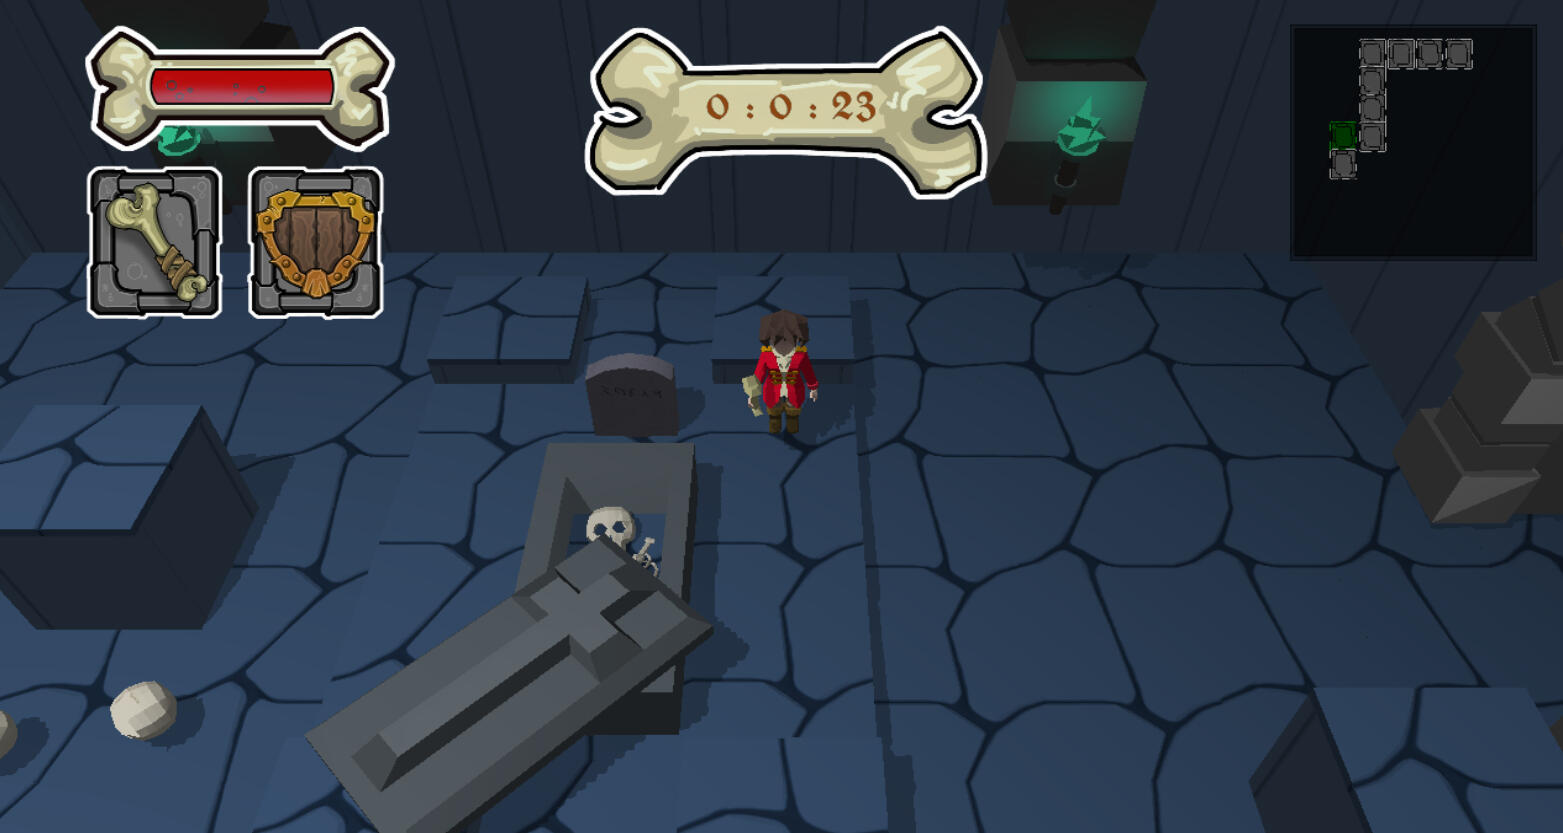
What the game looks like when playing.
The game was developed by six people over six weeks, in a self made engine, also built in those six weeks.My main contributions on this game was building the collision system, and designing the enemies for the game.
Collision
The collision system uses axis aligned bounding boxes and raytracing to determine distances between objects, and only tests collision against the closest objects. Finding the minimum amount of rays needed for performance was the largest setback for developing this system, as too few rays often led to objects not finding each other and not properly colliding.
Enemies
The Lair features three different enemies:
- Skull
- Wraith
- Pile
Skull
Being a skull that jump around, it is the simplest enemy in the game as it jumps towards the player and hits them if it gets close.
Wraith
The only enemy in the game that shoots projectiles, the Wraith teleports to a random location, after a few seconds shoot out a fast projectile directly towards the player, and then teleports again. The wraith is very simple, but adds a lot of difficulty to the game when paired with the other types of enemies.
Pile
As the name suggests, the Pile is a pile of bones. The Pile always walks towards the player and doesn't collide with them. Instead, the player will take damage while they and the Pile overlap. The Pile is also able to pick up dead Skulls, making the Pile larger and increasing the damage it does.
Pac-Man Recreation
This game can be downloaded here and be played by opening index.html in a browser.
As part of learning JavaScript, I recreated Pac-Man, rendered in an HTML file. I mostly tried to stick to how the original works, but took some liberties in how the ghosts' pathfinding is calculated. I also drew all assets myself, meaning they are slightly off from the original.
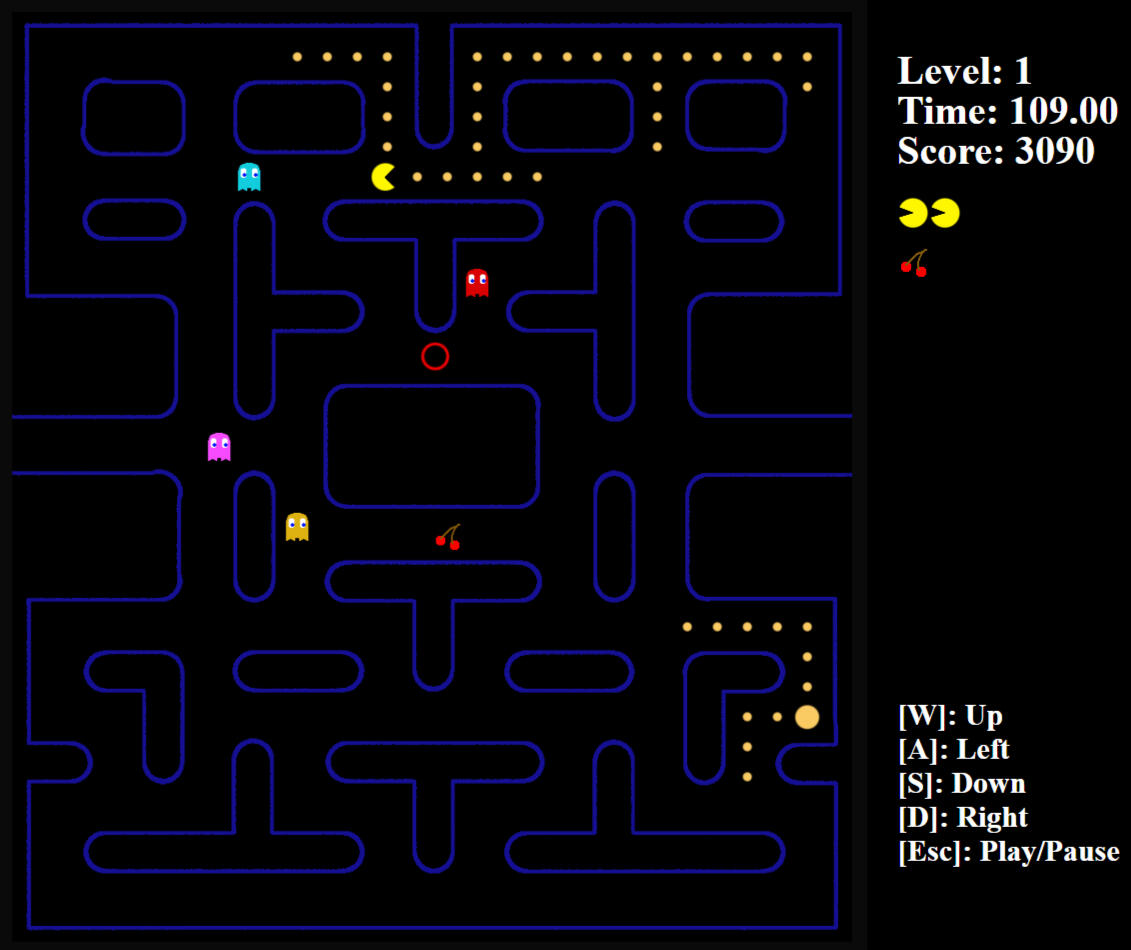
What the game looks like when playing.
Pathfinding
In the original, a ghost will pick the direction that is the least tiles away form its target. I instead chose to use linear algebra to create a vector for each possible direction, and a vector towards the target. I then use dot product between the vectors for the possible directions and the vector to the target, to see which direction is closest.There was also a bug in one of the ghosts' original behavior caused by an overflow issue. I fixed that bug, but kept in the code a simple way to keep the bug.
Assets
The assets I drew for the game.
Projects
DirectX11
A project made with DirectX11 showcasing several rendering techniques.
Particle Handler
A system for handling particles in a game engine.
Maya
A collection of works made in Maya.
Level design
Levels I have made.
Game Engines
A collection of works made in Unity and UE4.
Level design
My primary work with level design has been to make levels for the Halo franchise during my spare time. Over the past 10 years and throughout the different Halo titles, I have spent over 8000 hours on creating and improving levels. The level I'm most proud of is called Immolate.
Immolate
Screenshots of Immolate.
Immolate is a 2v2 multiplayer level made for Halo Infinite using the built in level creator tool called Forge. Immolate was primarily made for a community-made contest for 2v2 levels, took roughly 3 months to make, and ended up placing in the top 10, out of over 150 submissions. Immolate then went on to be the first ever ranked 2v2 level to be added to the official matchmaking in Halo Infinite by 343i, and second ranked level to be added into matchmaking overall.The level mainly went through 3 major layout iterations, with each iteration undergoing several tweaks to gauge what the level should evolve into after several playtesting and feedback sessions.
Screenshots depicting the iteration of Immolate for different areas
Iteration 1
The first iteration of the level was a rough concept of what the level should be. Whenever I create a level, I focus on the core idea(s) for the level, and create something simple around it, and expand upon that after feedback has been collected. Primarily, two distinct ideas were used for Immolate.The first idea was verticality, with people always having access to the top of the level. This was made by having a large chamber in the middle of the level, with a floor that teleports anyone that lands on it to a lift that launches the player over the level, landing on a part of the upper floor. The thought behind this was that on most levels, high ground is very powerful, and I wanted to shake things up a bit by allowing all players to easily get to the top, to hopefully promote more movement around the level.The second idea was that the level should have three main rooms/areas, connected by the chamber in the middle of the level. As Immolate is a 2v2 level, this means that only 2 out of 3 areas can be covered by one team at a time, meaning a team can lock down a majority of the level, but always leave a part of the level for the opposing team.In order to combine the two ideas, the areas were placed on different heights, with the top and bottom areas on top of each other. Each area was given a balcony overlooking the middle, and two "bridges" were placed in between the areas to allow for movement between the areas beyond the fixed pathways between them.
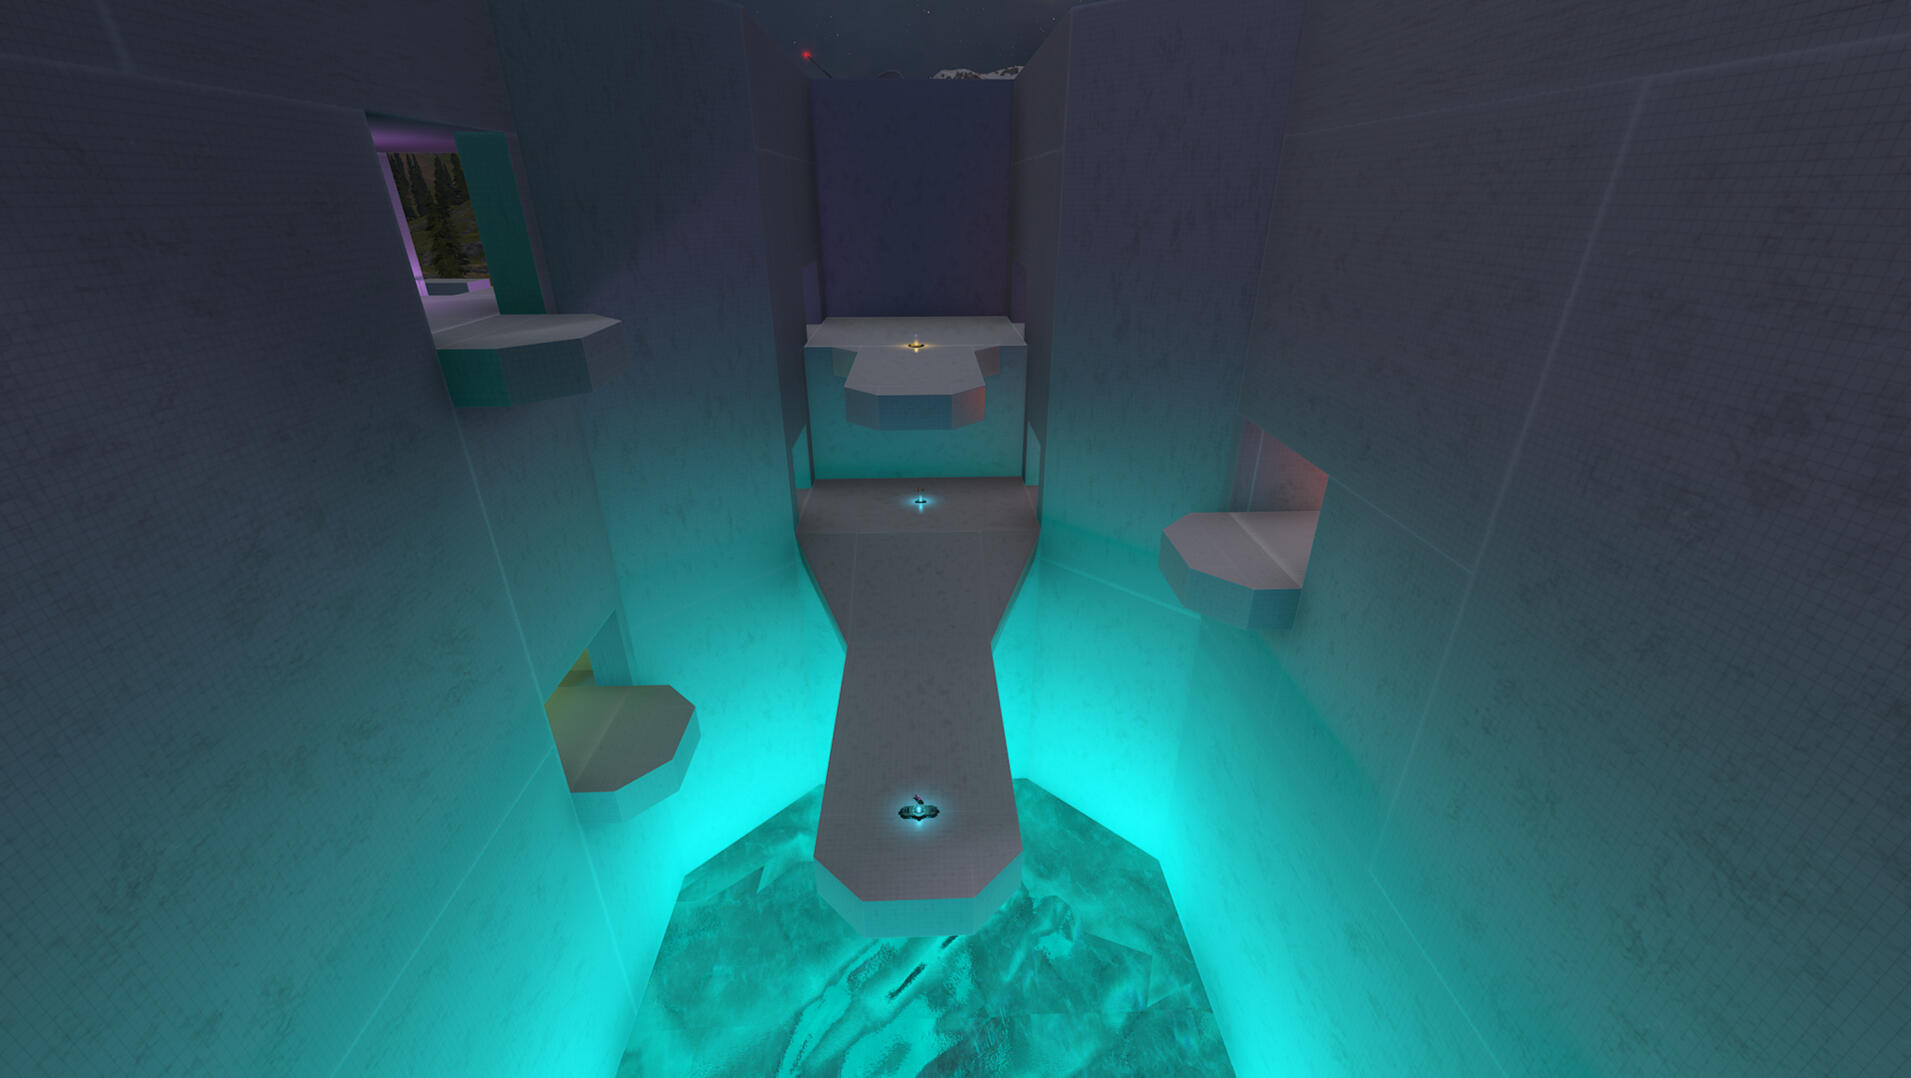
The middle chamber
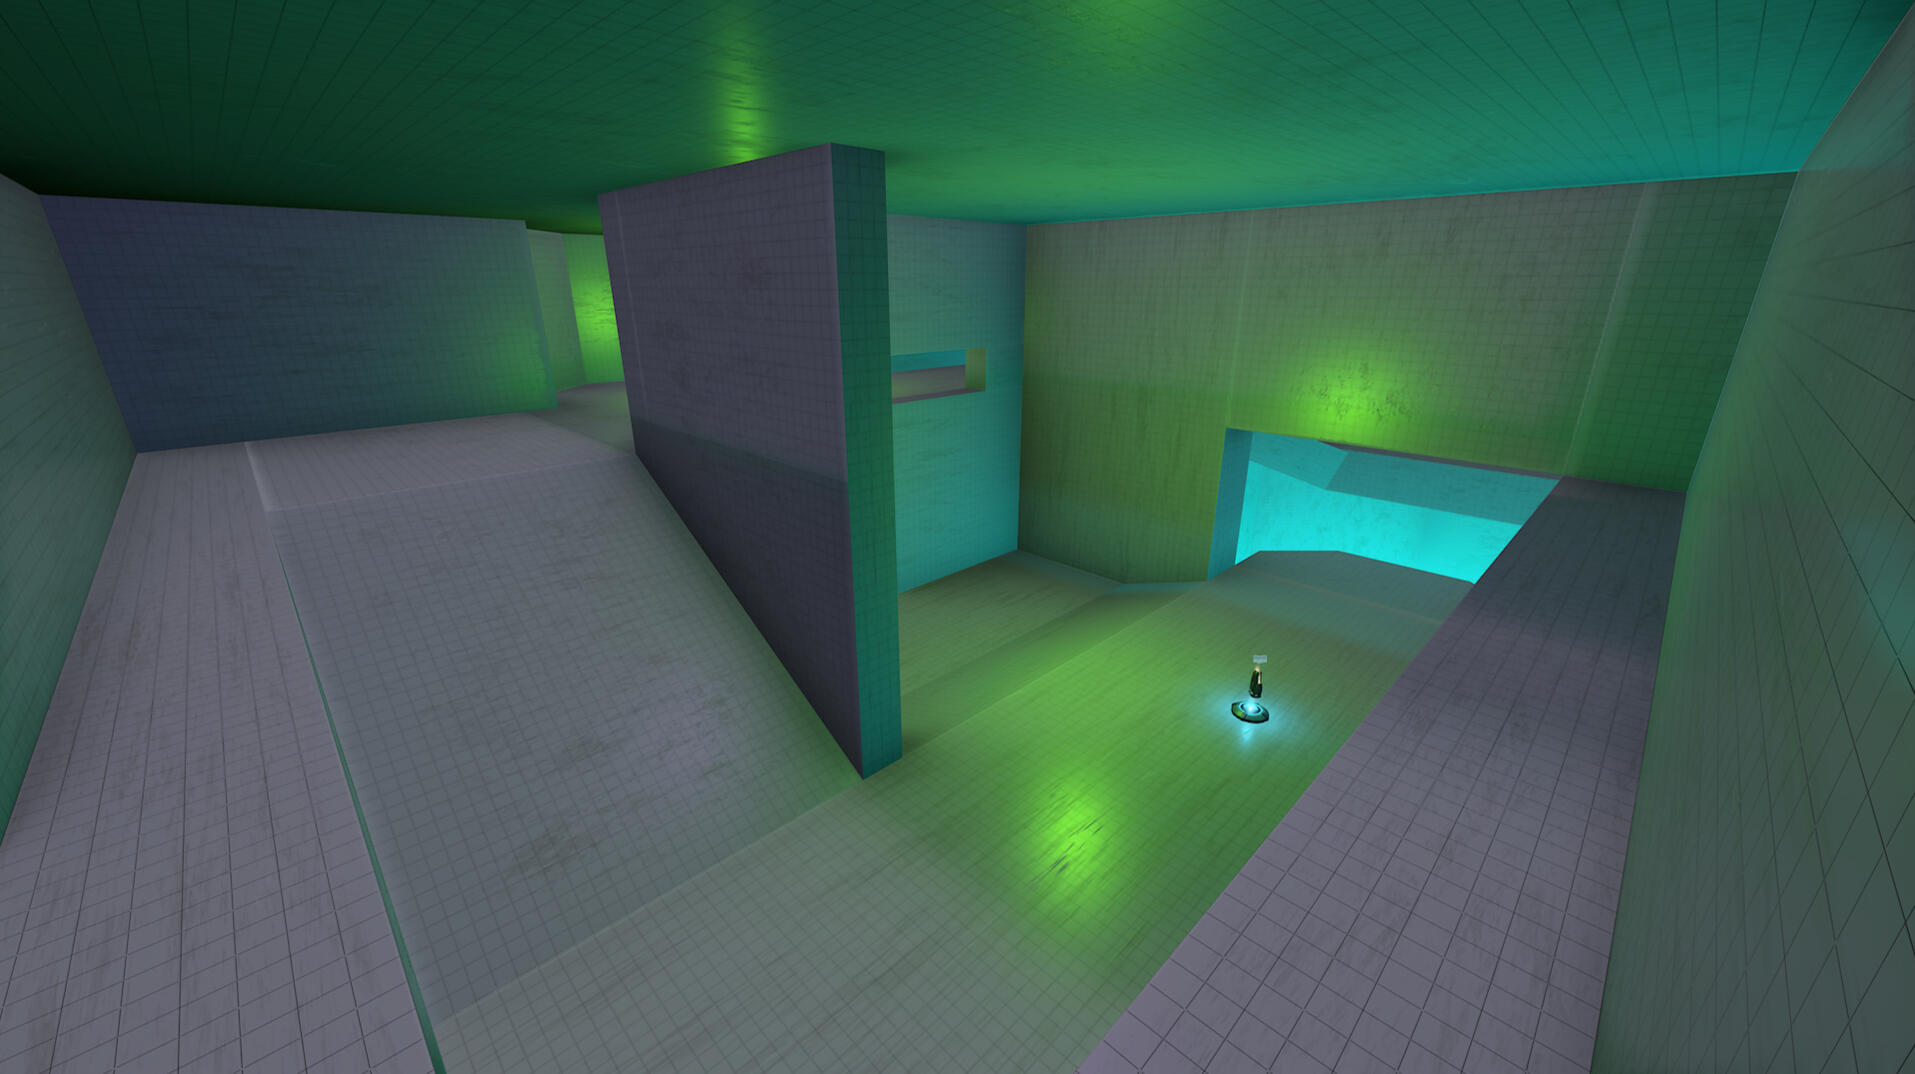
The bottom area
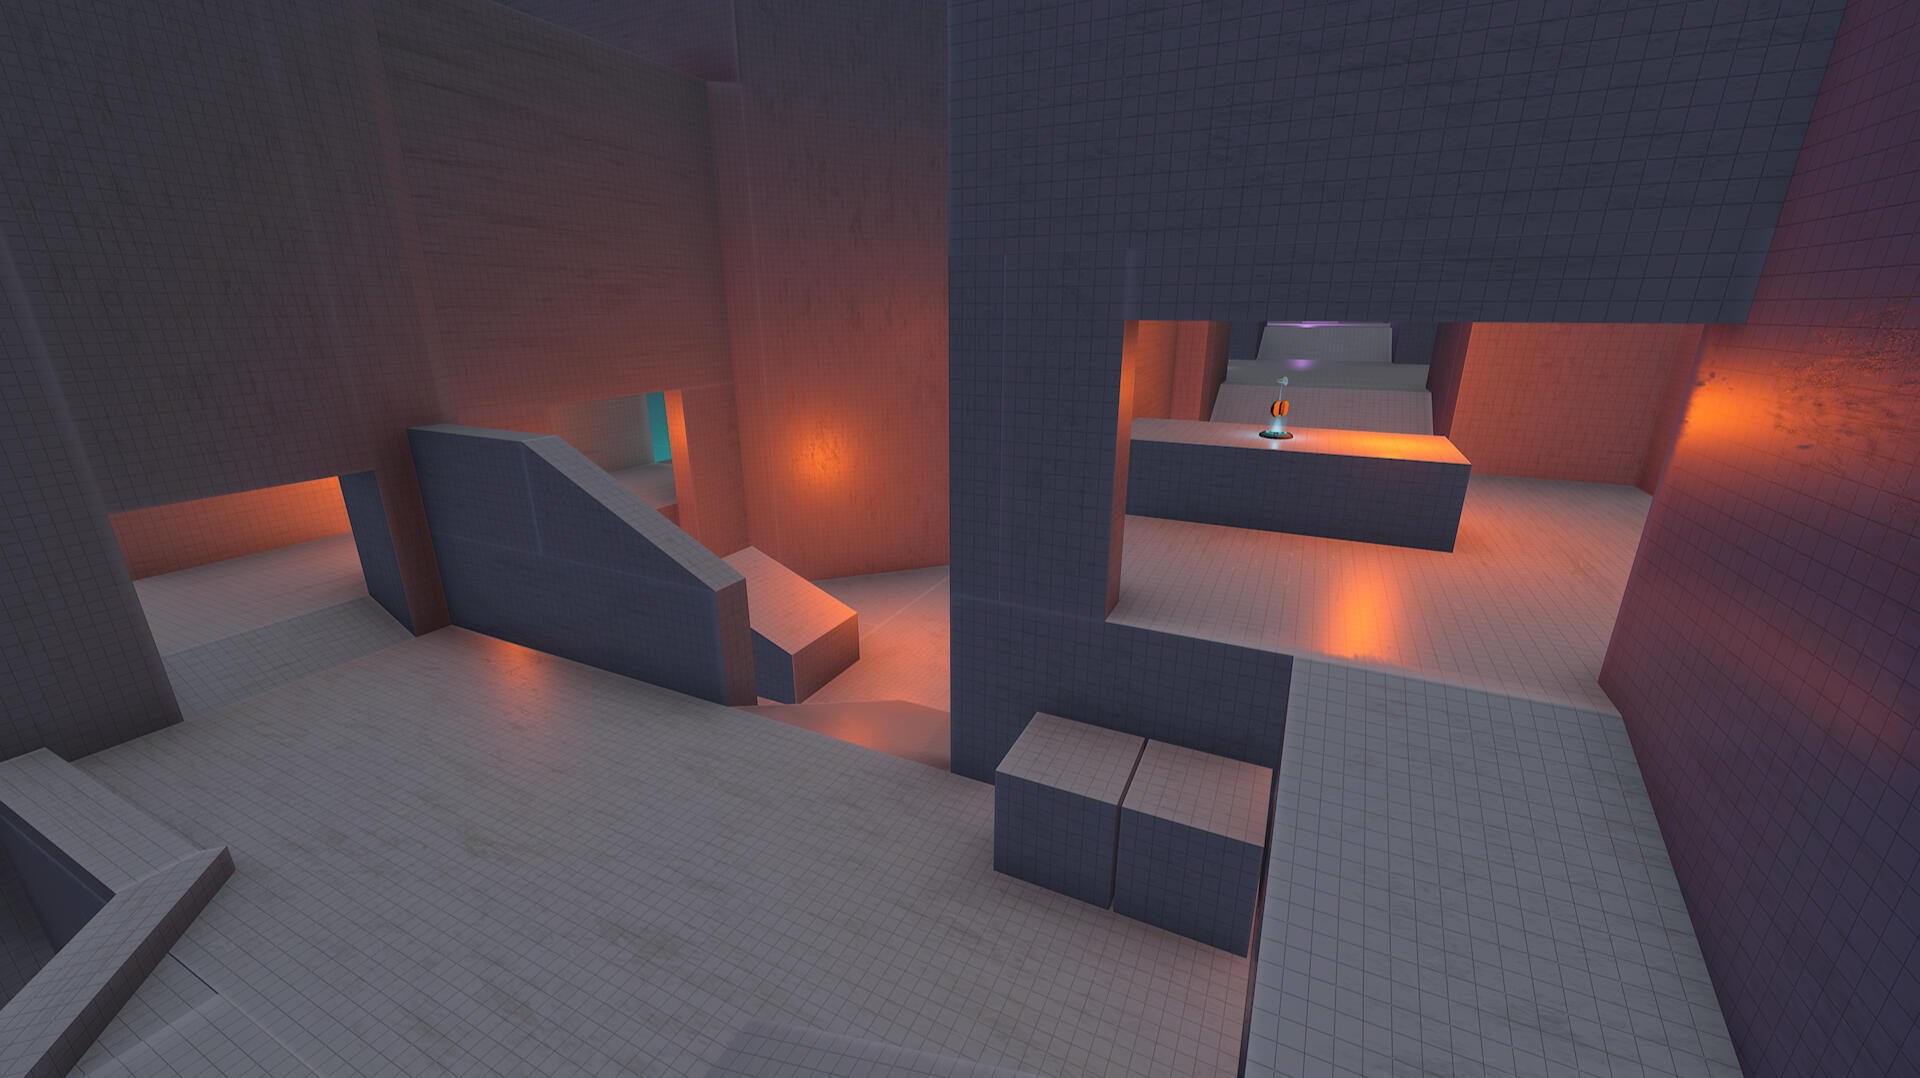
The middle area
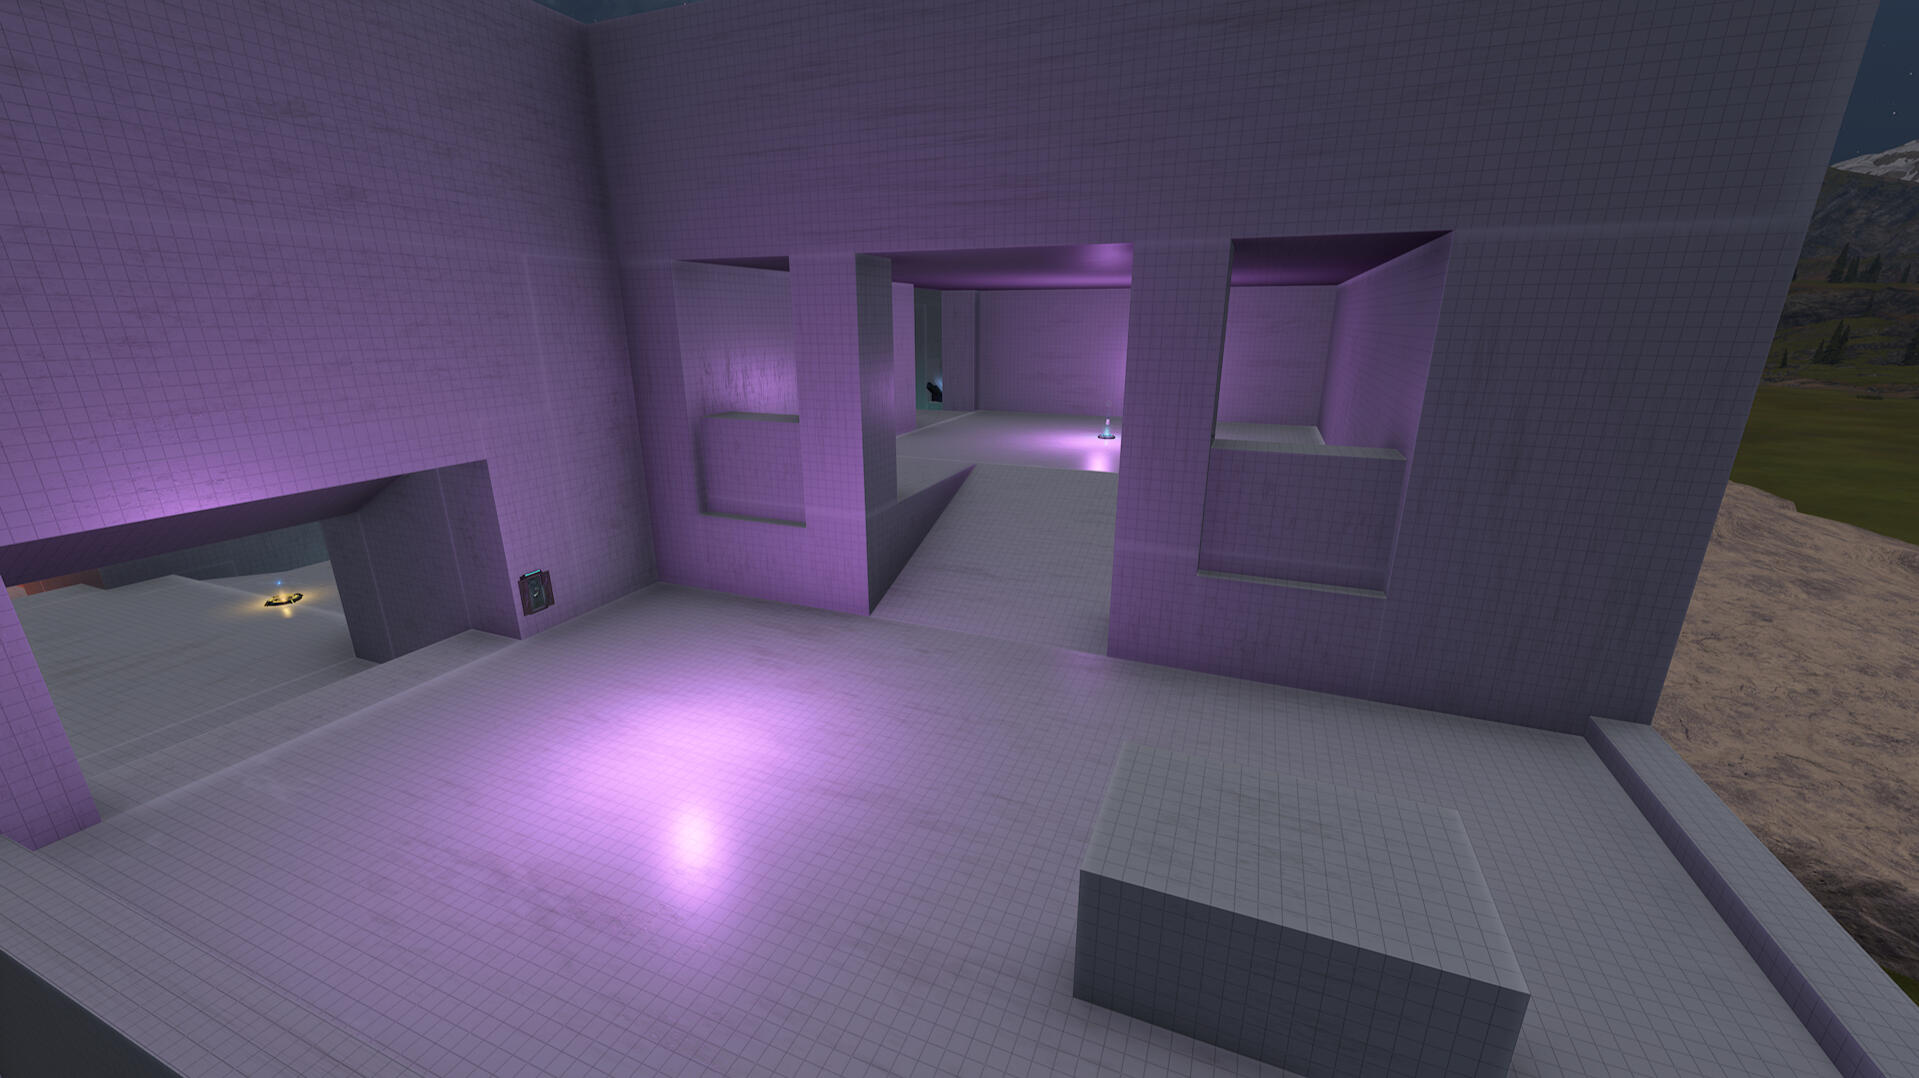
The top area
Iteration 2
The second iteration of the level changed a lot of the original layout but tried to keep the same ideas in mind. Feedback on the first iteration prompted the following changes:
Unintuitive
Usually when a player jumps off a ledge in a Halo game, they expect to die. As such, the idea of having players jump of the edge into the teleporter was very unintuitive for new players. To address this, I changed the teleporter into a hole in the larger bridge in the middle of the chamber, to make it into its own defined area that intuitively can have its own rules than the rest of the chamber. To further communicate to new players that they are meant to jump into the hole, the level's power weapon was placed in the hole, with the only way to pick it up being to jump in. This worked as new players either figured out that they could jump into the hole, or watched the power weapon and saw experienced player jump in and be fine.Normally a power weapon or similar shouldn't be used to bring traffic to an area, but in this instance it was only to let new players know about a specific feature of the level, so that they then independently of the weapon will use the teleporter.
Linear
The first iteration of the level was very linear, offering only one normal path to any given place, with the teleporter or balconies in the middle chamber serving as a second, more exposed, path. This led to many matches being repetitive and boring.To remedy this, the first thing that was done was to open up the back of the level, and create a walkway between the bottom and middle areas, with the top area having a balcony overseeing it. As the walkway also connected to the middle chamber, this change altered how players could move around through the bottom of the level, making it more complicated for player on the top of the level to track players on the bottom, making interactions between the levels more interesting.The second change was making traversal through the middle chamber easier by adding ledges that players can use to climb anywhere. The lift from the teleporter was also altered. Instead of dropping players on the top of the smaller bridge, a floating platform was created above everything in the middle of the chamber, which the lift drops players on. This gives players more versatility in where they go, as they can jump off the floating platform to any room they want to go to. This new versatility came with a risk though, as players have to spend more time exposed to enemies in the air compared to the first iteration.In addition, all rooms were altered for more streamlined and interesting gameplay, as they mostly served as rough placeholders in the first iteration anyways.
Top area
The top area was too easy to defend in the first iteration, despite the teleporter. As it was also the best tactical position on the level with its height advantage towards all other positions, I decided to make it easier to contest players held up there. To do this, I first added a lift from the bottom area to the top area, making it easier for players to get to the top area. I then added a new area on the outside of the level, that players can use to contest players in the top area.
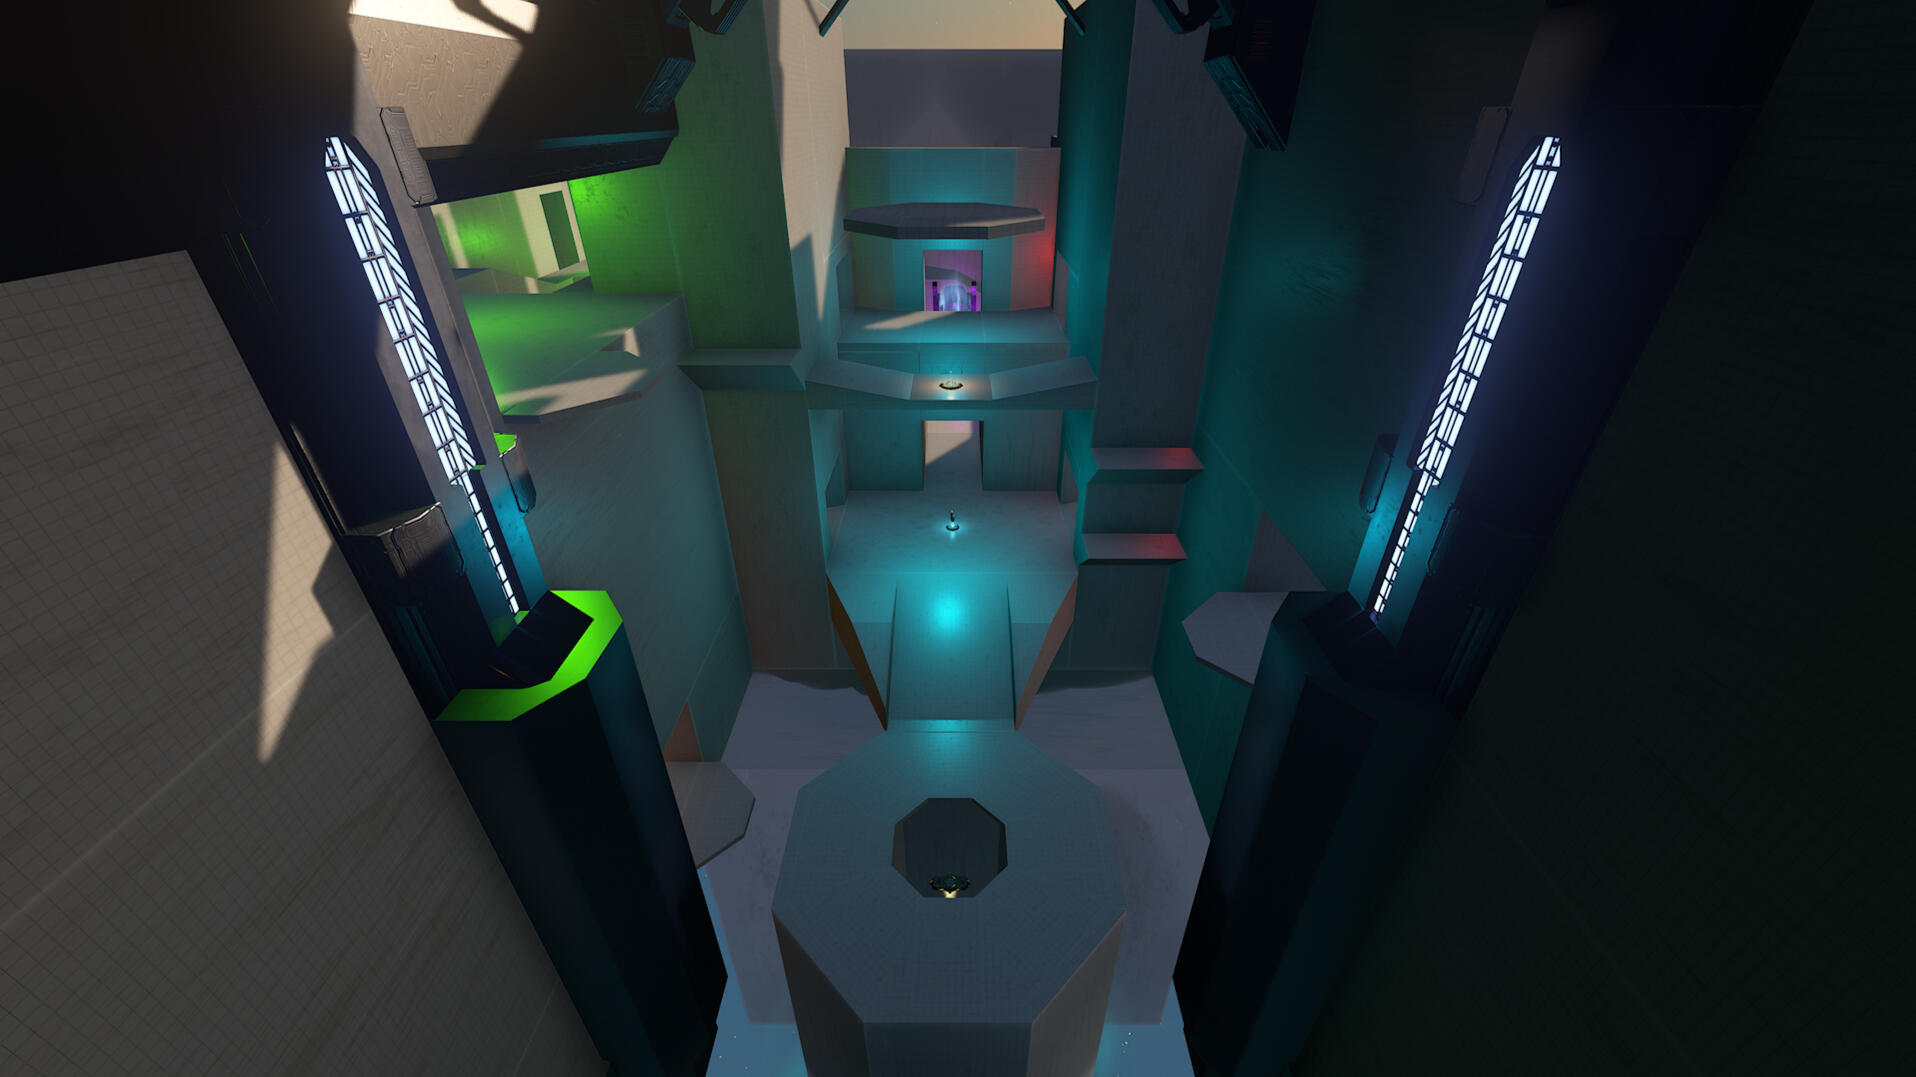
The middle chamber
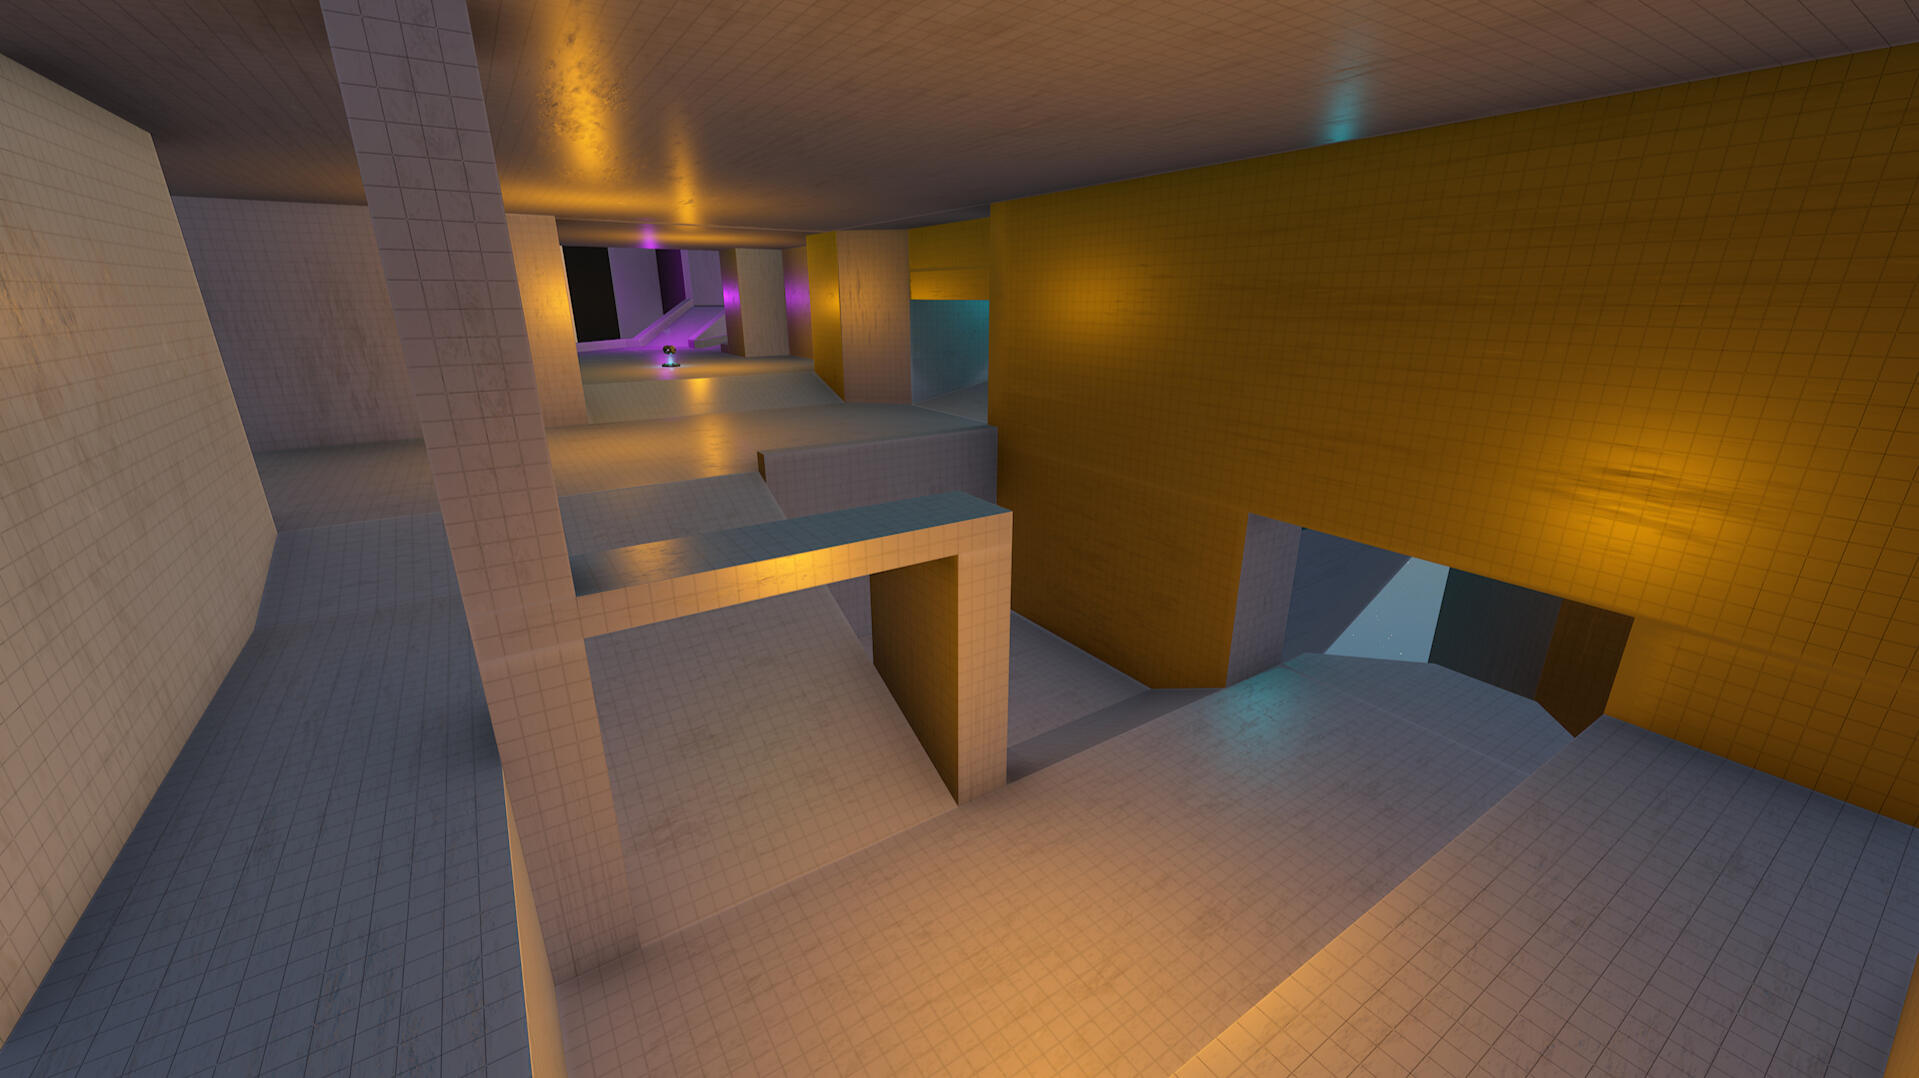
The bottom area
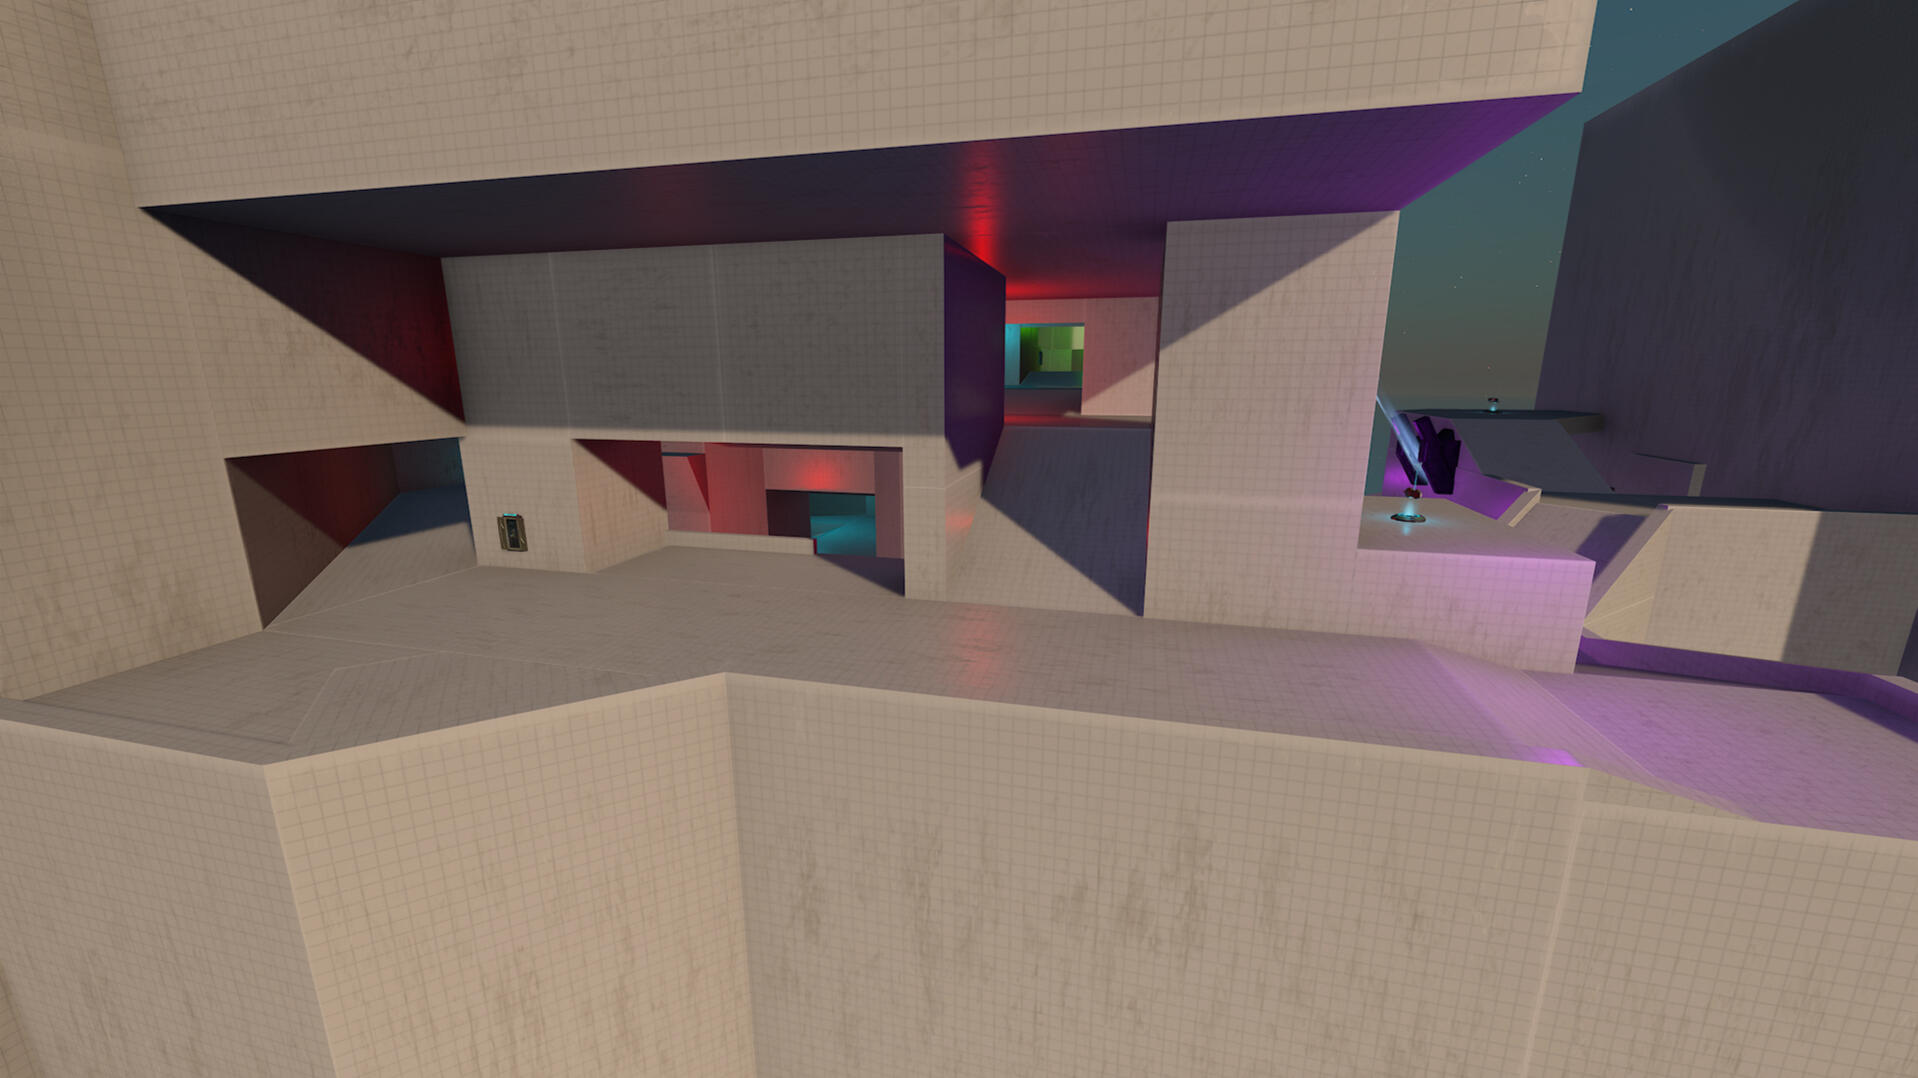
The middle area
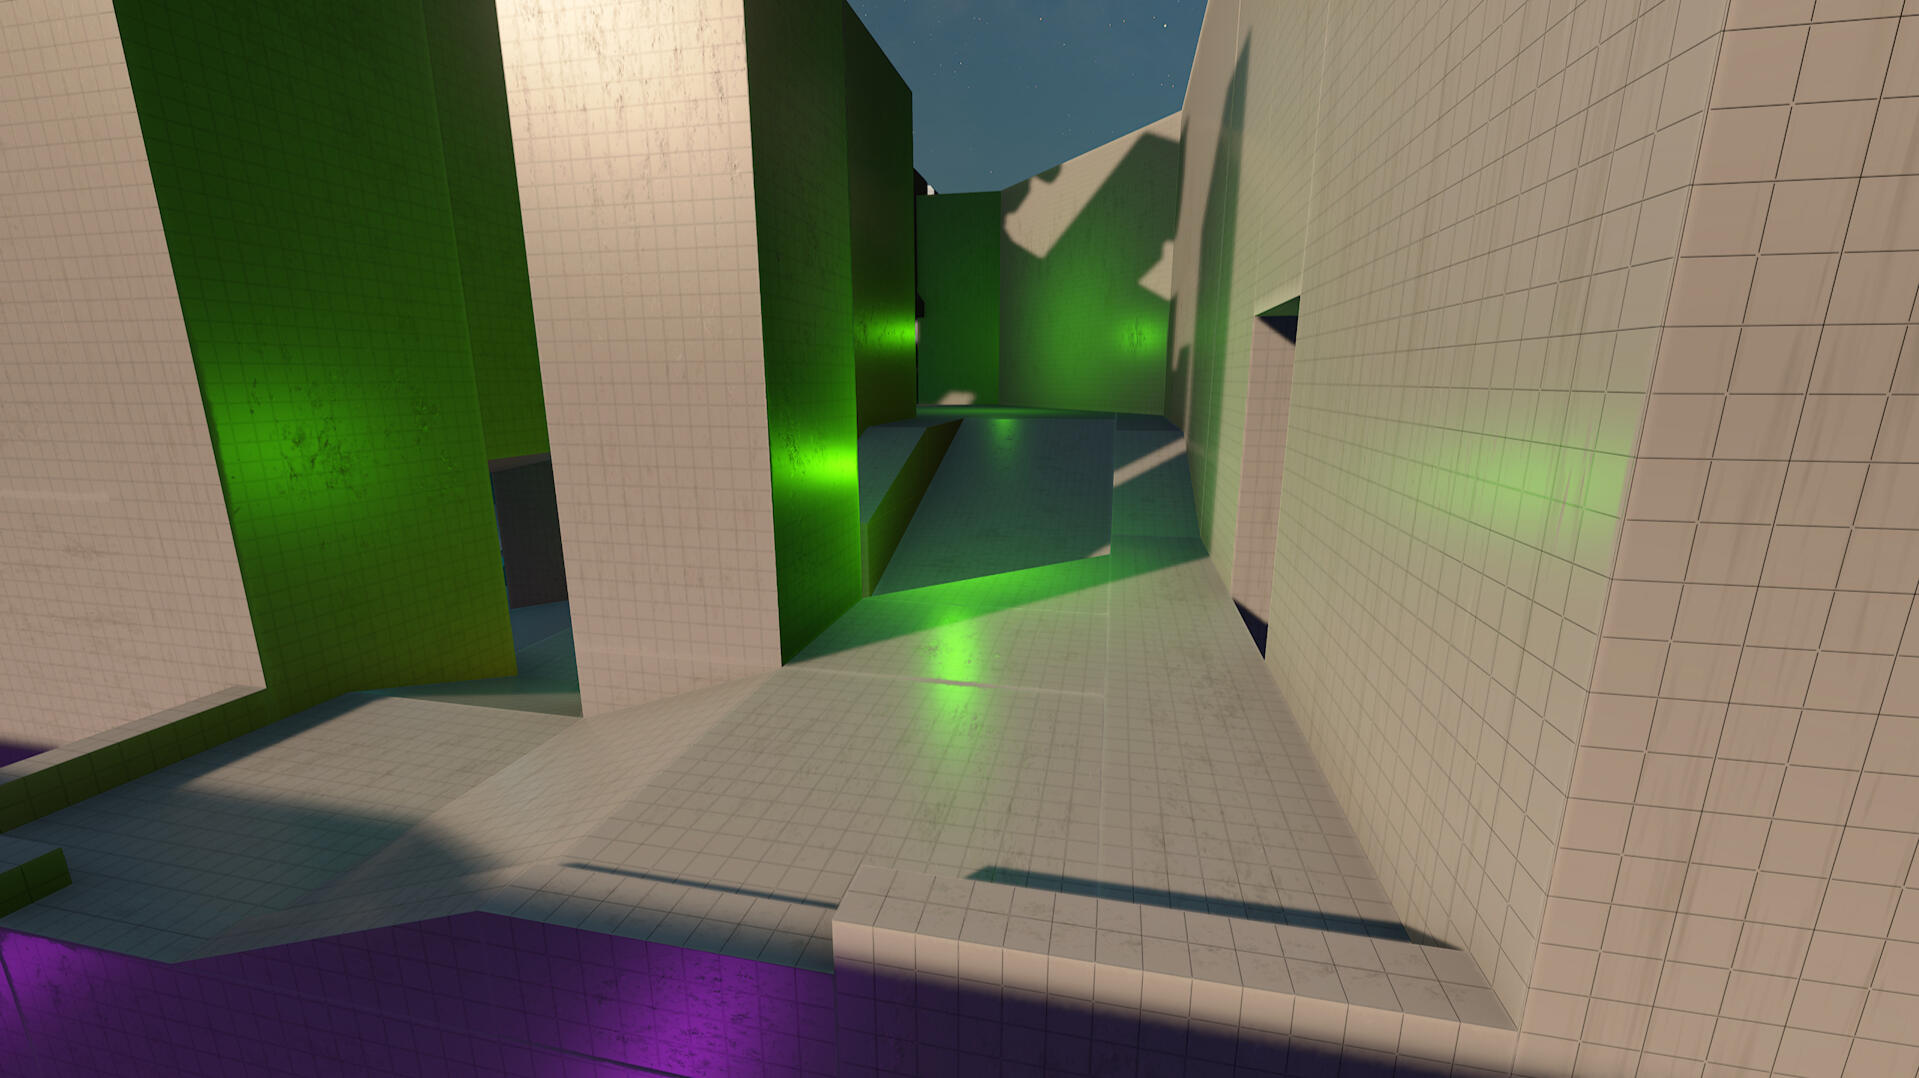
The top area
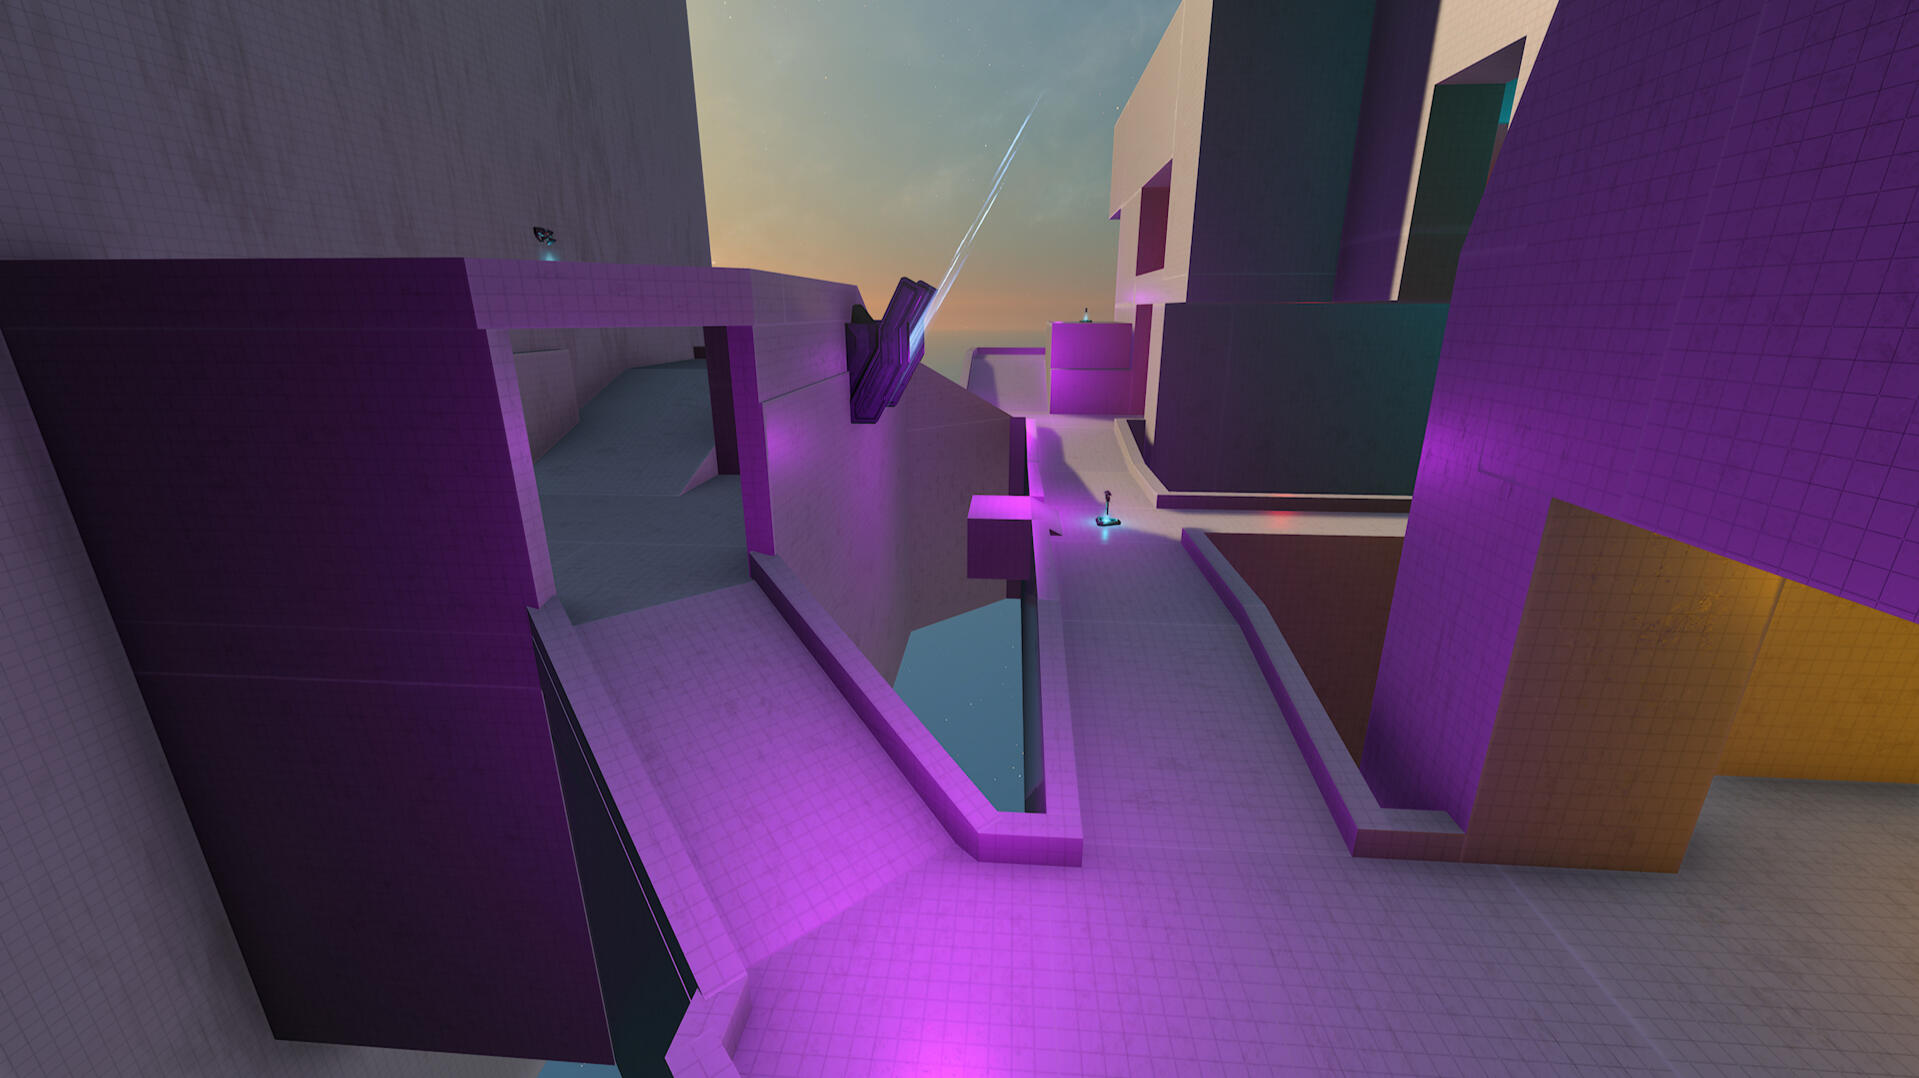
The new area and walkway
Iteration 3
The third iteration refined the updates made in iteration 2, and then made the level pretty. At first the level was supposed to be a Forerunner(a type of alien in the Halo universe) level, which can be seen on some parts of iteration 2. However, I changed my mind, and decided to turn the level into a jungle temple.
Layout changes
The most significant change was removing the new area that was added in iteration 2. The new area went through several iterations, but since it violated a core idea of the level, and rather than fix issues, it brought more, I decided to look at other solutions to the top area being too strong. One of the main problems of the new area was that it removed focus from the middle chamber with the teleporter, which made the entire level play chaotic and unstable, without any focus.The solution I went with instead of the new area, was a path wrapping around the other side of the teleporter than the rest of the level. This new path instead encouraged battles over and around the teleporter. Together with new ledges and a new platform, ways for players to move around the middle chamber greatly increased, making gameplay less linear and boring, like it was in iteration 1. The new path also created a new way for players to reach the top area, which together with the lift ended up being what the top area needed.
Art
The art of Immolate took a lot of thinking to plan out. Most buildings were easy to see how they could fit into the theme, but some aspects of the level were harder, primarily some ledges and platforms, with floating platforms being by far the hardest to justify in the theme I chose. The solution I went with, was creating a tall tree in the middle of the level, and making the platforms into branches of that tree. This solution however, created a new problem, as it was hard to see the branches, and for new players to see what parts of the tree were playable area, and which parts were not. To fix this, I added glowing flowers to all ledges and platforms that are important for players to notice and know that they can use. For less important ledges that players can use, I then added ivy hanging off the ledges' edges. This solution makes it so the eyes of new players are caught by the glowing flowers, showing the important parts of the level, while still leaving a visual indicator to help players learn the more intricate parts of the level while playing it after the first time.
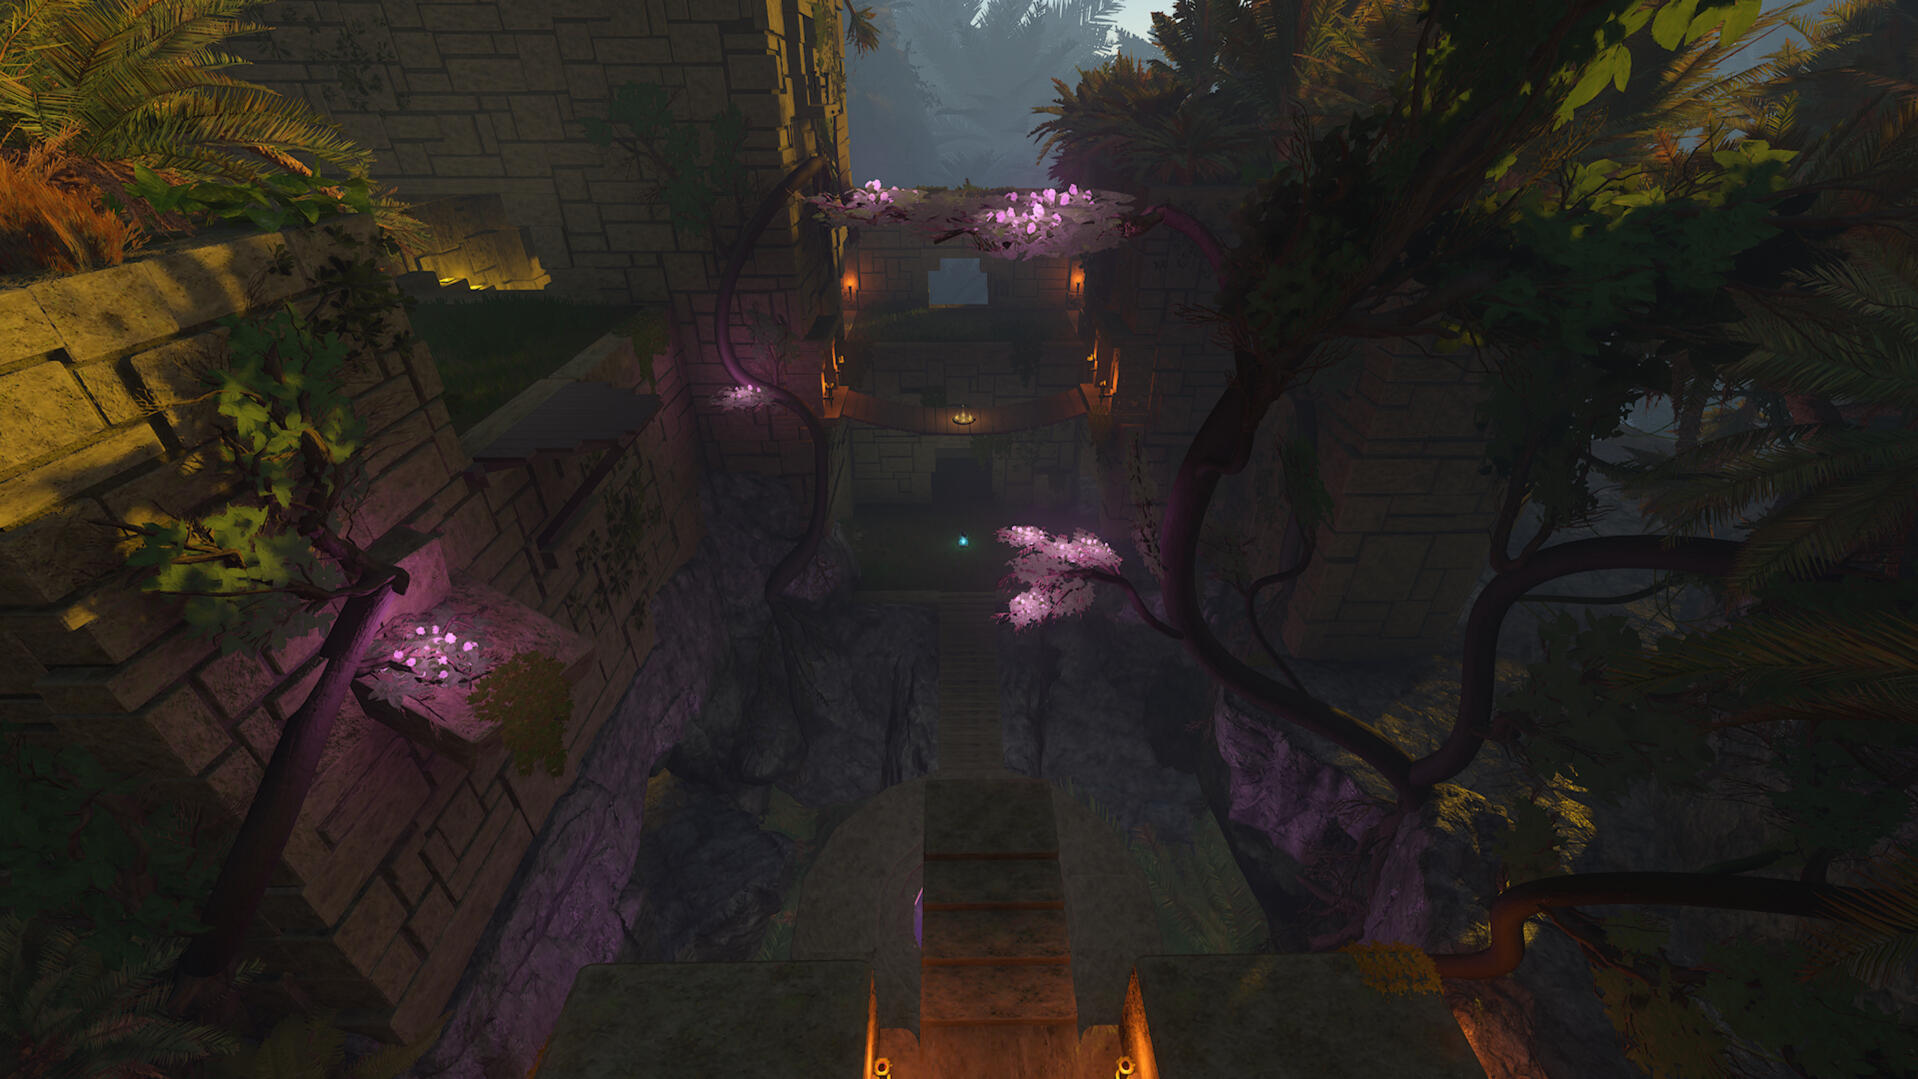
The middle chamber
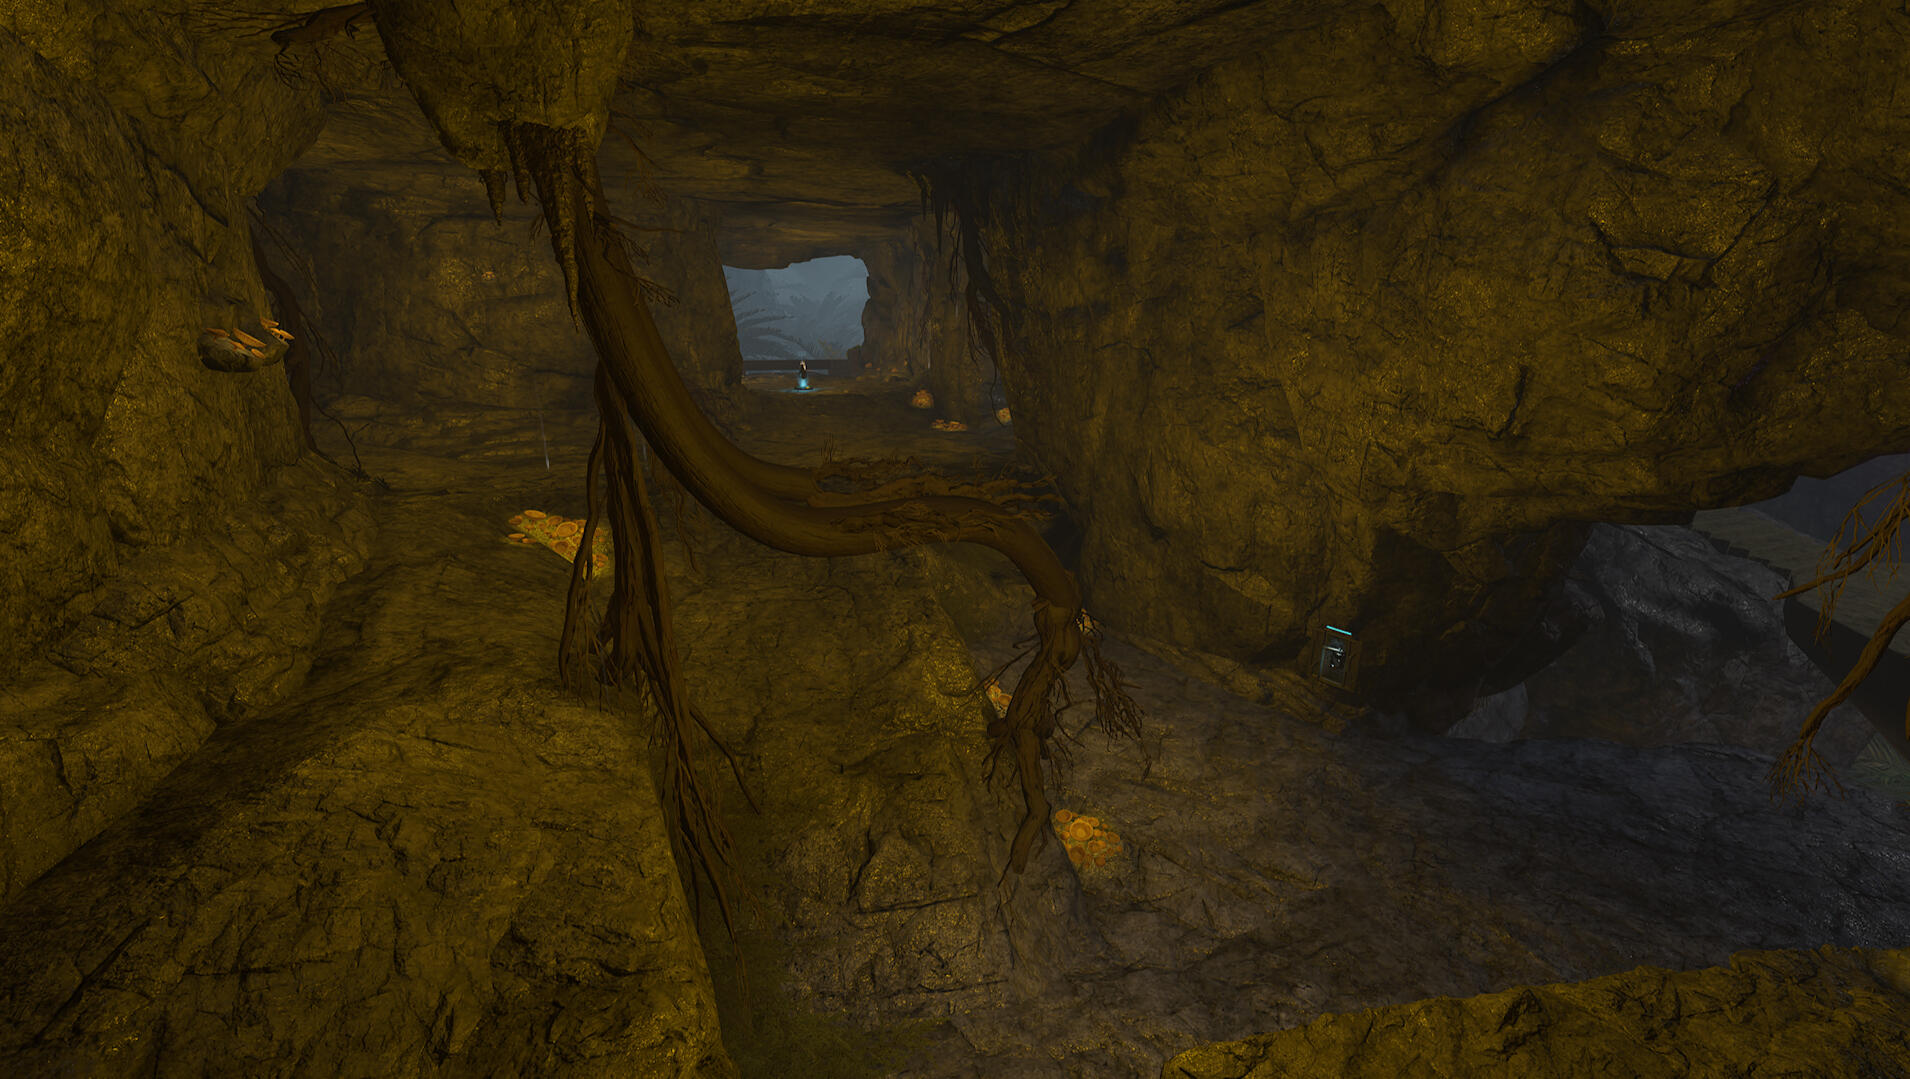
The bottom area
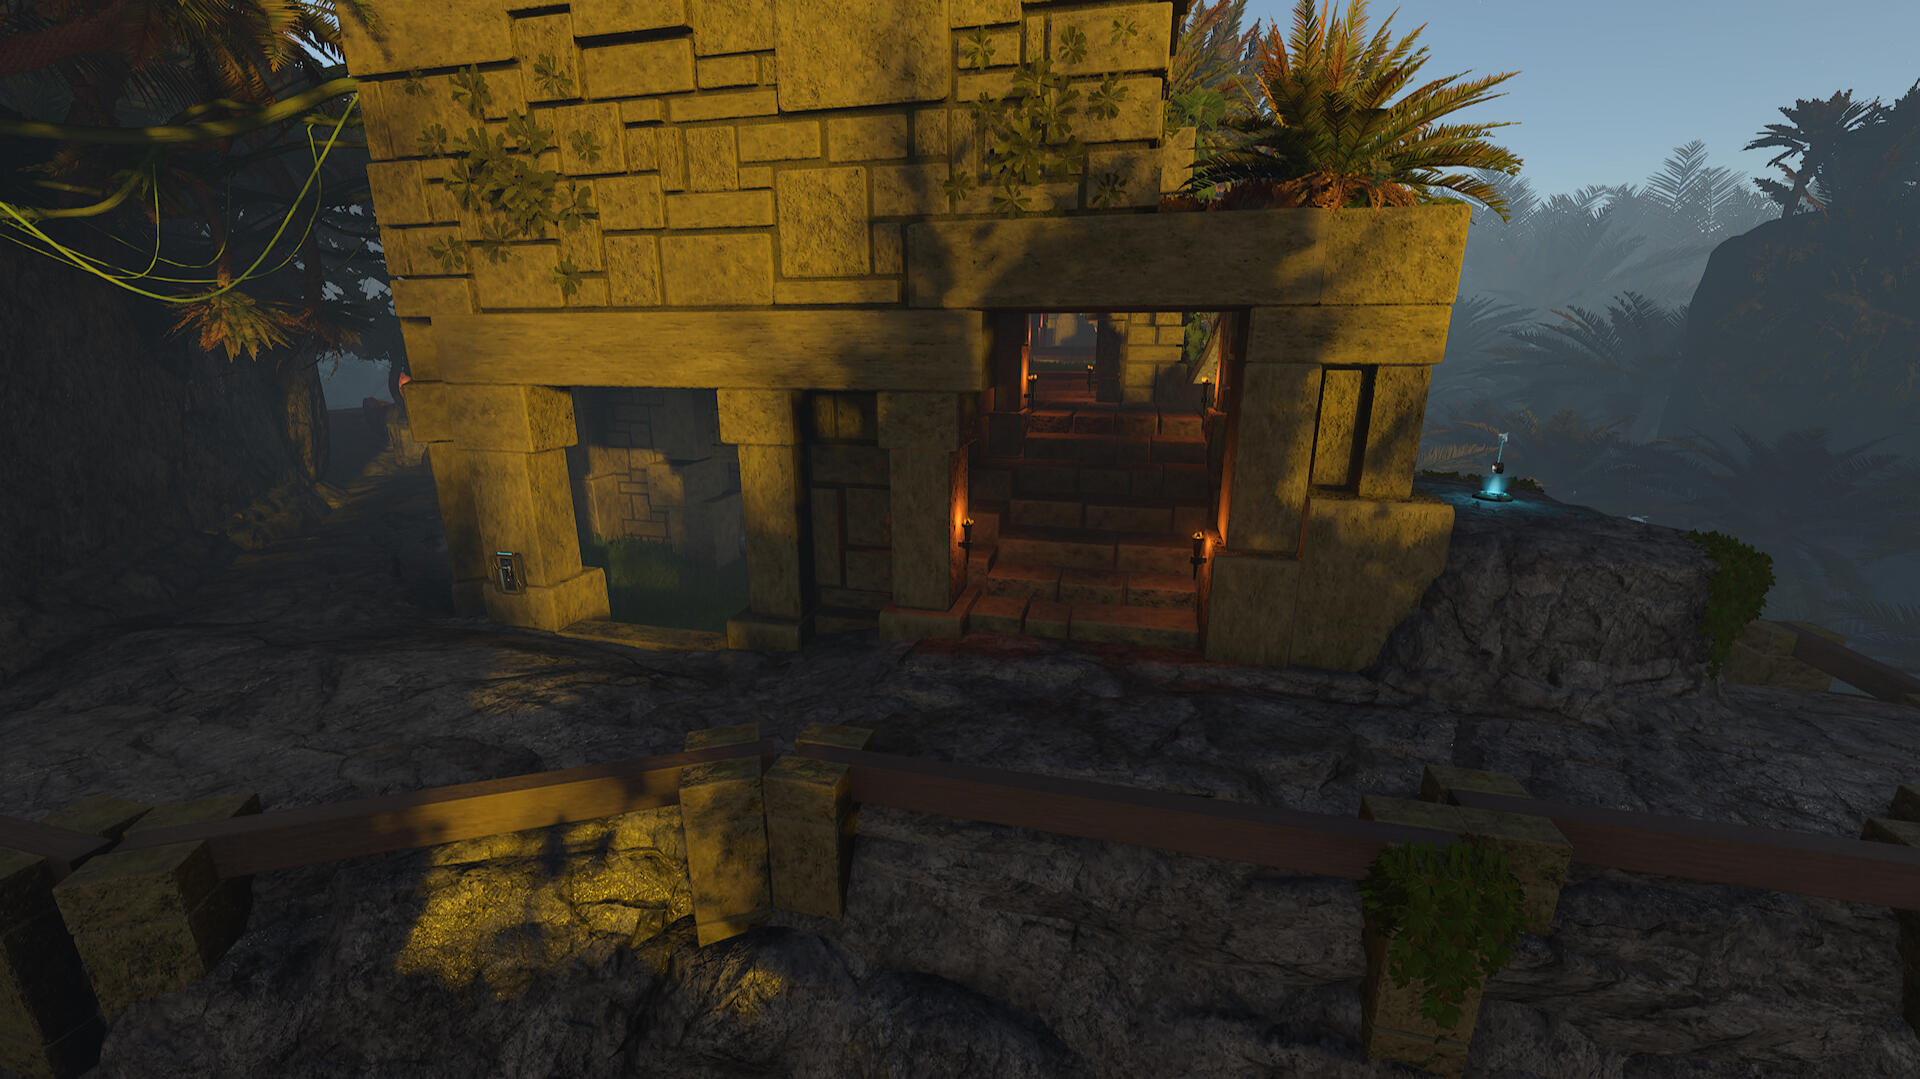
The middle area
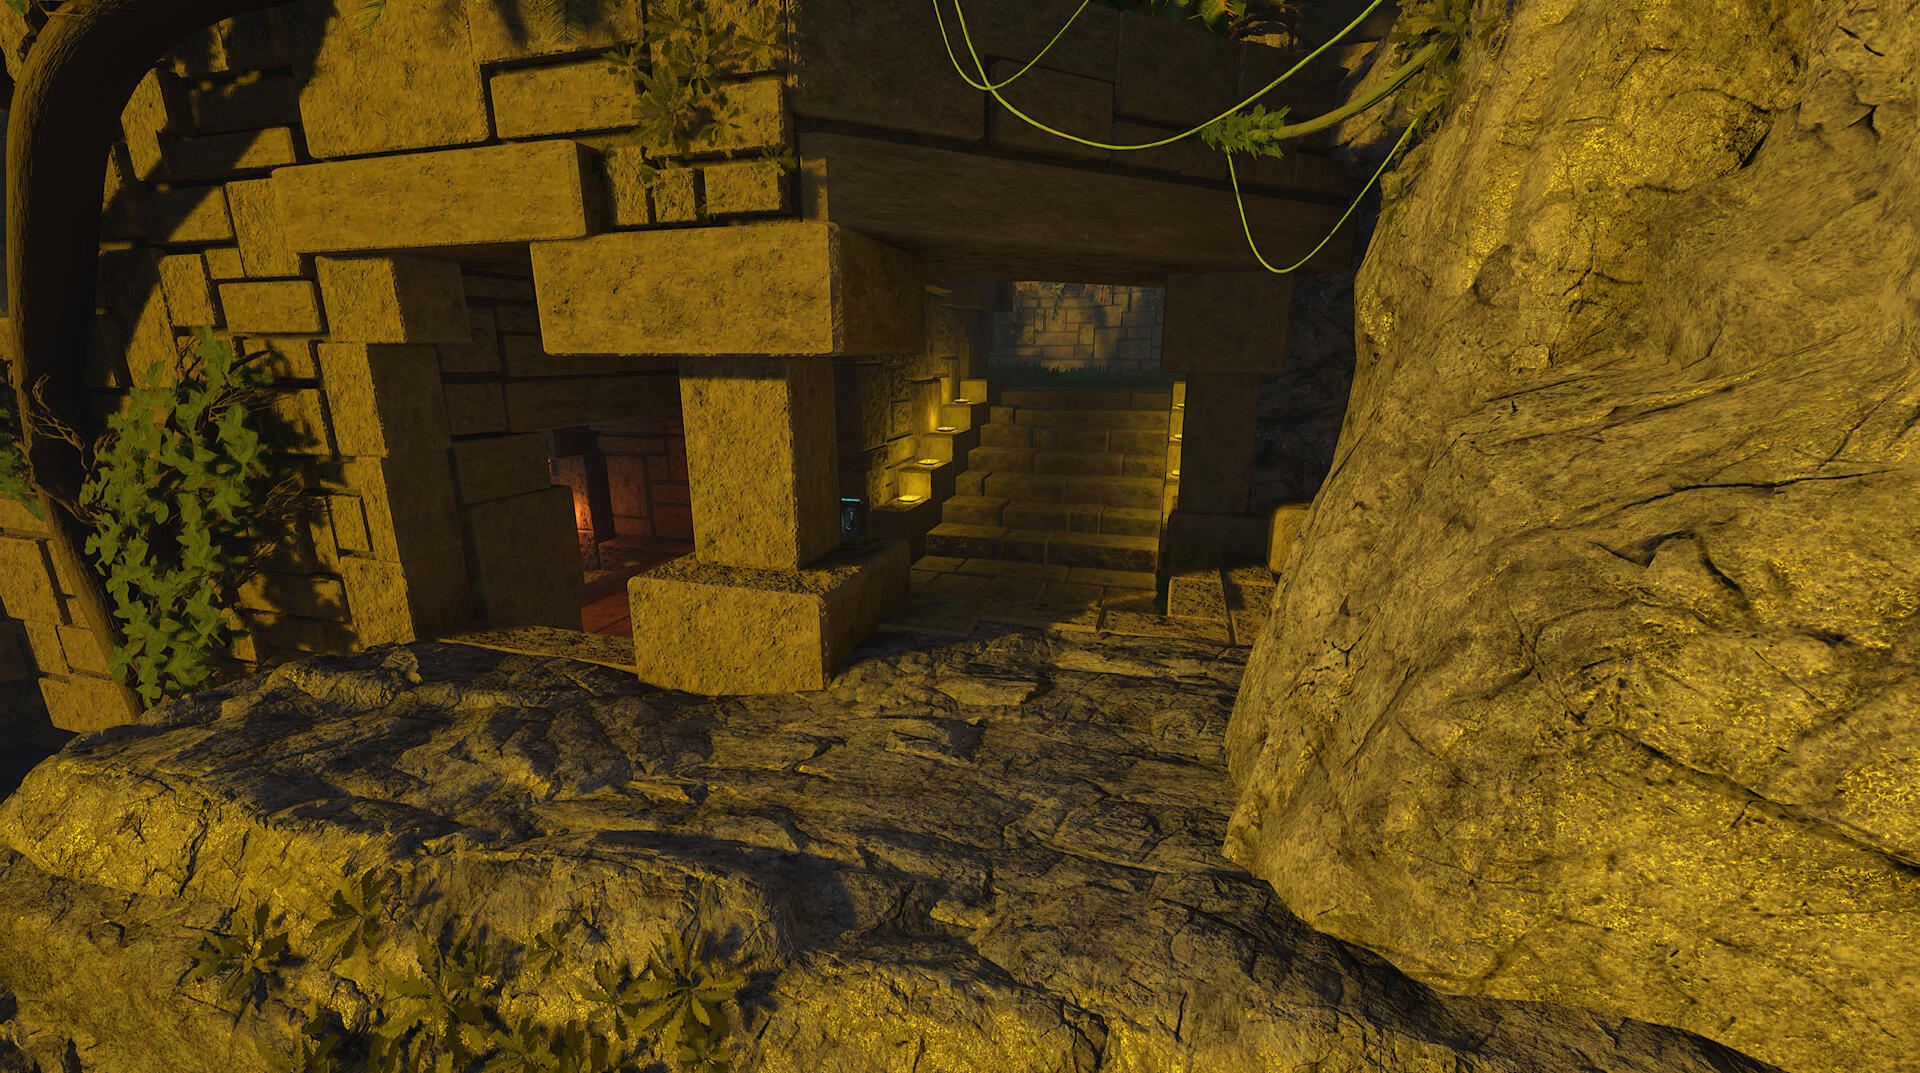
The top area
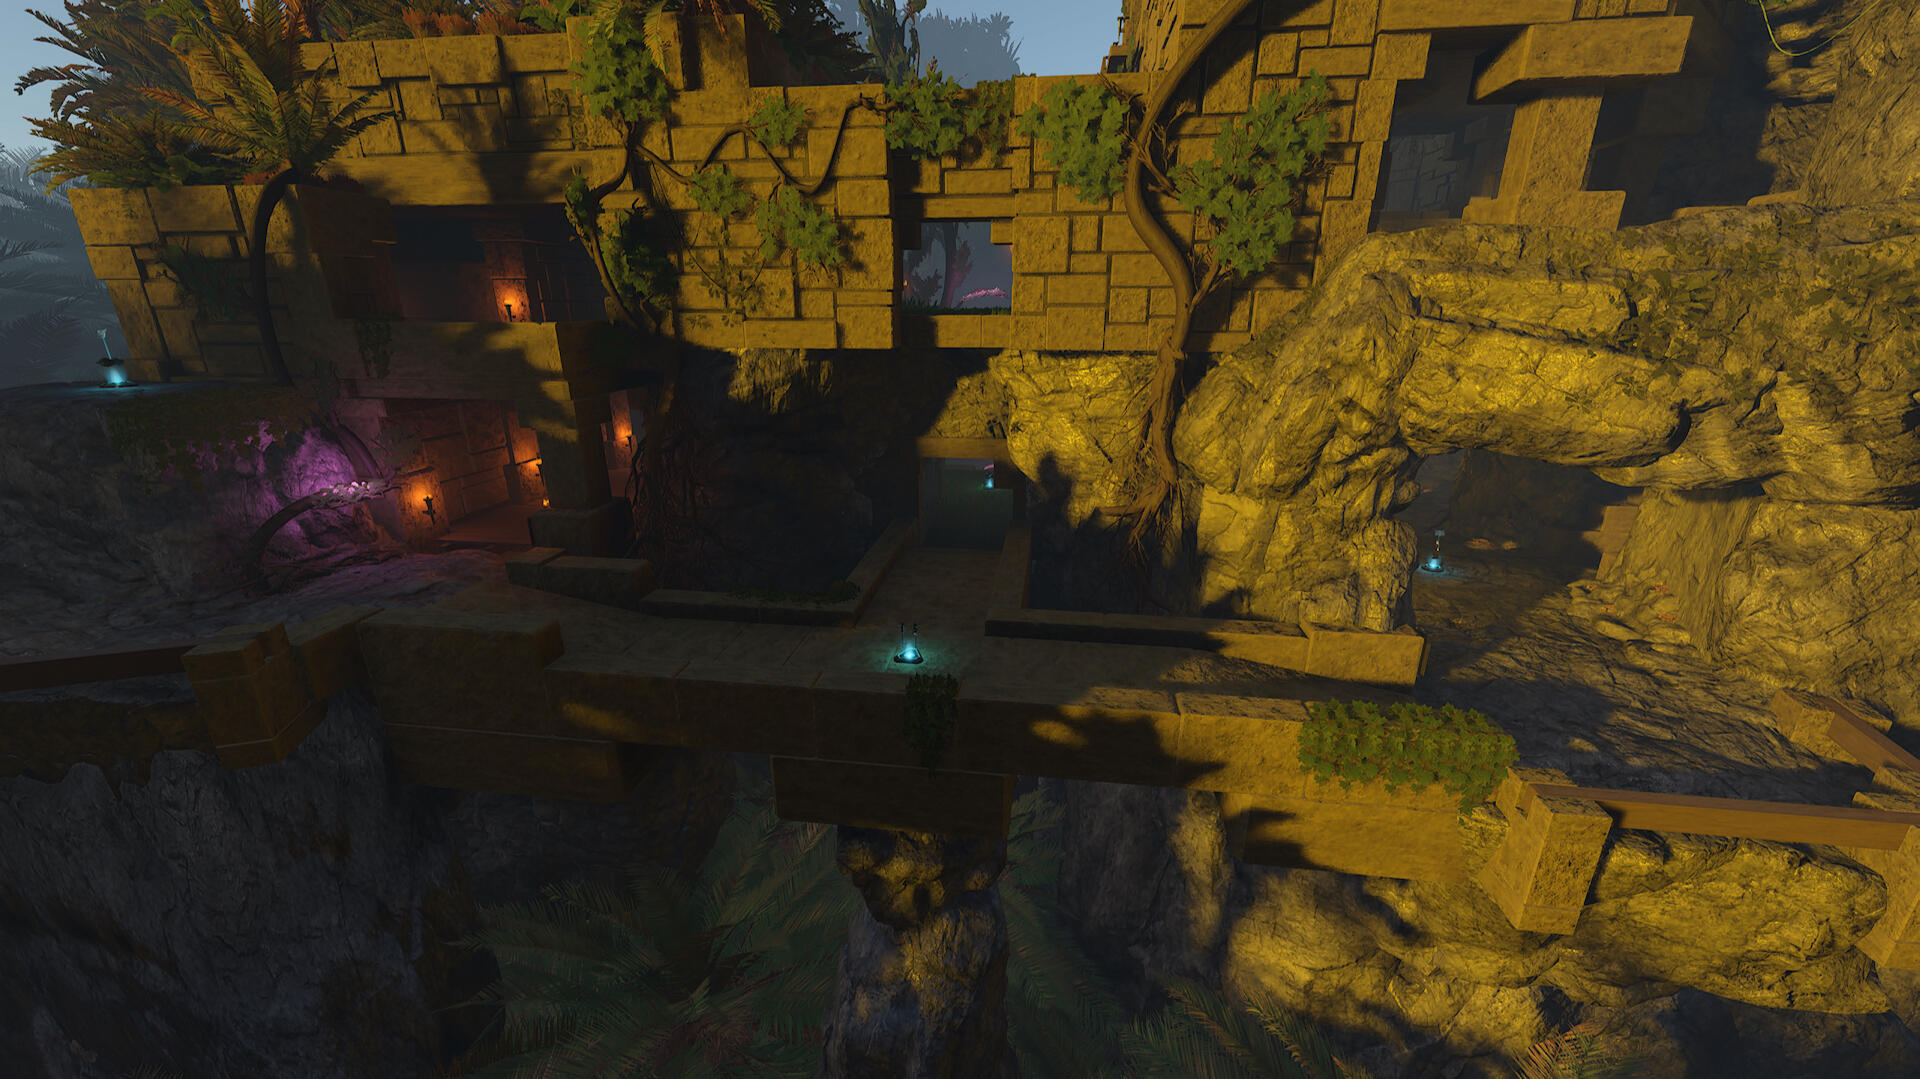
The pathway added in iteration 2
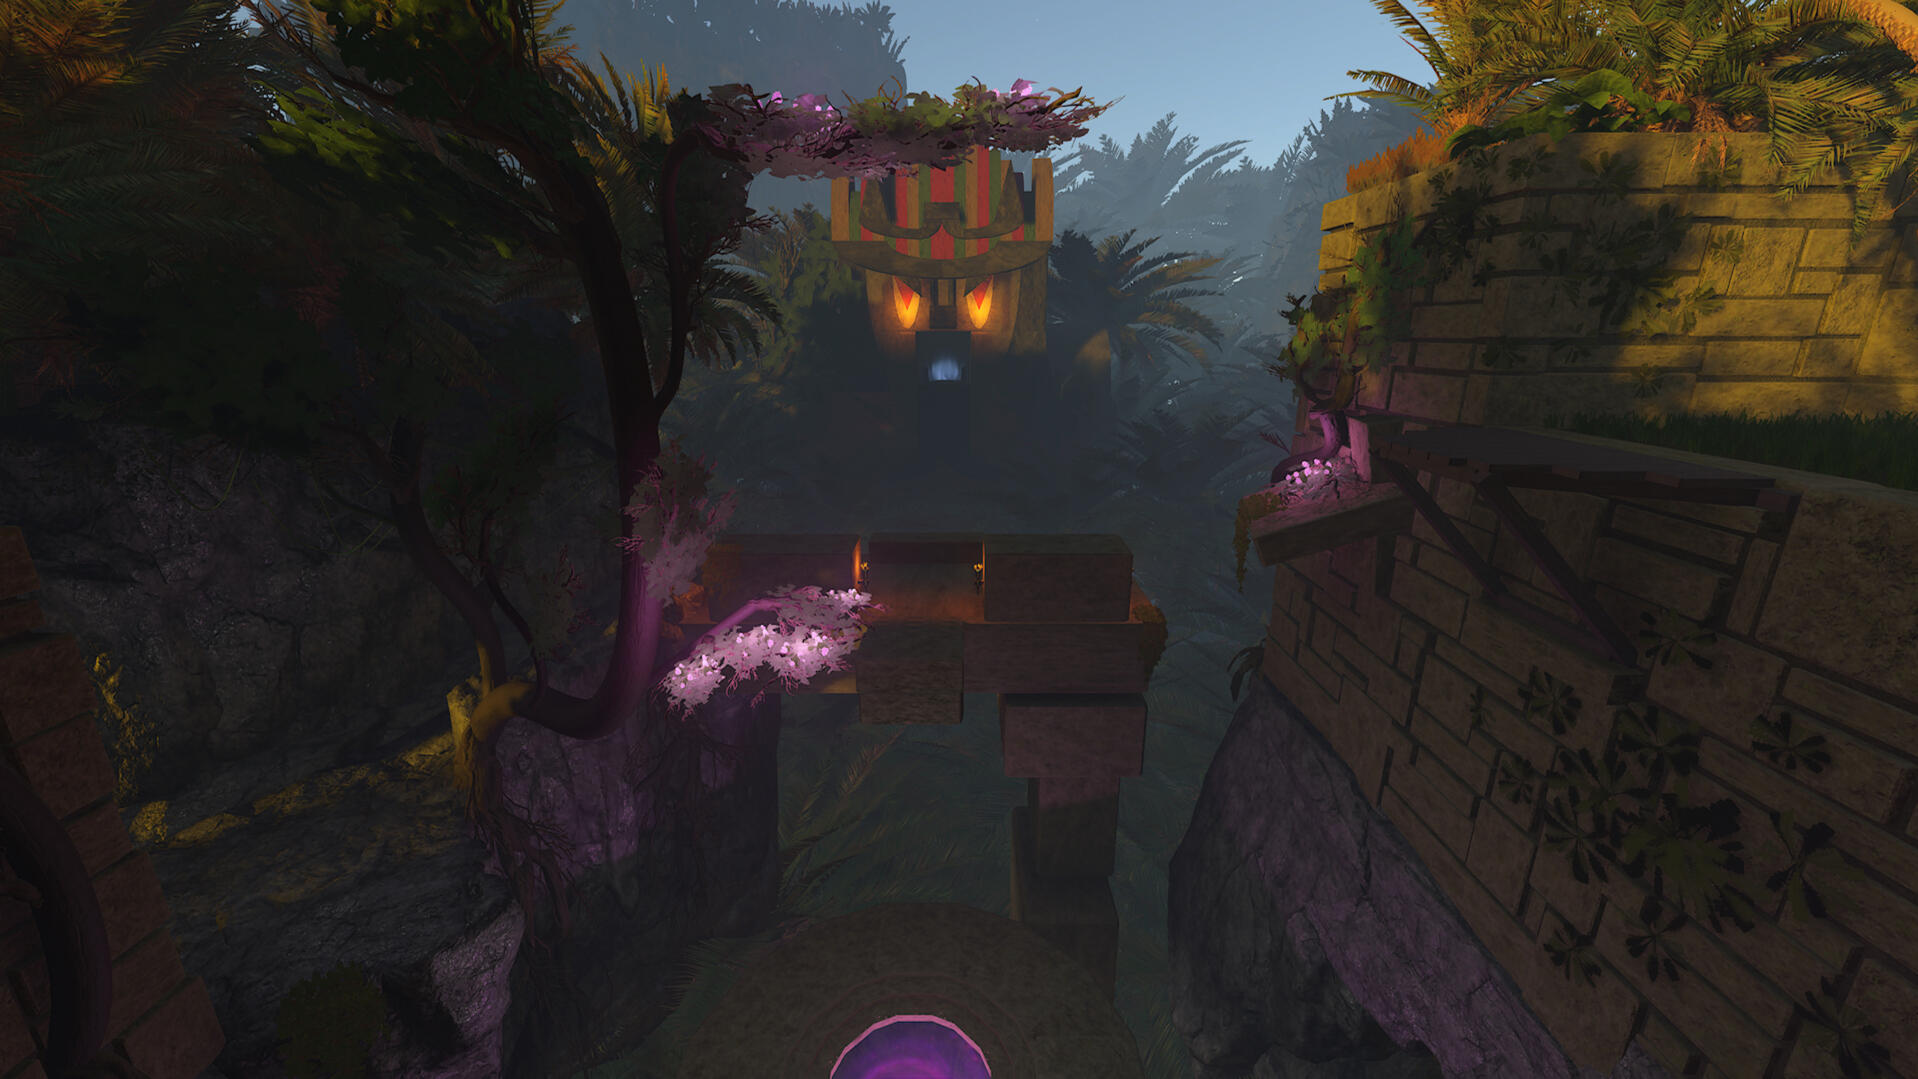
The new pathway and final look of the teleporter lift
Maya
Scripting
Scripts made for Maya.
Modelling and Rigging
Work in Progress
Animation
Work in Progress
Scripting in Maya
The following scripts are written with Python,
using the Qt and PyMEL libraries.
Rigging
This script was made to aid in rigging characters for modelling. It started out as a simple script that would only create Forward Kinematics controllers with a few parameters, but during the development of Damned Soul, I developed it further to aid team members and myself in the creation of animation rigs.The core functionality of the script is the following:
- Create Forward Kinematics controllers with several options.
- Create Inverse Kinematics controllers with several options.
- Link Controllers to each other in parent-child hierarchies.
- Unlink Controllers from each other.
- Delete Controllers without leaving anything in the scene.On top of the core functionality, the script also features:
- Custom checkpoints that marks when an action is done by the script, and what.
- An undo feature for anything the script does using the custom checkpoints.
- A script output window that displays messages from the script such as errors, successes, and when a checkpoint was placed.
General Info
1. When using the script, the name of any joint you want to add a controller to must end with "_Joint". There is a button in the script that adds it to any object selected that don't have it, and its descendants. By selecting the root of a skeleton and pressing the button, the entire skeleton will work with the script.
2. All controllers created by the script have a group as their parent to make sure their transform isn't affected by any controllers further up in the hierarchy. If controllers are deleted directly without using the script, those groups could remain in the scene. There is a button for cleaning up stray groups in the scene.
3. The script has an undo feature that undos the actions performed by the script by placing a checkpoint in the scene in the form of a group, that keeps track of when each action is started. This makes it so an action can be performed, the user can test it out, and still go back to before the action was made with one click. Unless the checkpoint is removed, all actions made by the script can be undone.
4. The script window will stay on top of all other windows, but this can be toggled off and on again.
5. When filling in what a joint or controller in the scene is called, you can either manually type in the name, or select it in the scene and press the associated "Get" to automatically fill it in.
6. "Save and Close" keeps the checkpoint in the scene so you can use it the next time the script is opened. "Delete and Close" removes the checkpoint.
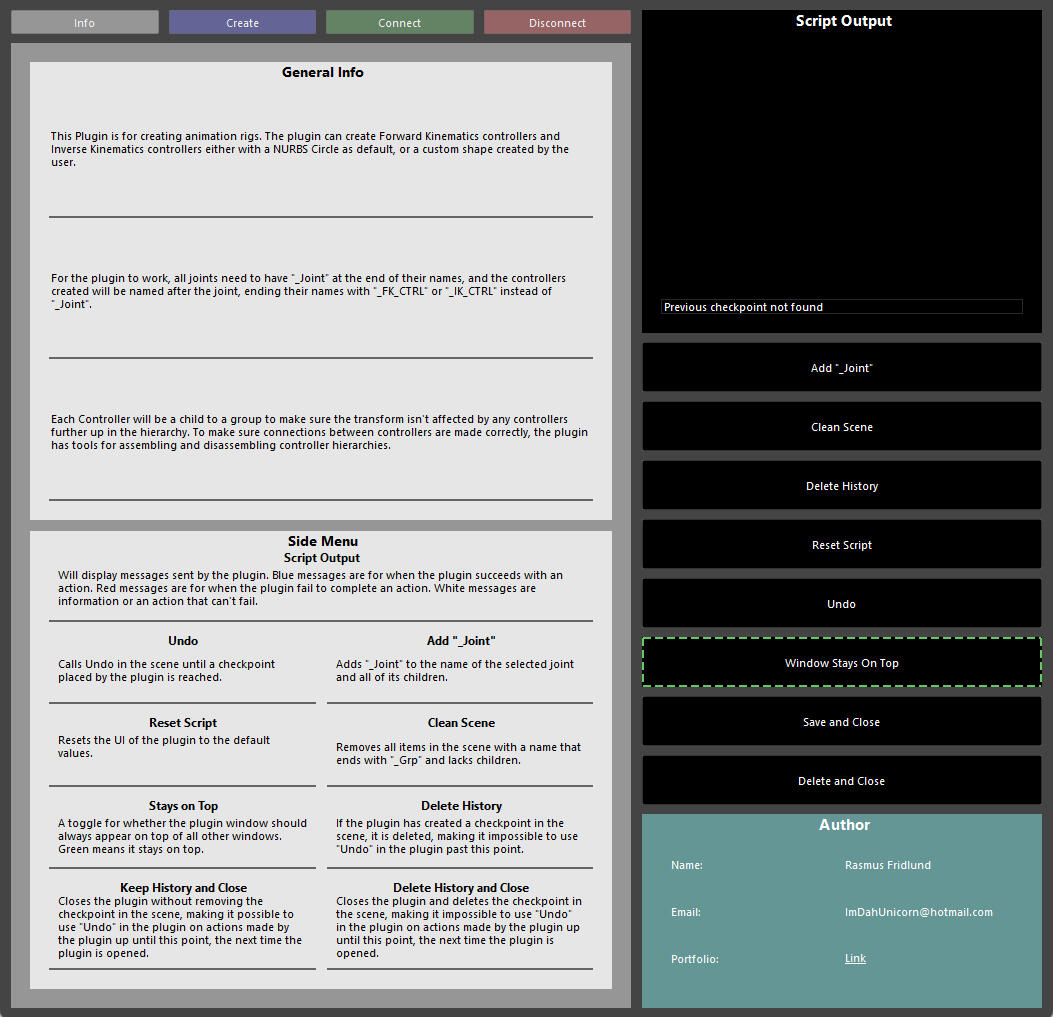
The front page of the script.
Create Controllers
The script allows for creation of Forward Kinematics (FK) controllers and Inverse Kinematics (IK) controllers.When creating IK controllers, the user can either select a pre defined shape in the scene to become the controller, or the script will create a circle as the controller. The user can choose to also bind a locator to the controller.When creating FK controllers, the user can select a pre defined shape in the scene which will be duplicated and teleported to the selected joint, where it will become a controller, or the script will create a circle as the controller. The user can choose to apply an offset in position and rotation from the joint to the controller. The user can also choose to add controllers to the descendants of the selected joint. The user can then choose to limit the depth the script will go in the hierarchy, as well as apply additional offsets that will be applied for each child, for each step down the hierarchy.
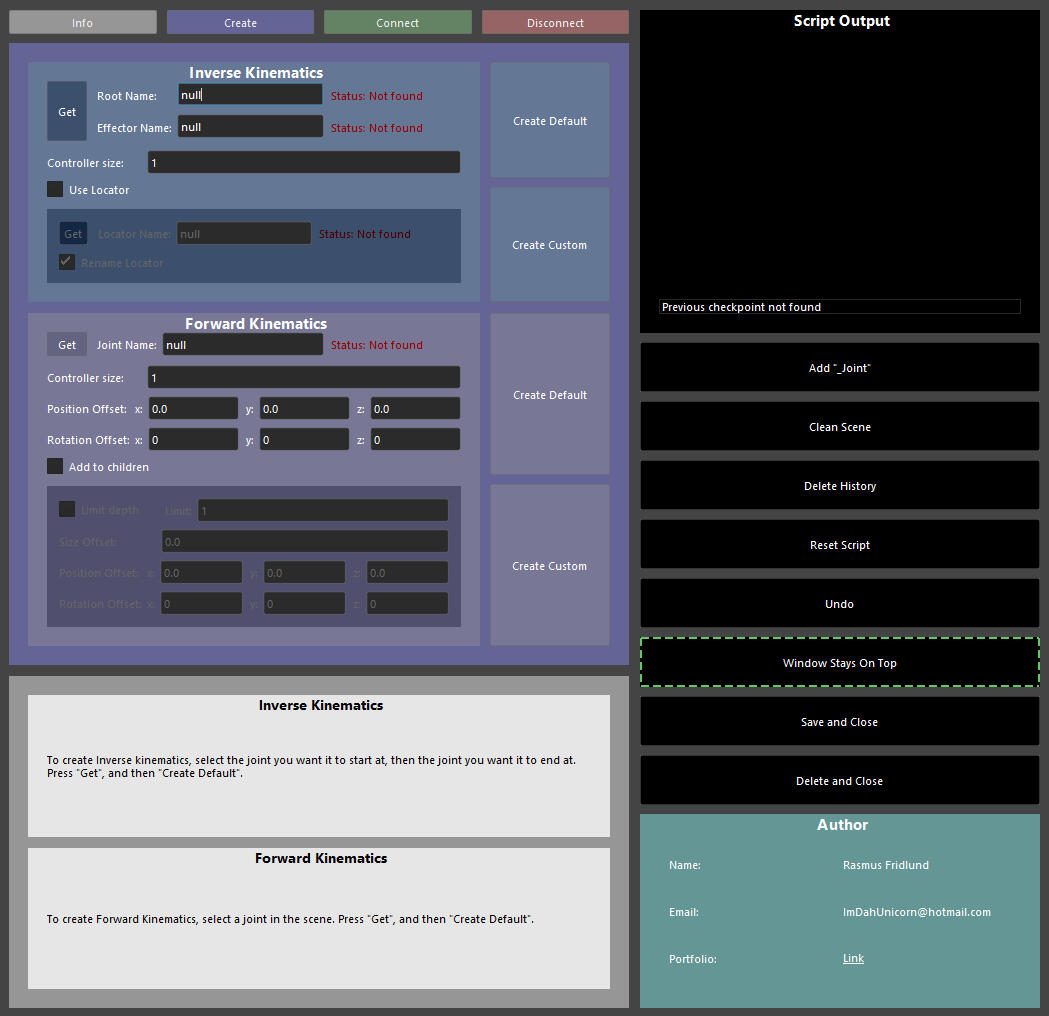
The second page of the script.
Link Controllers
The script allows for linking controllers in two ways to ensure that controllers don't inherit any transforms when building the controller hierarchy.The first way is to link one controller to another. The user selects what controllers they want linked, and what type of controllers they are, and the script links them. This option can also be used to bind locators or other miscellaneous objects in the scene to controllers.The second way to link controllers is for binding several FK controllers at once. If a chain of joints all have FK controllers, this option will go through the hierarchy from the selected joint and link all consecutive FK controllers it finds.
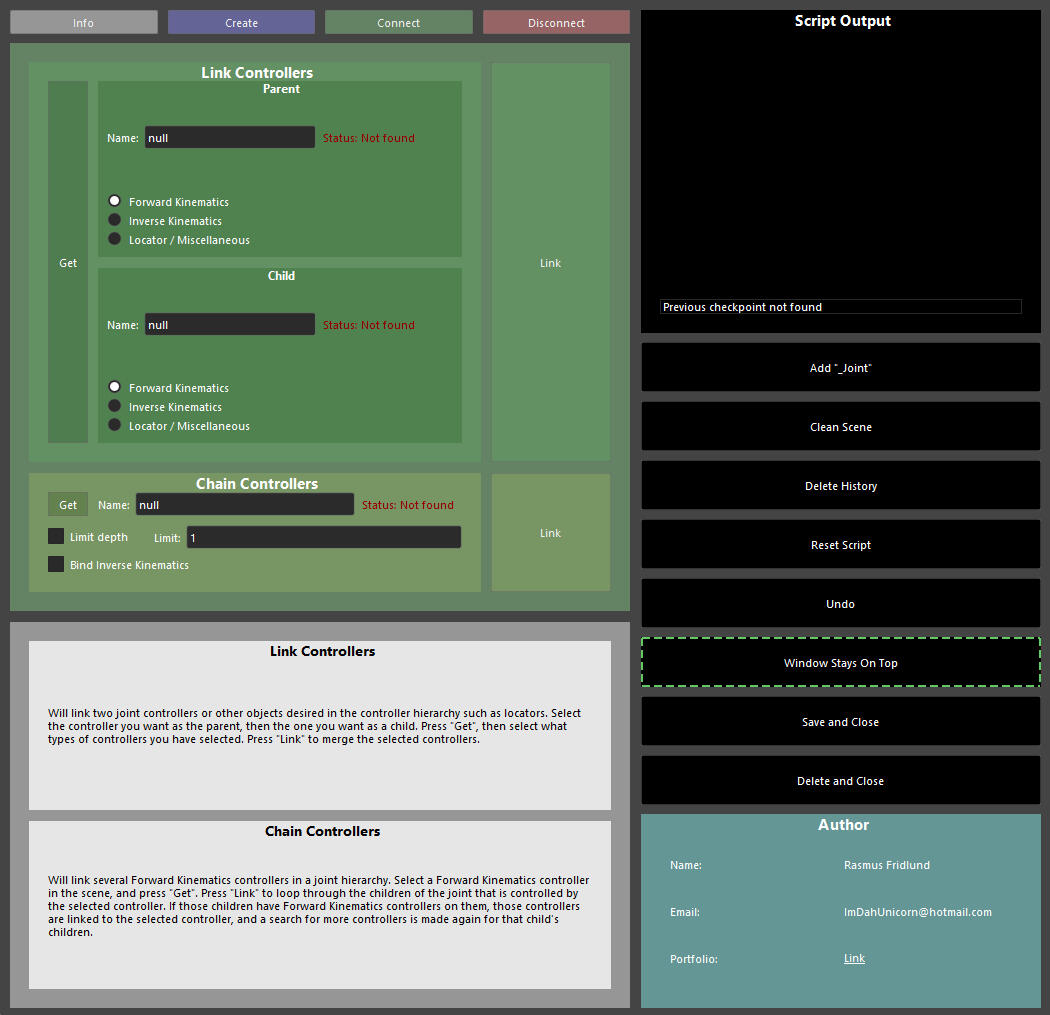
The third page of the script.
Unlink Controllers
The script offers two options for unlinking controllers from each other to make sure it is done properly. Both options offer options for what to do with the selected controller's children.The first option is to only unlink the controller from its parent. This makes it so you don't have to find the controller in the hierarchy and select its parent group, to then unparent the group from its parent.The second option is to outright delete the controller, and the script will then also delete the controller's parent group.The options for what to do with the selected controller's children are:
- Keep, which keeps the children parented to the selected controller.
- Delete, which deletes the children.
- Stay, which makes the children stay in the hierarchy they were in, as children of the parent to the selected controller.
- Unlink, which unlinks the children from all hierarchies.
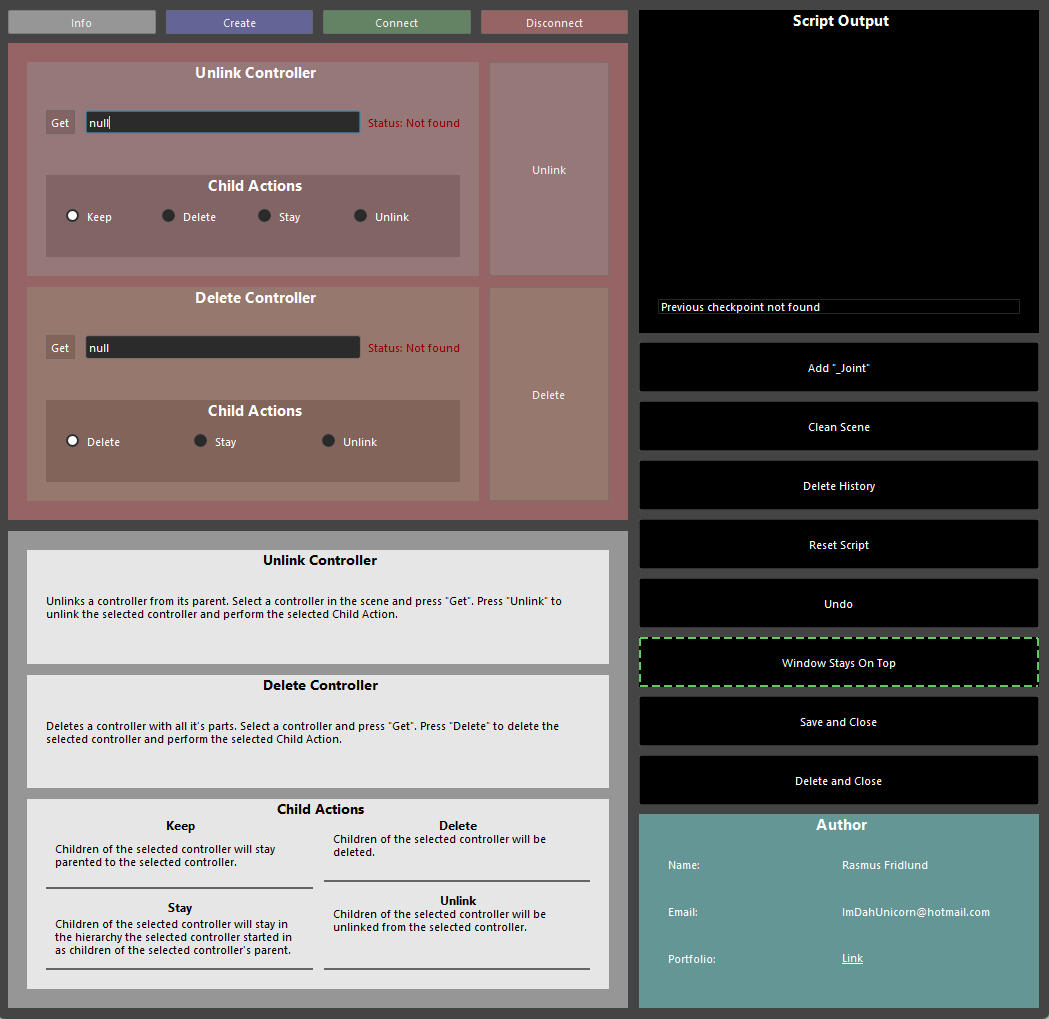
The fourth page of the script.
Sort Mesh
This script allows its user to sort the order of vertices in a mesh by looking at it in 2D from above. This script is very niche, but was created during the development of Damned Soul to generate a list of points used for perimeter collision.The script will load the vertices of a mesh and visually display how they are ordered. The user can then rearrange the order of the vertices to achieve a desired order and then print the new list of positions.
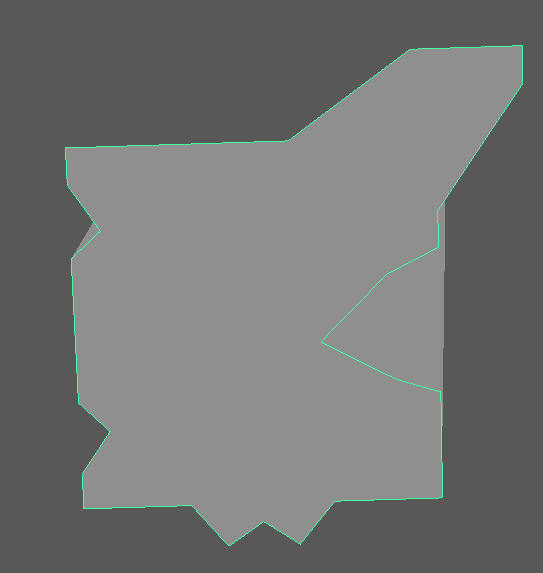
The mesh being sorted, looked at from above.
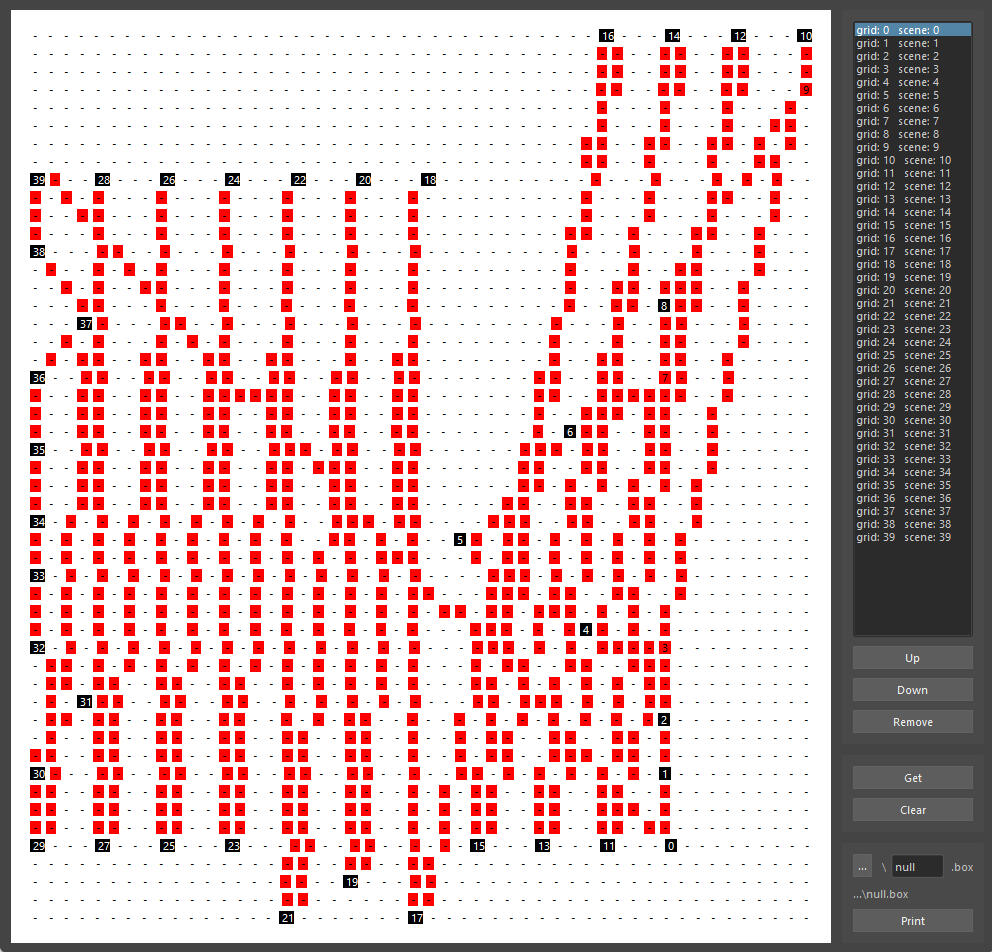
What the mesh looks like when loaded by the script.
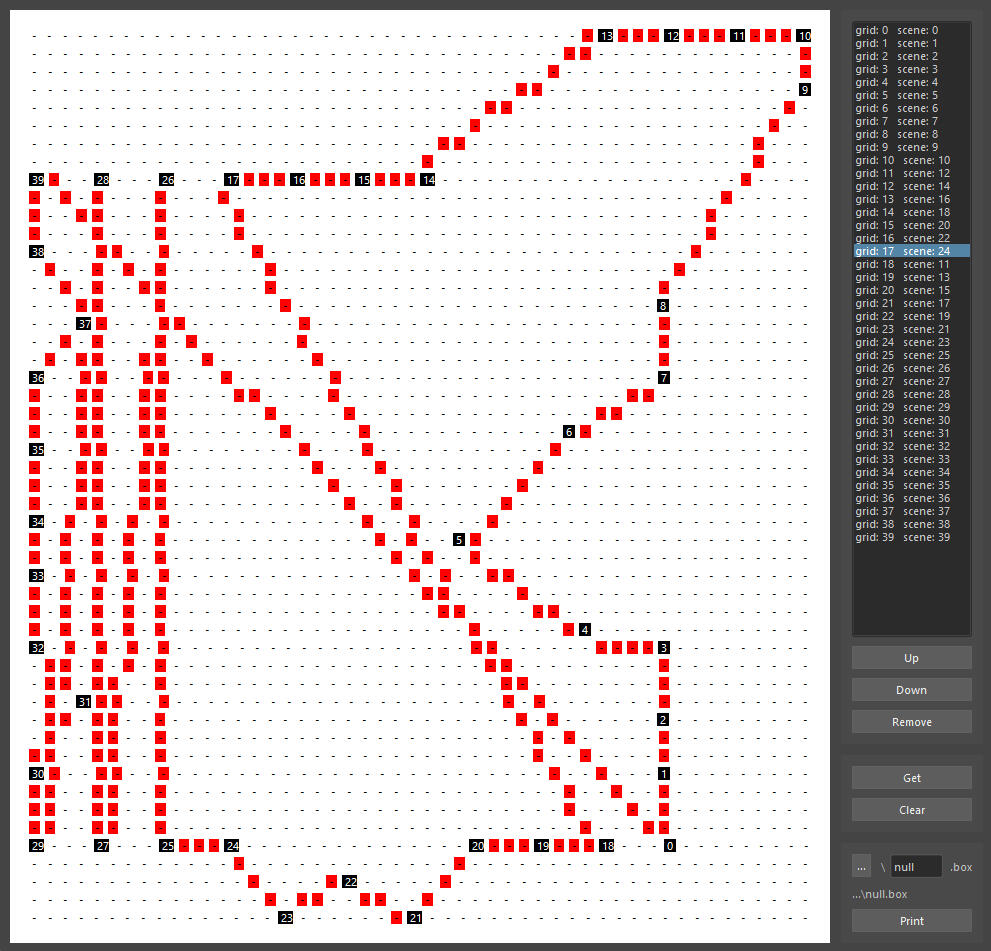
Halfway through sorting the mesh.
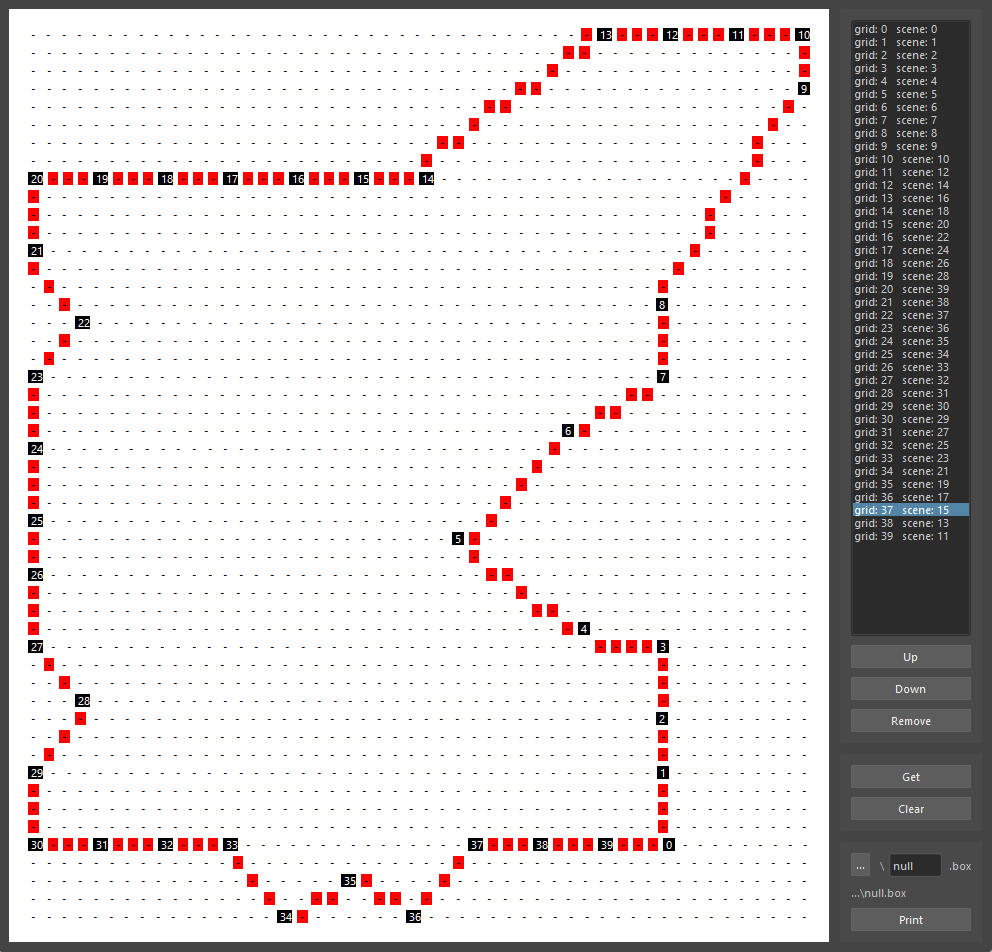
The mesh being fully sorted and ready for export.
Transfer Animations
This script will transfer the animation of one skeleton onto another. The user can sort the skeletons inside the script by changing the order of joints and delete joints from the list. These changes won't affect the skeletons in the scene, only how the script interacts with them when transferring the animations.The script will display how far into the hierarchy a joint is compared to the root, how large the skeleton is in terms of number of joints, what a selected joint's parent is in the scene, as well as the progress of the script during the transfer with the help of a progress bar.
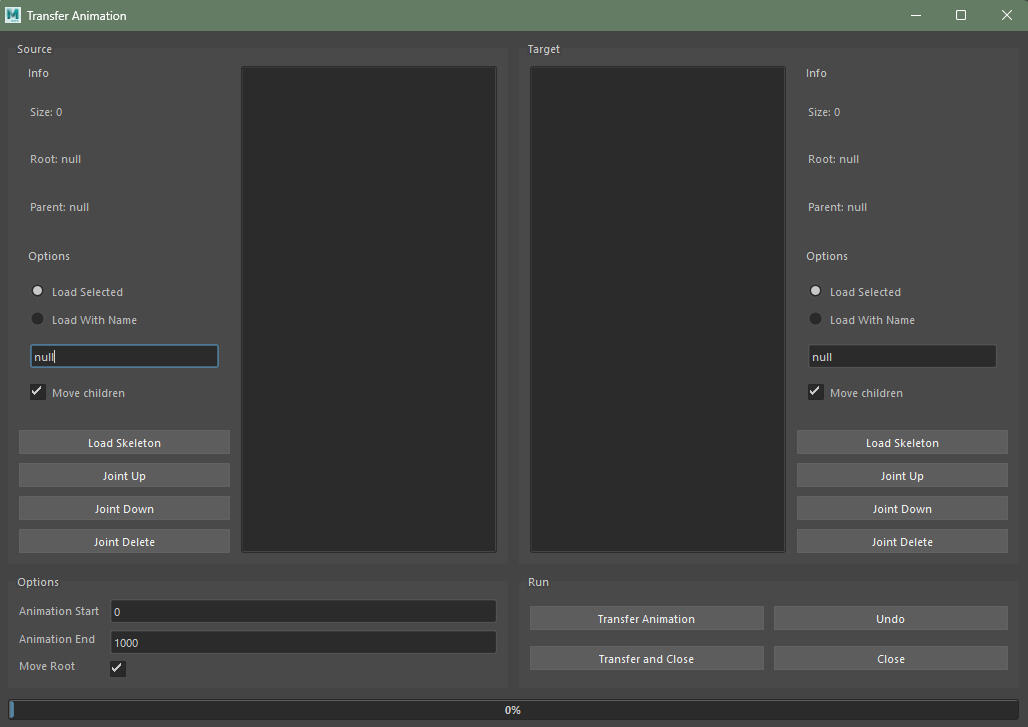
What the script looks like when opened.
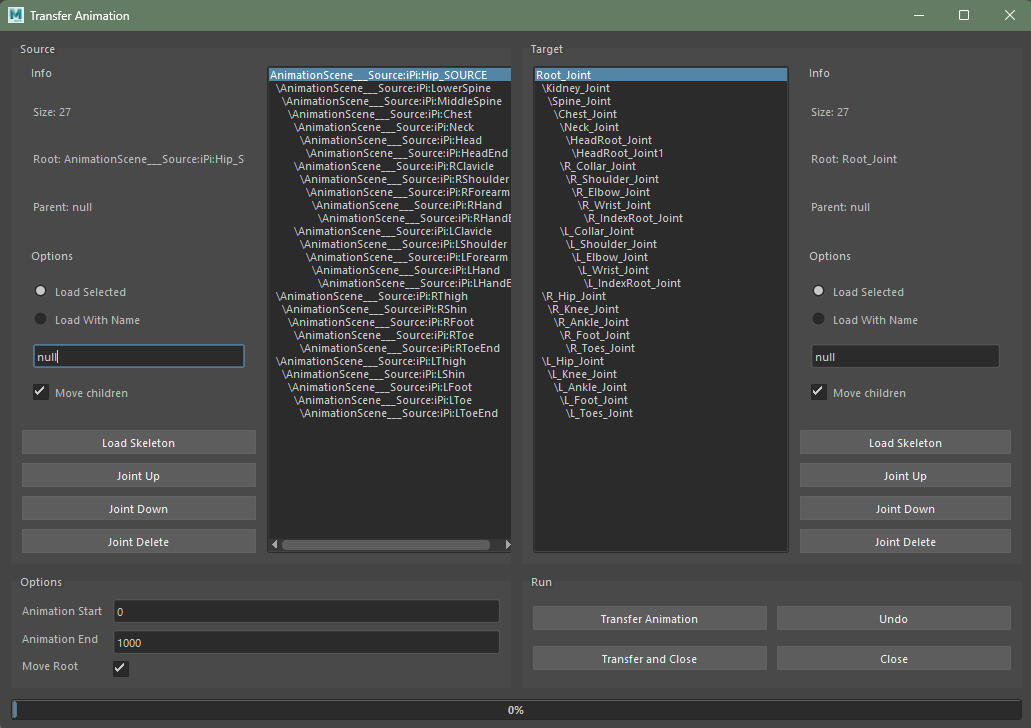
When two skeletons have been loaded.
Export Scene
This script will collect the transform of all objects selected in the scene, and print the objects' names and transforms to a custom file. This script was made to aid in recreating scenes from maya, in an external rendering project.
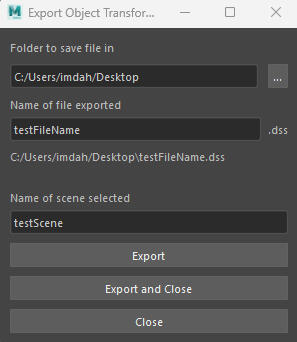
The UI of the script.
Game Engines
Materials
This project was made in UE4 to try out some techniques for making interesting materials
Glow
The goal of this material was to add glow to the edges of stones in a wall. This was achieved by isolating the blue color in the wall's texture, inversing the values, and adding the result back into the material as red glow. To make it easier to compare the glow to without glow, the glow value is also multiplied by a gradient.
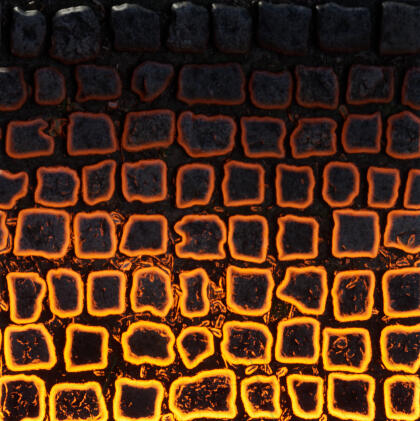
The way the material looks like.
Snow
This material played around with creating snow by displacing certain parts of a mesh. This was done by getting the normals of the meshes, isolating the z-value, and multiplying that value with the intended displacement. This results in snow only building up on top of meshes, and will build up less, the more angled the surface is. On top of this, the displaced parts are changed to white, to actually make it look like snow.The material was implemented in a scene that slowly changed seasons, where it starts out barren, then snow start to build up. After some time the snow melts away, and I then added some greenery that will start to show up. All of these changes are made with one material.
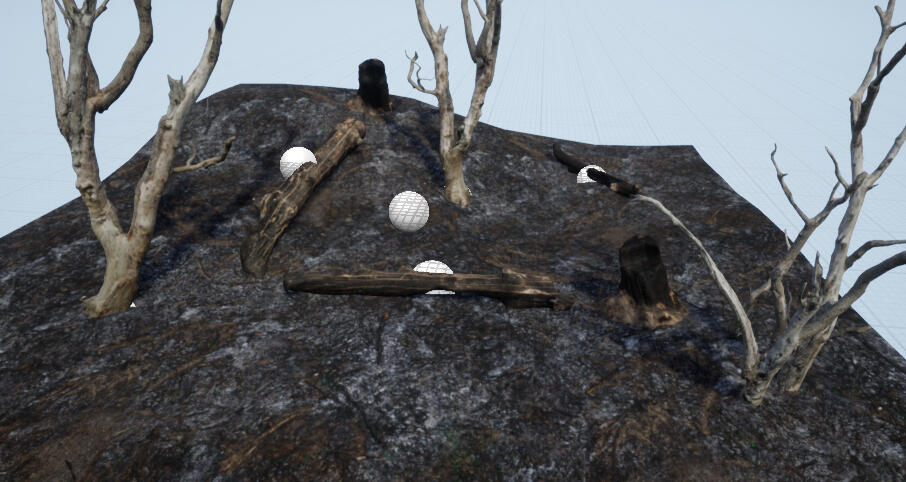
The scene without snow.
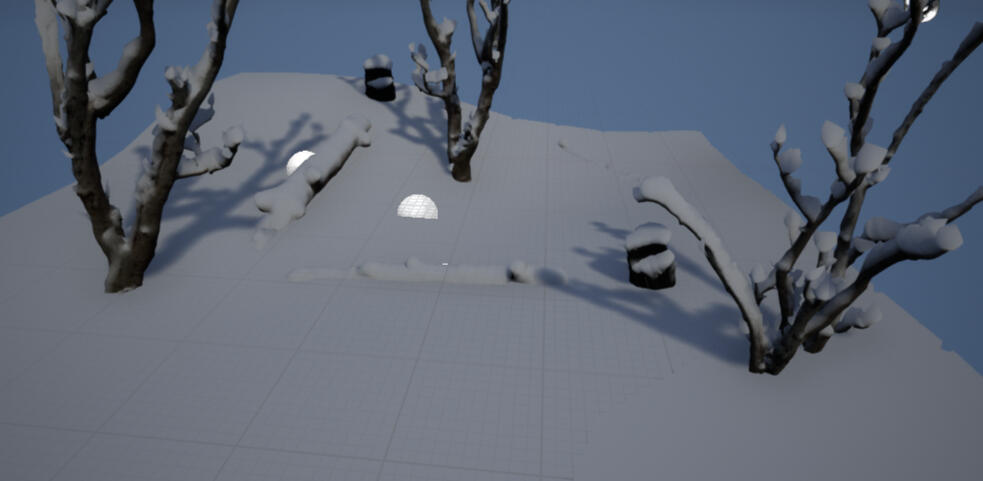
The scene with snow.
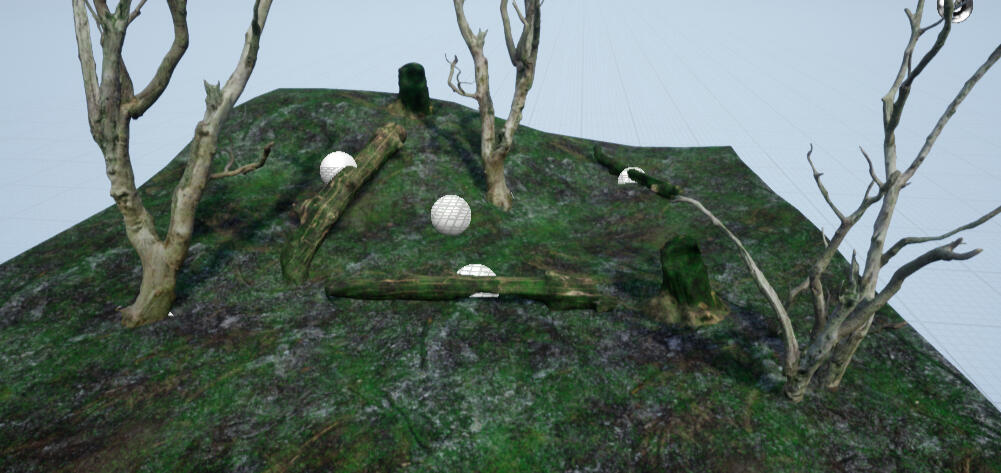
The scene with greenery.
Slime Game
This project was made in Unity to run tests for my Bachelor Thesis. The goal of the project was to create a small open world game for the player to walk around in, with two different quests to complete. One quest was linear, and one had several different endings. To make the game more interesting there were enemies scattered around the world that would try to kill the player, and the player was able to fight back.In an attempt to remove as many biases from the player as possible that might've affected the results of the tests, all characters in the project were slimes, with the only variation being that the slimes could be cubes, or spheres. The slimes were also color coded after whether they were hostile, could be interacted with, or if it was the player.The player could shoot and, if not engaged in combat, run. The player character was always aimed towards the mouse, and the player could see their health, current objective, and a mini-map on the UI.
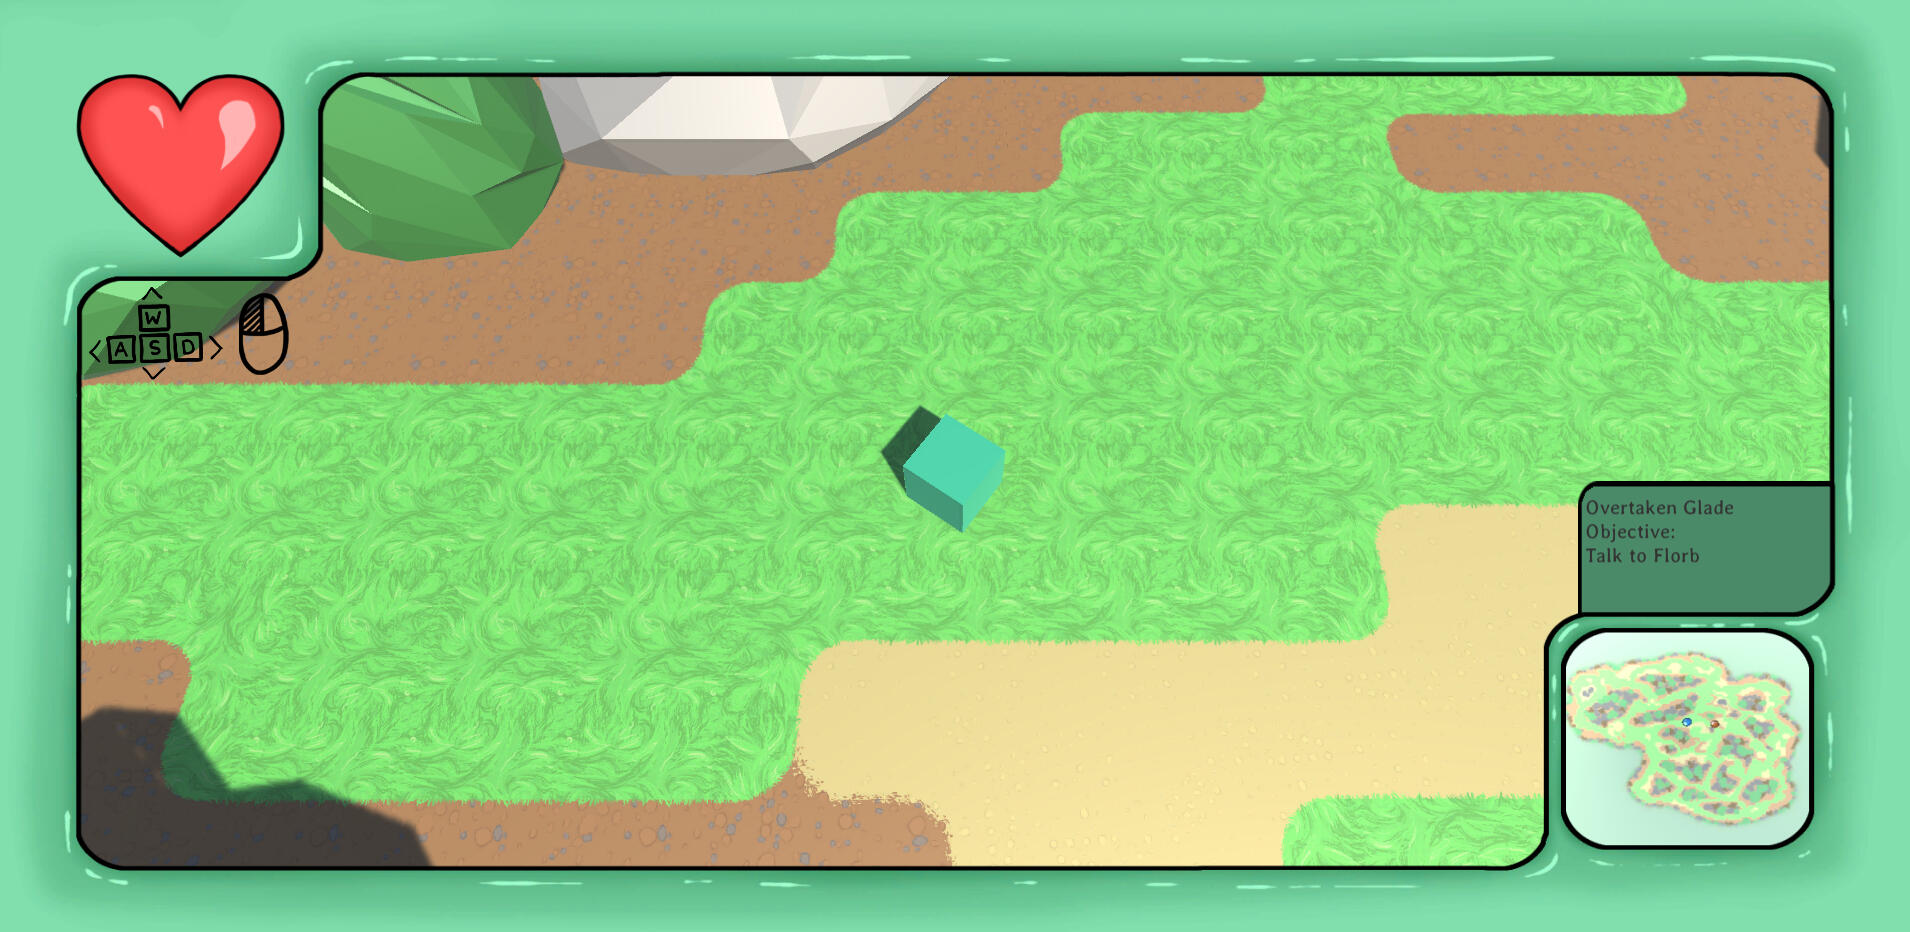
What the game looked like.
Particle Handler
This system was created to handle particles in the new game engine for Damned Soul. The system consists of 5 parts:
- Emitters
- Updates and Collection
- Sorting
- Drawing
- Merging
Emitters
All particles in the game engine belong to an emitter. Emitters keep track of their own lists of particles, and any buffers or textures that are needed for the particles. They also keep track of which shaders to use for their particles.Different types of emitters with different variables and functions are defined by inheriting a base emitter that holds everything required.
Updates and Collection
Every frame, each emitter is looped through and a compute shader that the emitter has is bound and dispatched. This compute shader updates the positions of the particles the emitter owns, and overwrites the old positions with the new ones. The positions are then added to the back of a larger list, called a "giga-list", together with their distance to the camera, and which emitter it comes from, in the form of an index.
Sorting
The giga-list needs to be sorted after distance from the camera, due to the way objects with transparency are handled by DX11. Otherwise, particles can be drawn behind already drawn particles, and partially or completely disappear.In order to sort the giga-list, a compute shader is used that employs odd-even sorting on the entire list. Odd-even sorting is often very slow, but by dividing up the workload on several threads, this method becomes very fast.The idea is that each thread get a pair of indices in the giga-list to compare, if the lowest index is lower, the data in the indices are swapped. Ternary is used to avoid branching. When the comparison is done, the thread waits for the rest of the threads to complete their work, before doing its next comparison.As it's not possible to make threads from different thread groups wait for each other, this approach is limited to threads within the same thread group. For DX11, the maximum threads in a group is 1024, meaning the maximum amount of particles that can be sorted is doubled to 2048. Due to odd-even sorting being able to leave one index at the end of the list at all times, that number increases by one, to 2049.To handle more than 2049 particles at once, each thread is able to handle more than one pair in each comparison-pass. The amount of pairs each thread has to compare is determined dynamically when the shader is dispatched, meaning that each thread compares one pair if there are 2049 particles or less, two pairs if there are 2050-4097 particles, three pairs if there are 4098-6145 particles, and so on.
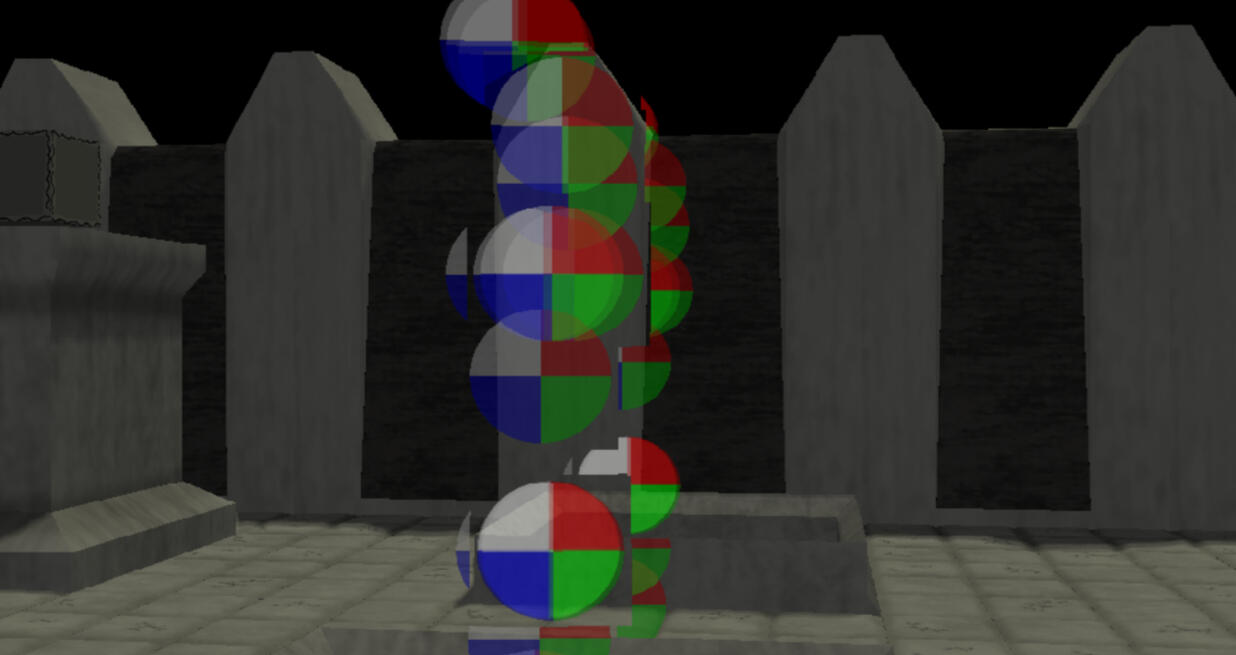
Without Sorting
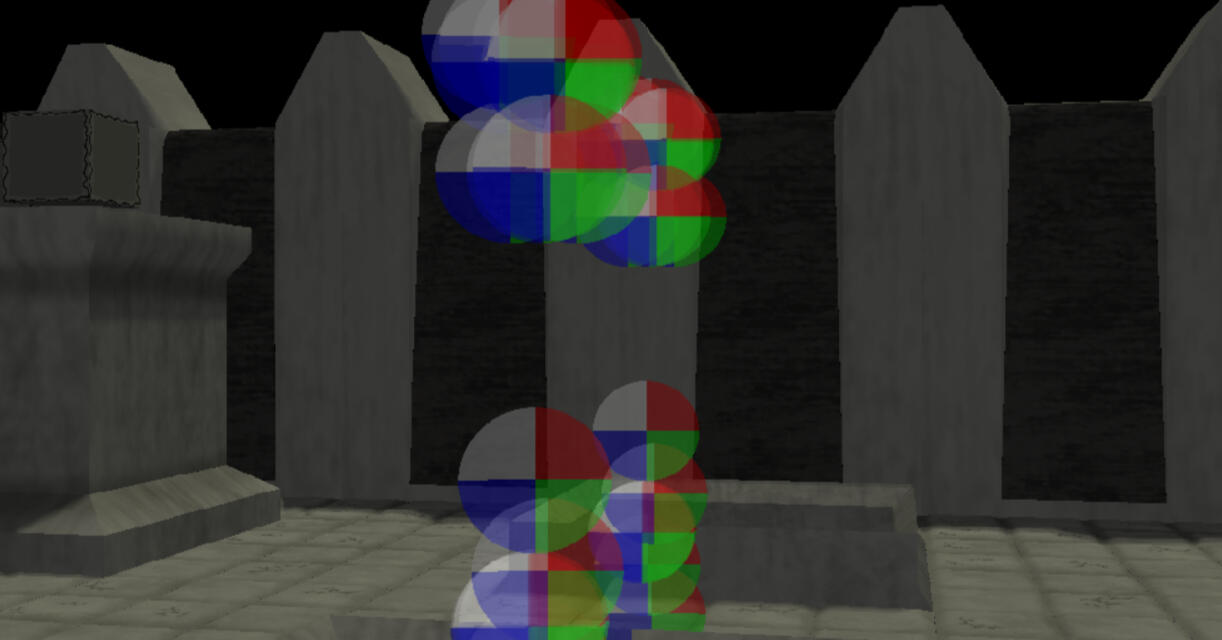
With Sorting
Drawing
When drawing the particles, the giga-list is read, and a drawing order is composed. The drawing order is a list where each element is two numbers. The first number is an index to an emitter, and the other is how many particles in a row belong to that emitter. Using the drawing order, the correct shader, textures, and buffers are bound.
Merging
These particles are used in an engine that uses deferred rendering. As deferred rendering doesn't support transparency, the particles cannot be drawn directly onto the textures used by the deferred rendering. Instead, the particles are drawn to a separate texture, that is merged with the output of the deferred rendering. This is done by comparing the depth stencils of the deferred rendering and particles, to make sure particles aren't rendered over geometry that is in front of them.
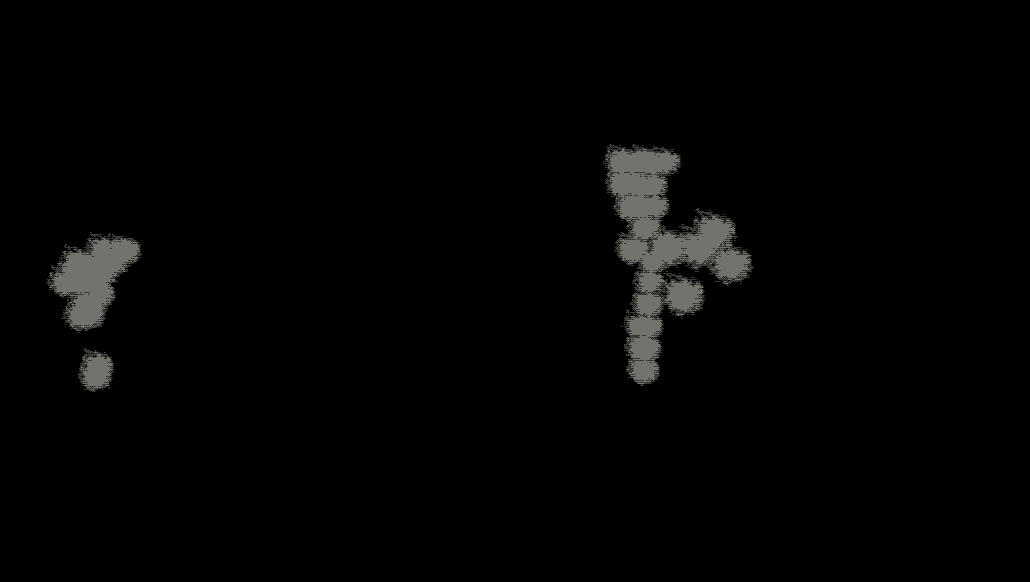
The image particles are drawn to
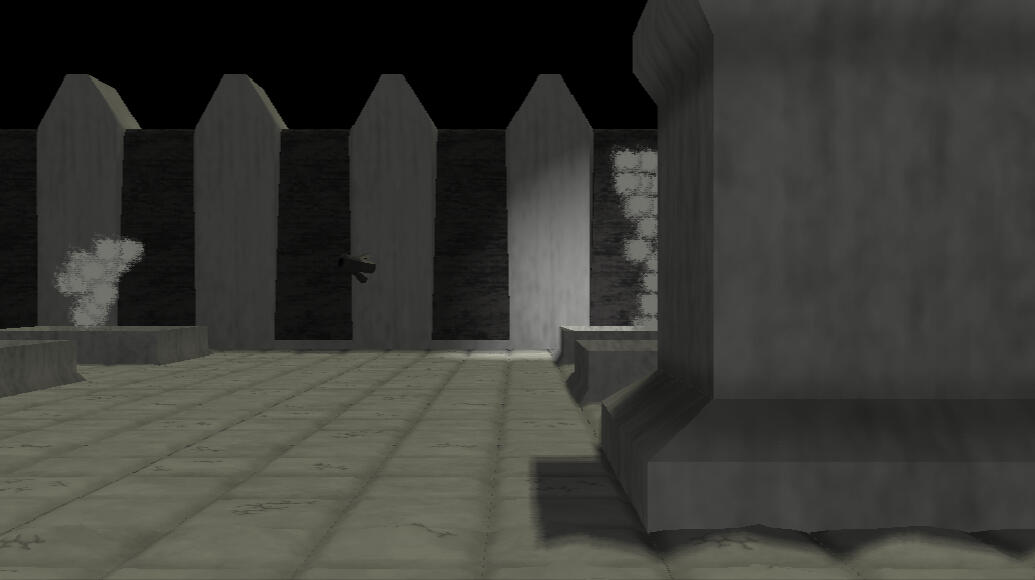
The result of merging
DirectX11
This project can be downloaded here, and incorporates the following techniques:
- Cube Mapping
- Deferred Rendering
- Displacement
- Frustum Culling
- GPU-Based Particles
- OBJ Parsing
- Phong Lighting
- Shadow Mapping
- Shatter
- Tessellation
Cube Mapping
Cube Mapping was utilized in this project to make certain objects reflect their surroundings. The cube maps are updated every frame if their objects are seen by the camera, and will reflect other reflective objects if any are nearby.The amount that is reflected is based on the object's Specular Map, meaning that it is possible to only have parts of the object reflect the surrounding. This can be seen in the second image, where the cube has edges that don't reflect anything, and some scratches were made on the reflective surface.Viewing more than one reflective object at once in the scene may cause the frame rate to go down noticeably.
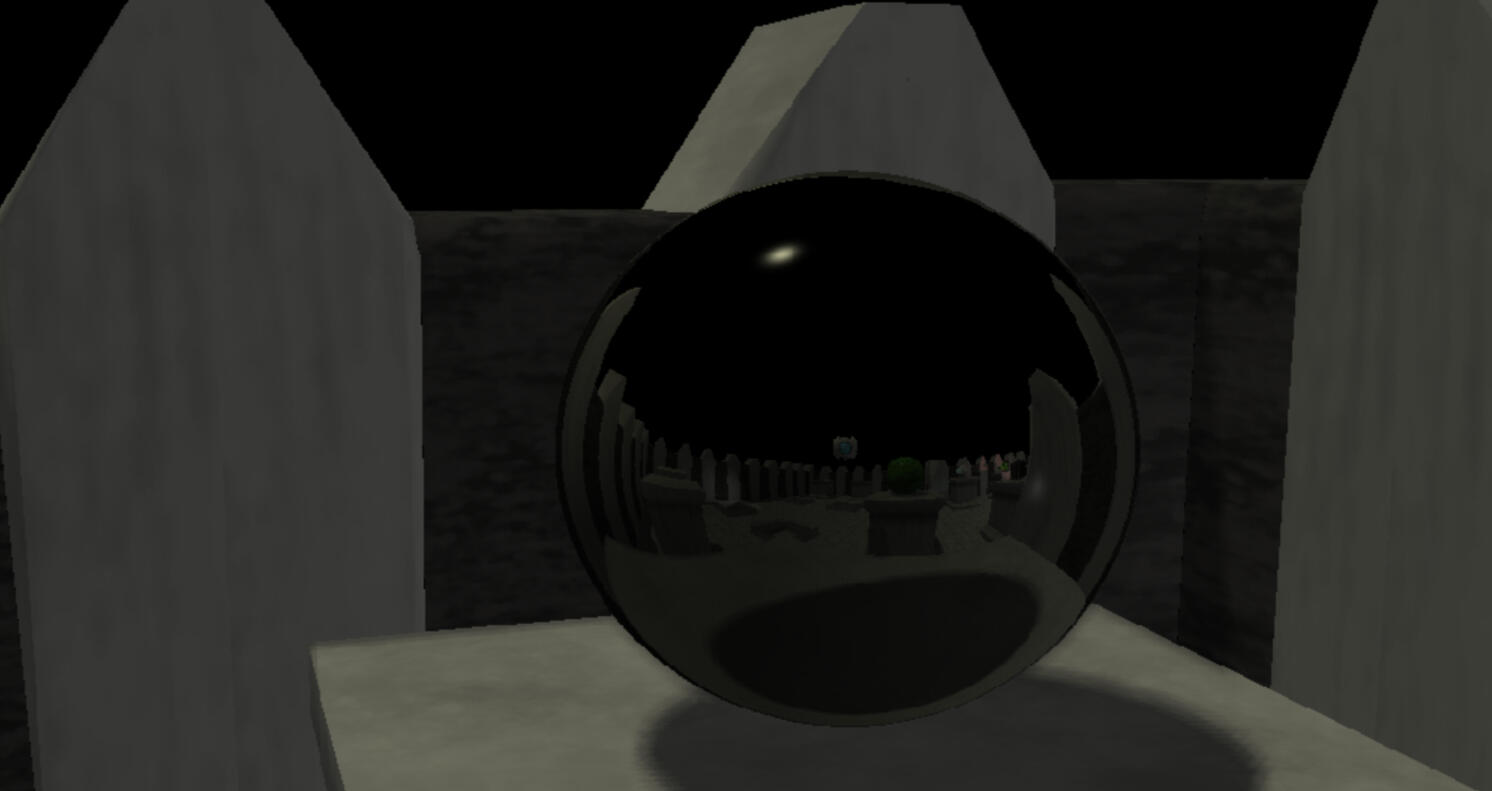
A sphere that fully reflects its surroundings.
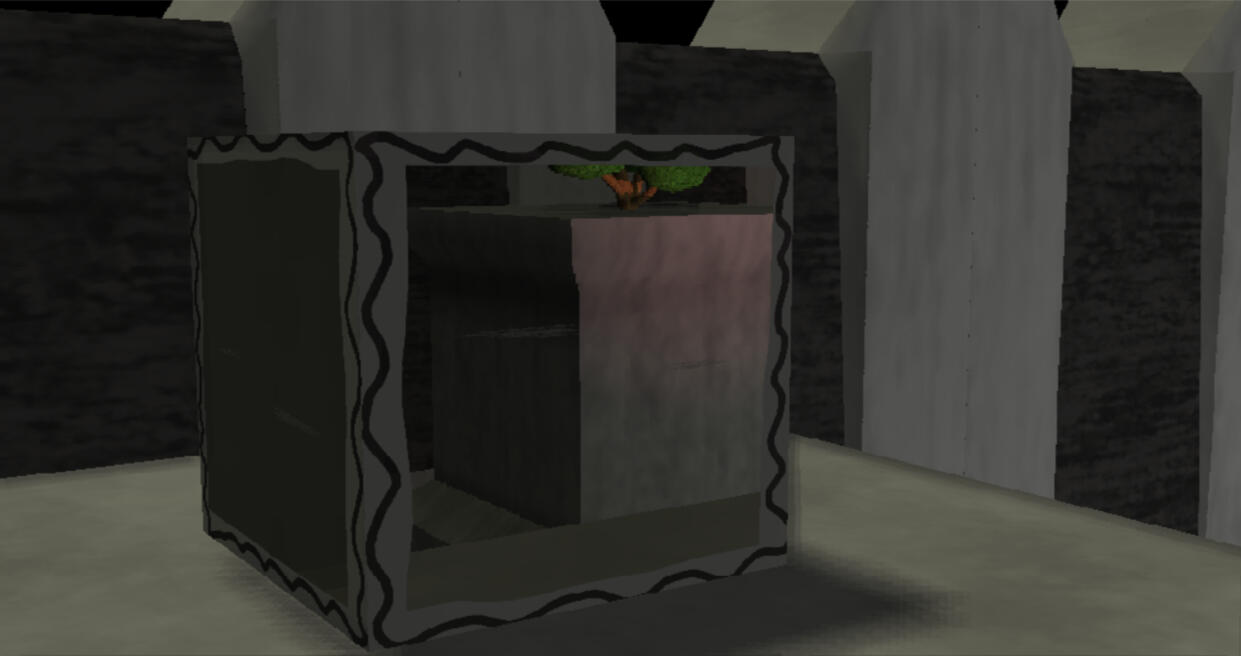
A cube that only partially reflects its surroundings due to its specular map not being fully white.
Deferred Rendering
The information from the Pixel Shader being stored is the rendered fragment's Position and Normal, along with its Ambient, Diffuse and Specular colors.
The information is packaged as four RGBA textures, where each texture contains:
- The ambient color and the X coordinate for the object.
- The diffuse color and the Y coordinate for the object.
-The specular color and the Z coordinate for the object.
-The object's normal and the specular exponent.

The textures being sent into the compute shader.
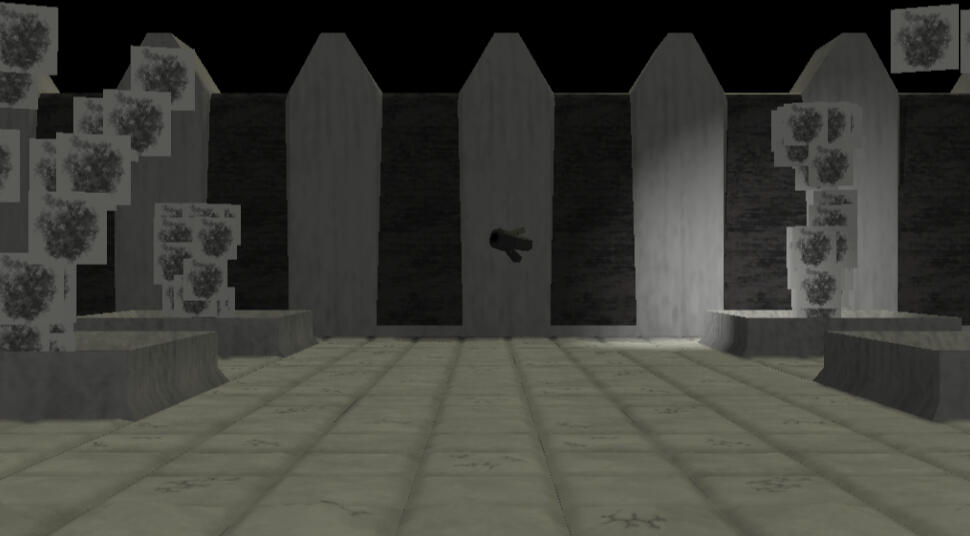
The result of combining the textures above.
Displacement
Each mesh in the project has a Height Map, which decides how much the triangles in the mesh should get displaced. In the project, a value of 0.5 on the height map leads to no displacement, meaning displacement can be done both away from and into the mesh.Only the floor in the scene is displaced, and is demonstrated as small bumps. To make the displacement easier to see I've also included a wireframe from the same angle.
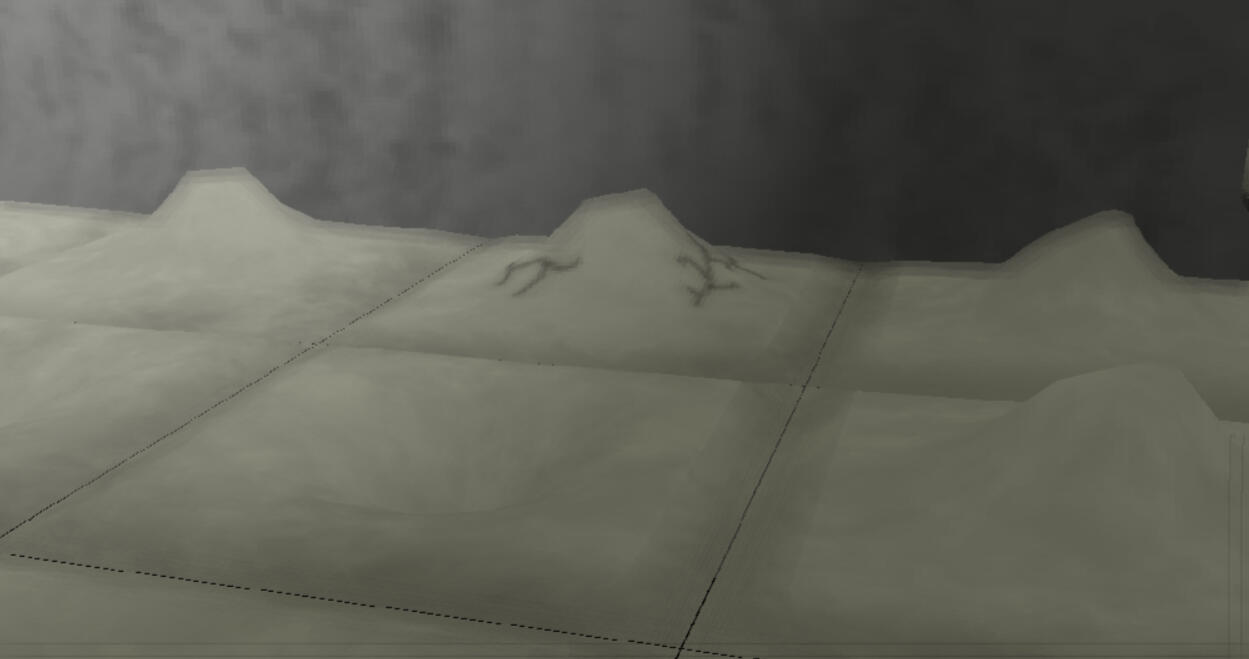
A floor with bumps in it.
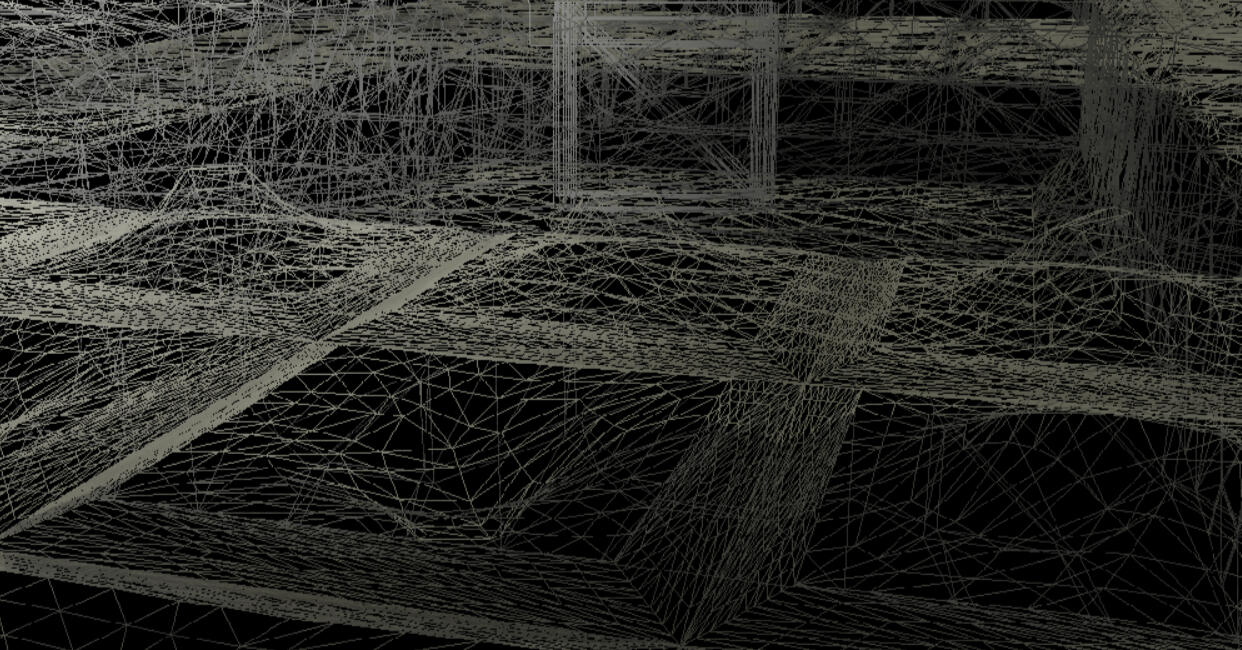
The same image but in wireframe.
Frustum Culling
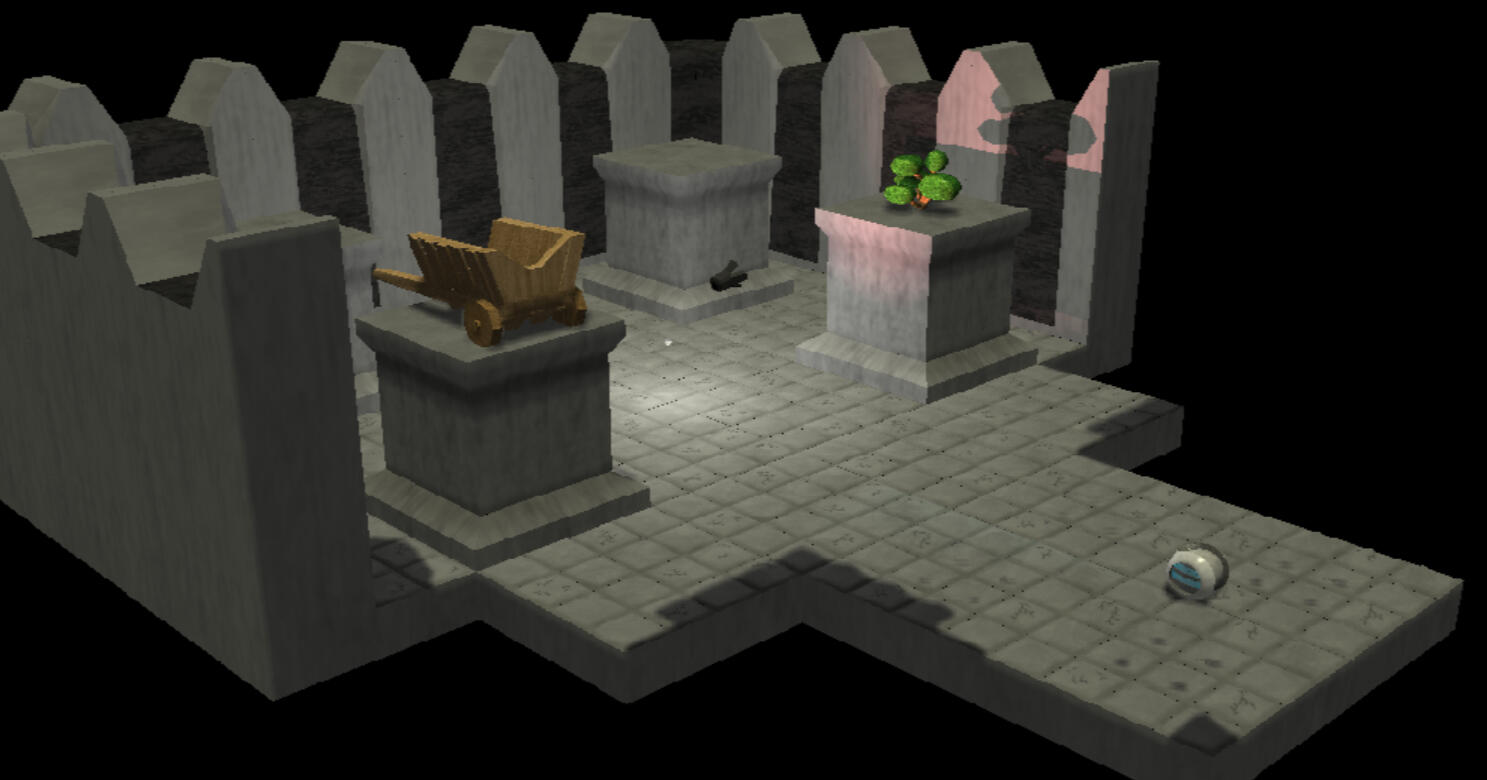
The project uses Frustum Culling against an Octree to limit the amount of meshes drawn each frame. The pictures below show the scene from a different camera in the scene vs. what the main camera sees.
What the second camera sees.
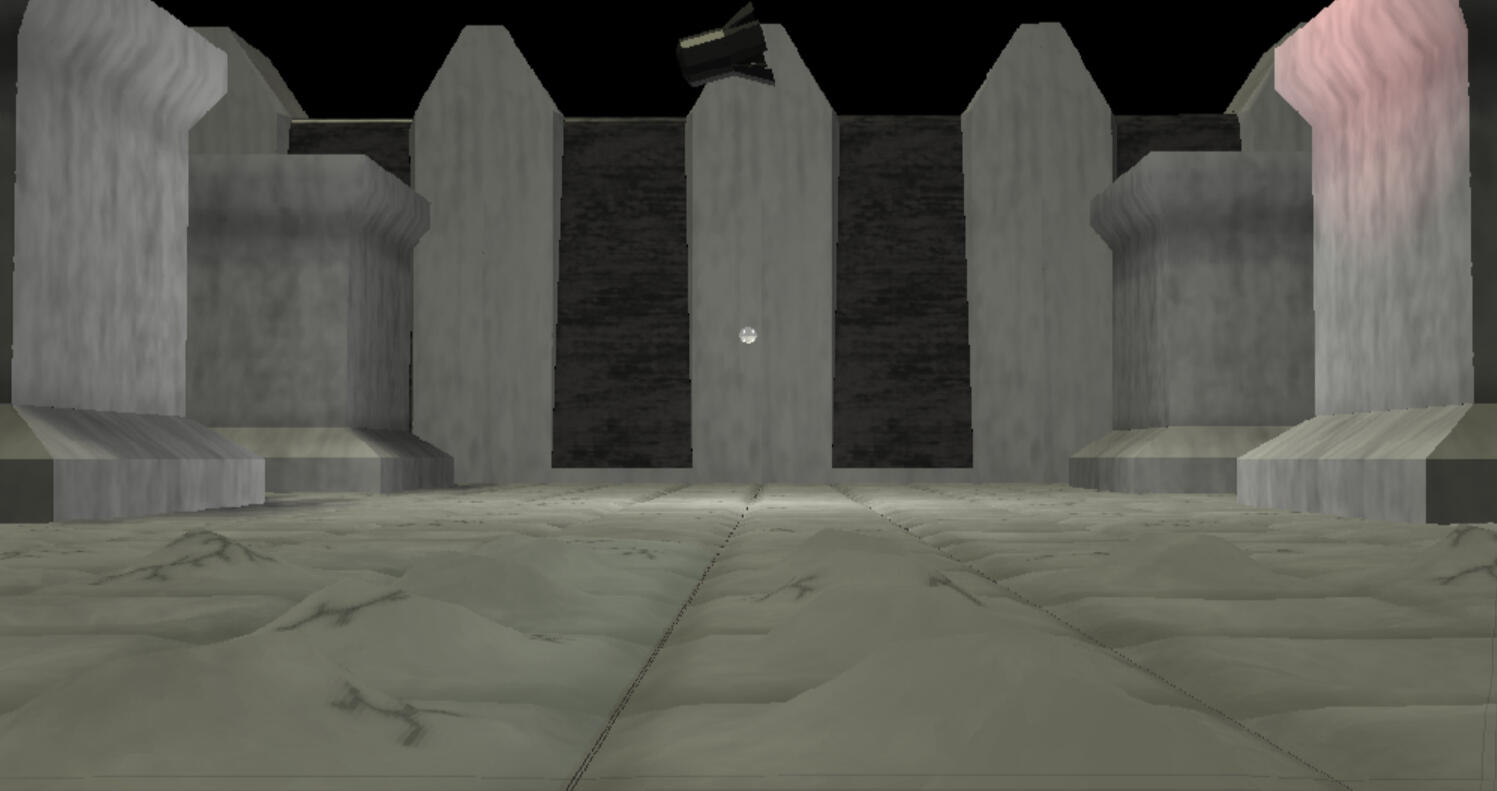
What the main camera sees.
GPU-Based Particles
The particles in the project were originally baked into the deferred rendering pipeline, not allowing any transparency. This can be seen above in the example shown under Deferred Rendering. As that approach looked awful, I went back and applied a different approach. Instead of rendering the particles to the textures used by deferred rendering, I render all particles on a separate texture, which I then blend with the output of the deferred rendering using the depth stencils from both textures. As some issues arise when trying to render images behind images with transparency, I sort the particles by length from the camera, to ensure that the particles that are the furthest away are rendered first. This sorting is however only done per emitter.The particles are stored as positions in a structured buffer that get updated in a compute shader every frame. The structured buffer is then used with vertex pulling when drawing out the particles.In the project, four different particle emitters have been placed with different settings, but all particles are still stored in one structured buffer. There is then a separate structured buffer that holds information about each emitter, such as position, type, and how many particles it uses. The image used for the particles has 50% transparency.
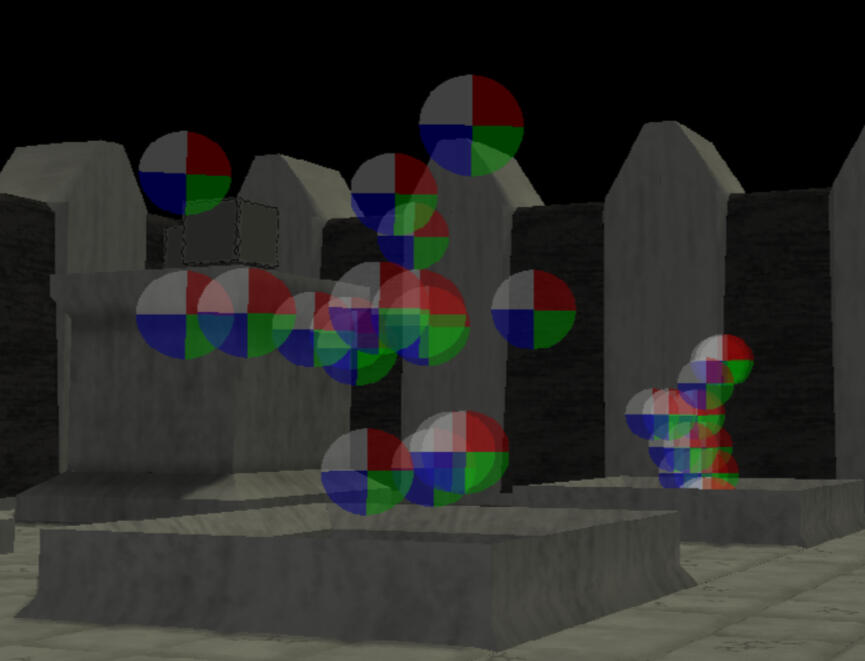
What the particles look like.
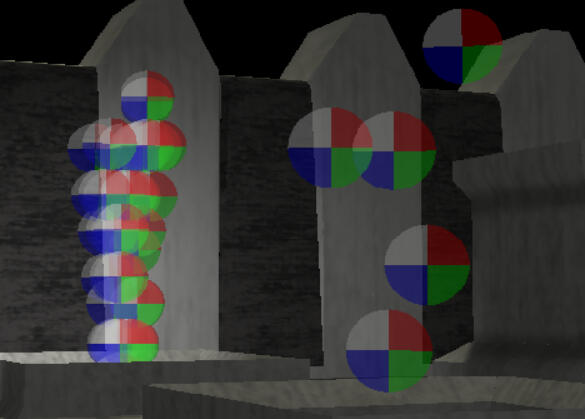
More particles.
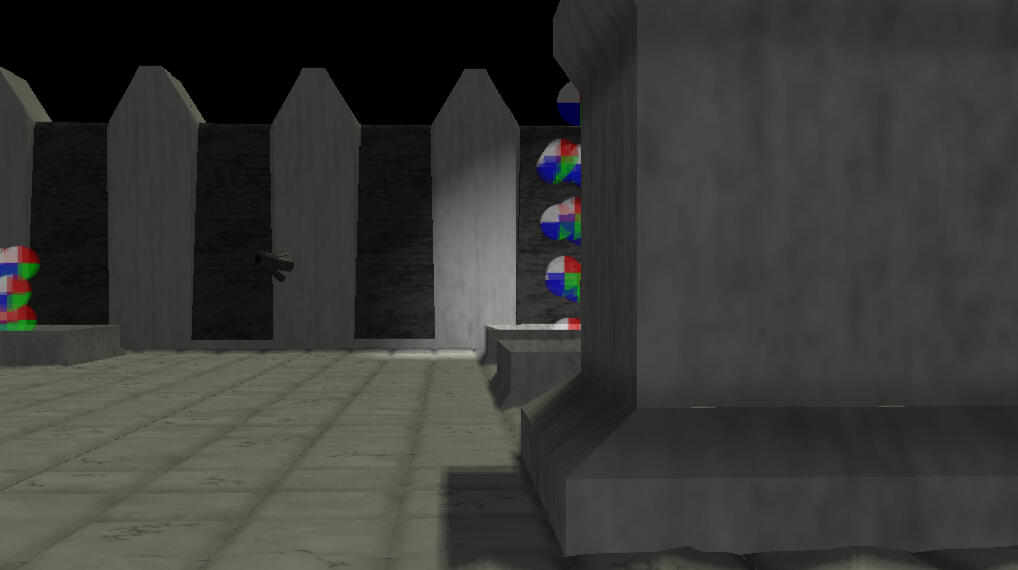
The particles are not seen through walls.
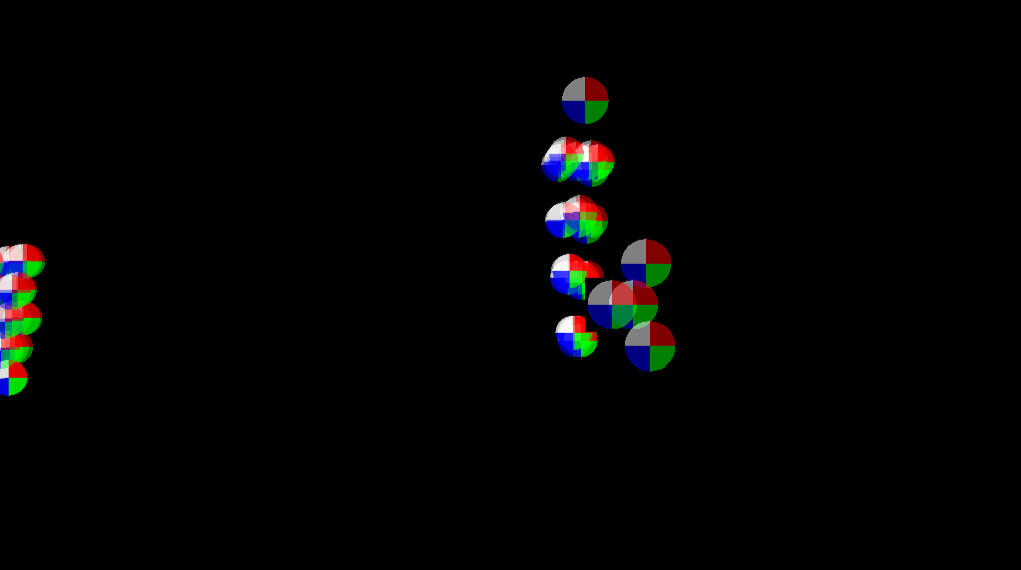
All particles rendered in the previous image.
OBJ Parsing
All objects in the project are loaded using an OBJ parser which loads ambient, diffuse and specular textures for the models if such textures are found. I also edited the MTL files of some objects to add a parameter called "map_Kh" to be able to load height textures.The parser supports having different materials on different parts of a mesh, and when loading mesh data for a model, it is not owned by the model, making it easy to instantiate the mesh.
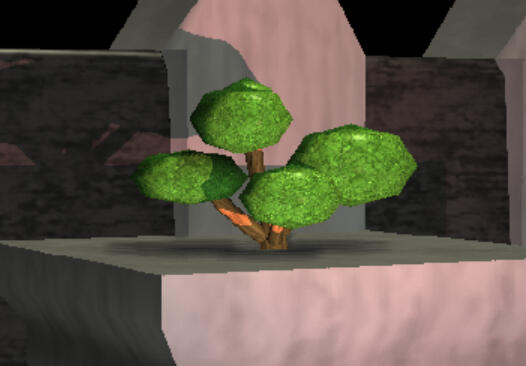
An example of a mesh that has two different materials on it, as the wood and leaves are two separate textures.
Phong Lighting
The project uses the Phong lighting model, and supports directional lights, point lights an spot lights.
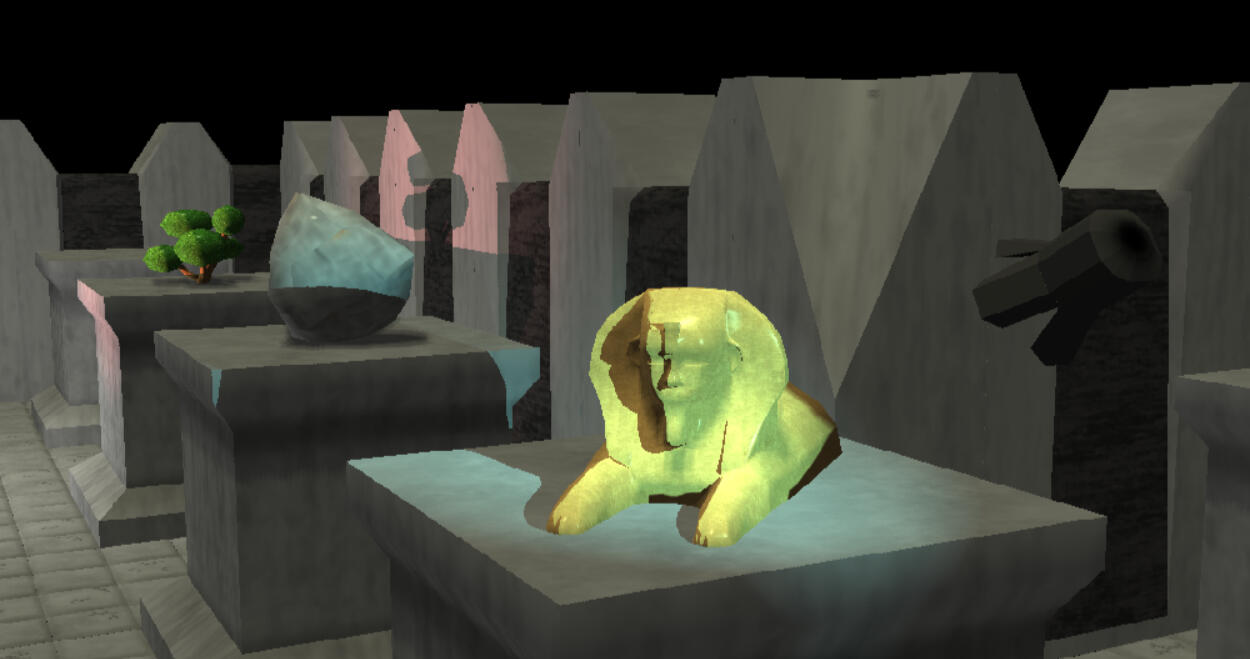
Some different colored lights. A red and a blue spot light, a grey directional light, and a white point light in the background.
Shadow Mapping
To create shadows in the project, shadow mapping is used. The project currently supports having shadows for up to 10 lights, but that can be easily expanded.As I did not like how you could move away from the shaded area made by a directional light, I made the directional light in the scene follow the player. This however made it so that the edges of the shadows would flicker. To mitigate this I decided to smooth out the edges of the shadows by sampling the neighboring pixels based on how close the camera is.
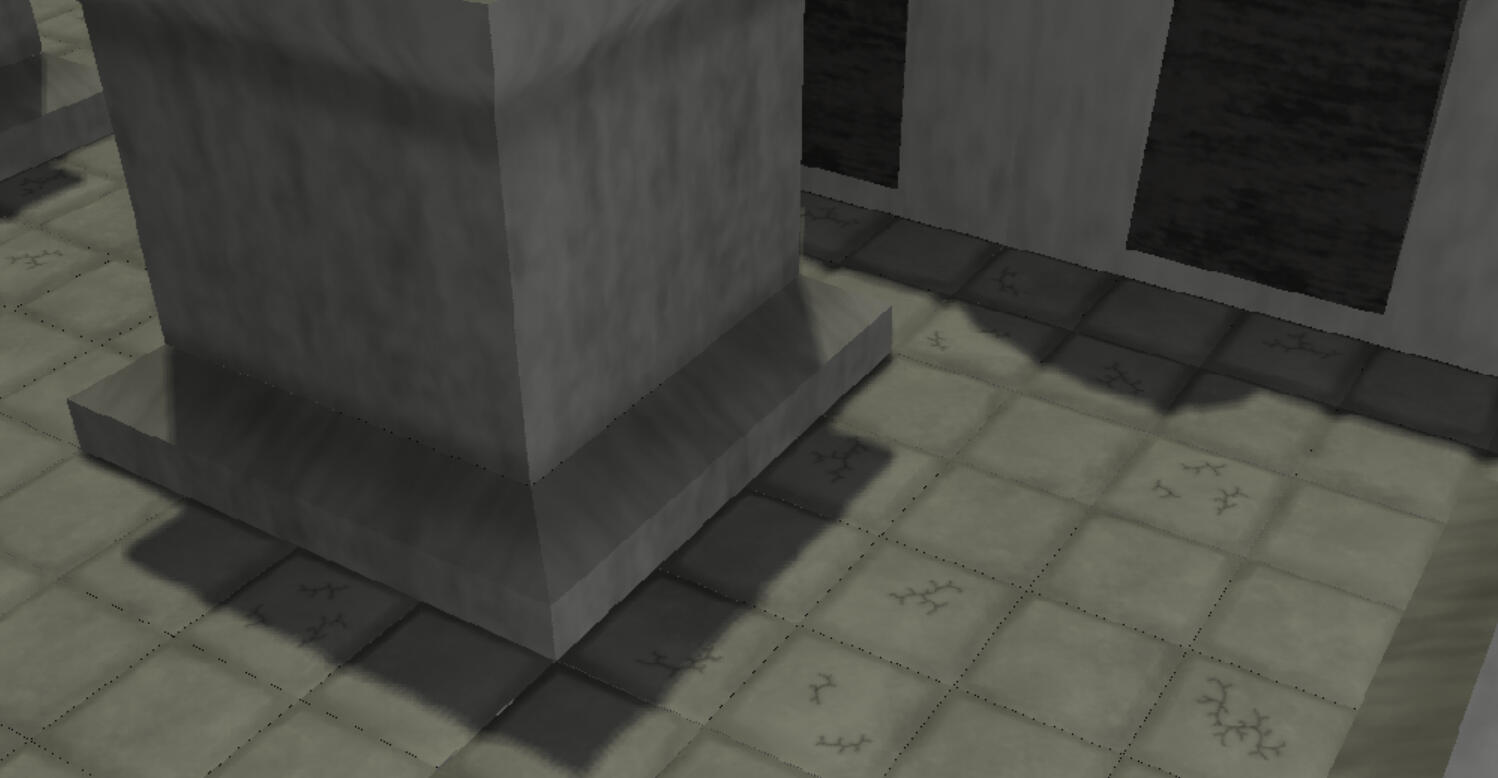
Shadows from a directional light.
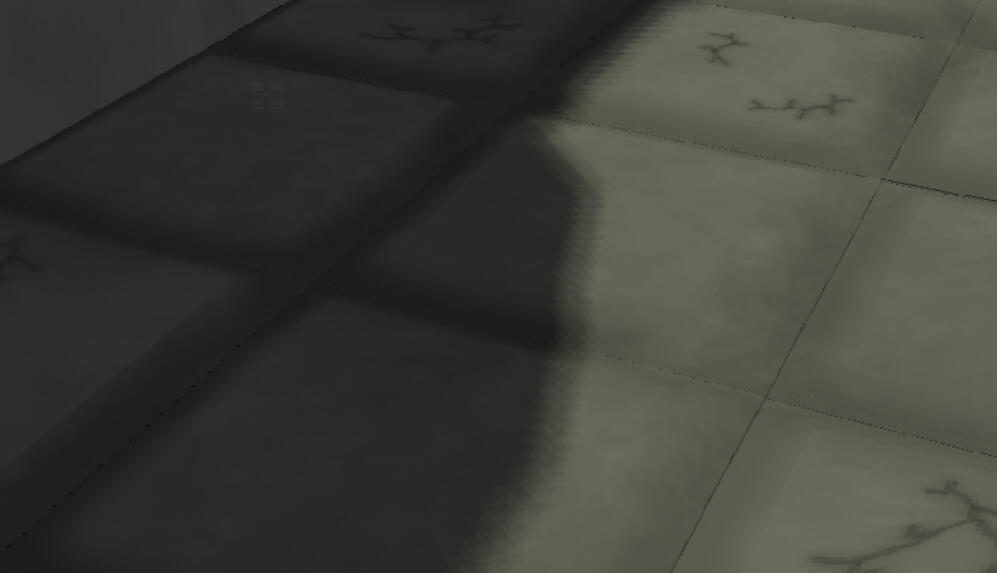
Shadows from a directional light up close.
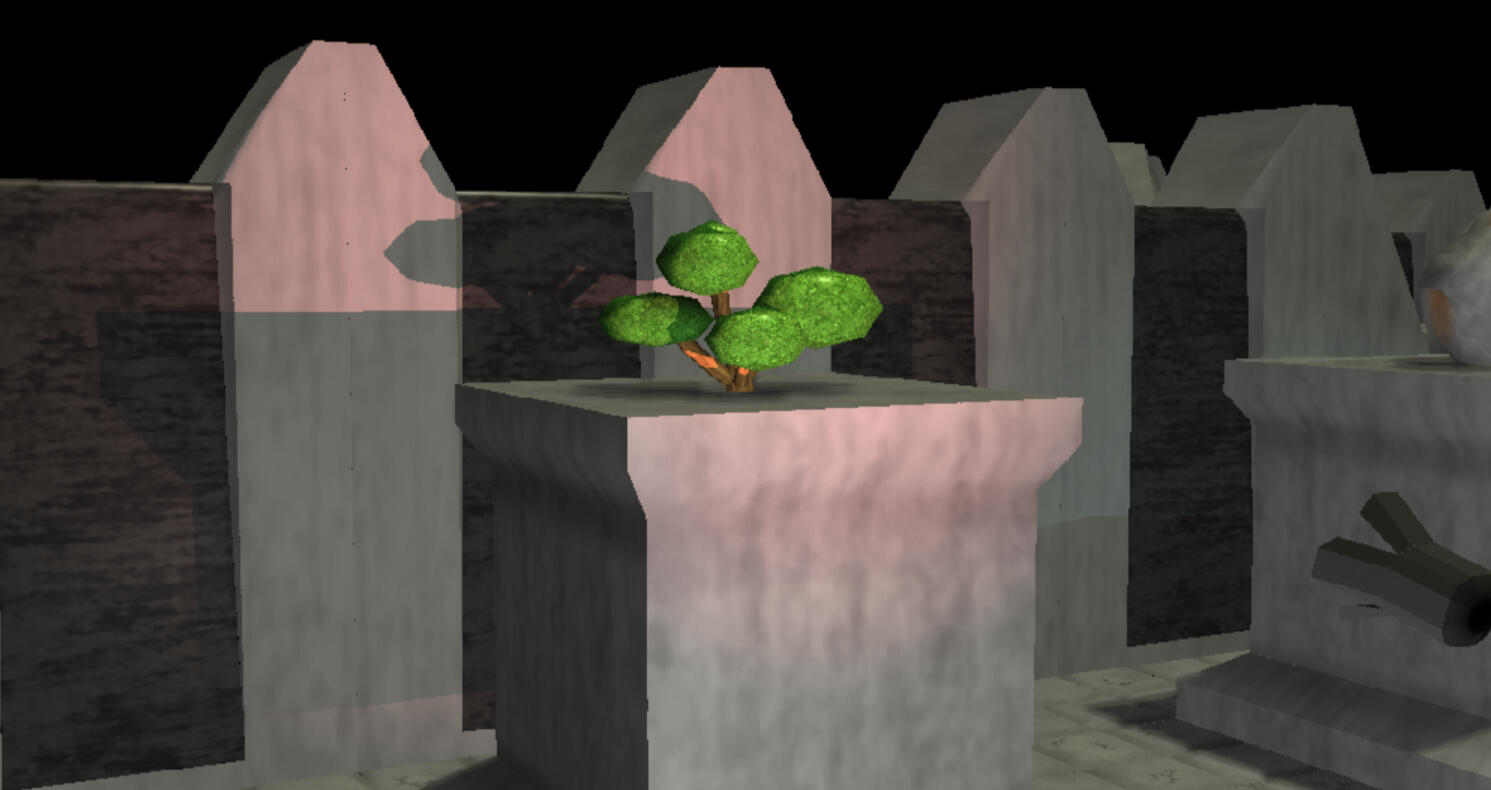
Shadows from a spot light.
Shatter
This technique was invented as part of the development of Damned Soul. The whole premise of Shatter is to make all of the triangles in a mesh fly away from each other. This can be achieved in many ways, but for a few reasons, I chose to use the Geometry Shader for this.The first reason is that I wanted to add geometry to each triangle, to give them a bit of mass.The second reason is that there already were techniques in Damned Soul that used the Geometry Shader such as Normal Mapping, and rather than add another pipeline step, it felt more appropriate to just add the shatter code to an existing shader.The way Shatter works, is that I made the Geometry Shader work per triangle. For each triangle I then calculate a displacement of how far from its original position in the mesh it should be moved. I calculate this displacement based on a few factors such as:
- direction (it will either shatter along the triangle's normal, or along the opposite of a vector from the triangle to the mesh's middle)
- force (how strong the shatter effect should be)
- gravity (how fast the triangles should fall to the ground)
- resistance (to simulate air resistance and make sure the speed of the shatter falls off)
- time (the time that has passed since the shatter started)
The displacement is based on time, so that if time equals 0, no displacement happens.After calculating the displacement, the triangle is moved, and three new triangles are made on the back of the triangles, turning the triangle into a three-sided pyramid pointing towards the mesh.
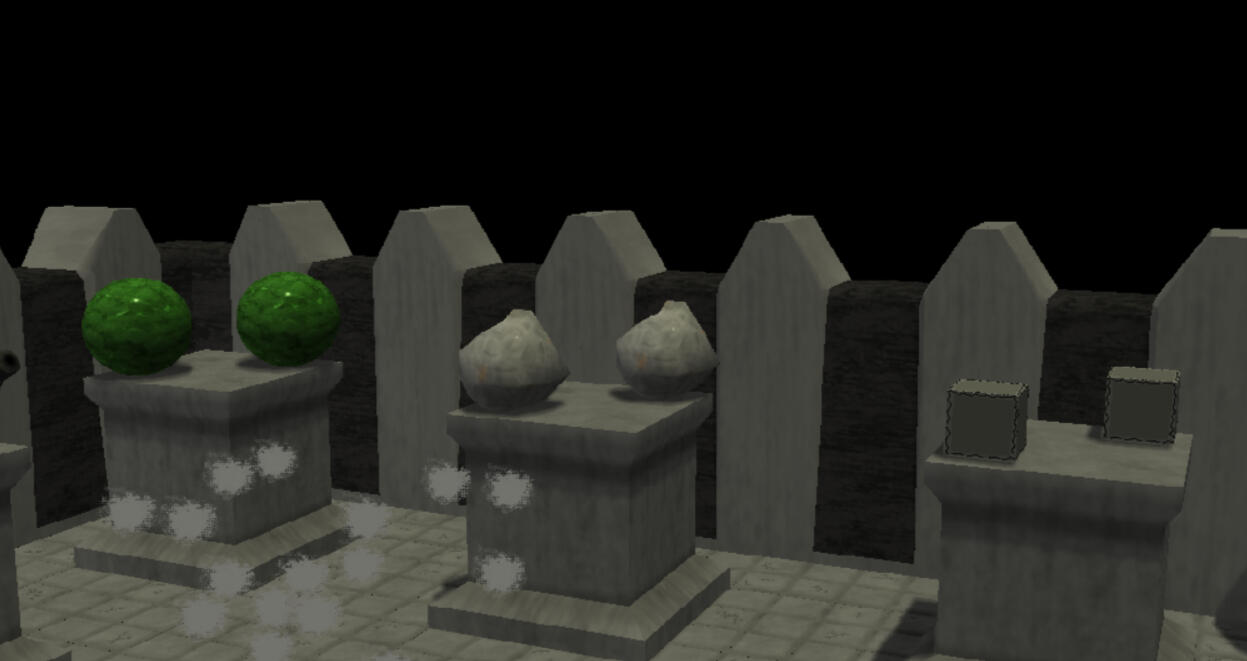
The six objects in the project that will shatter.
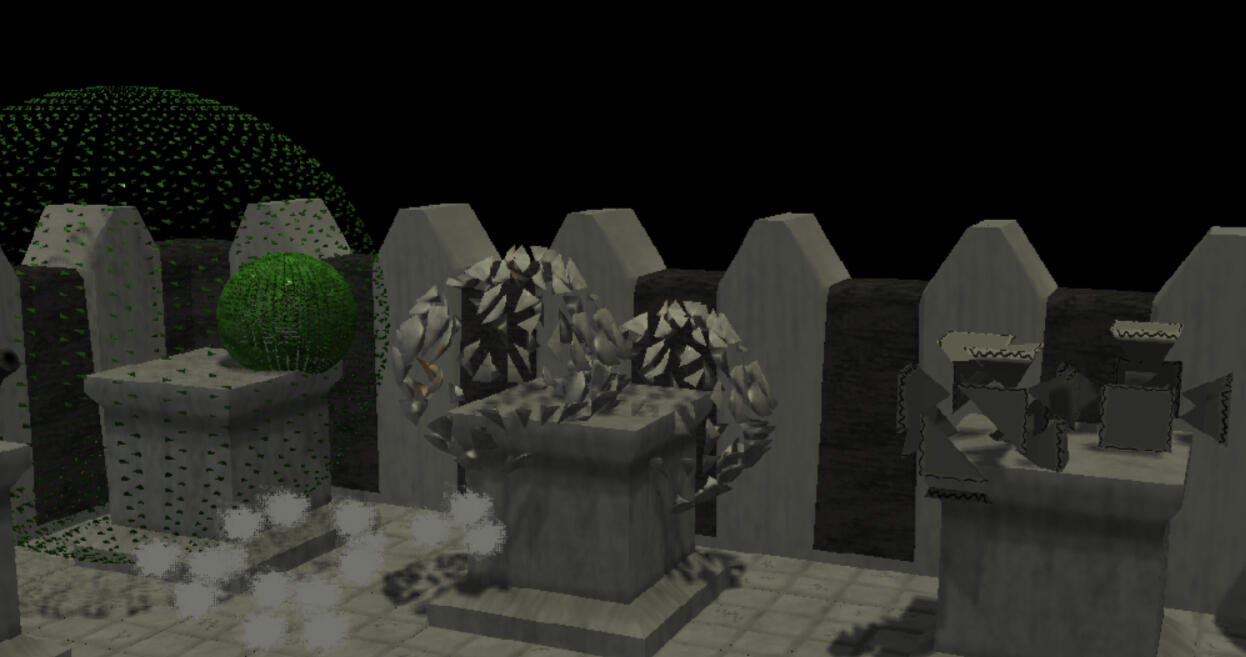
All six objects being shattered at the same time.
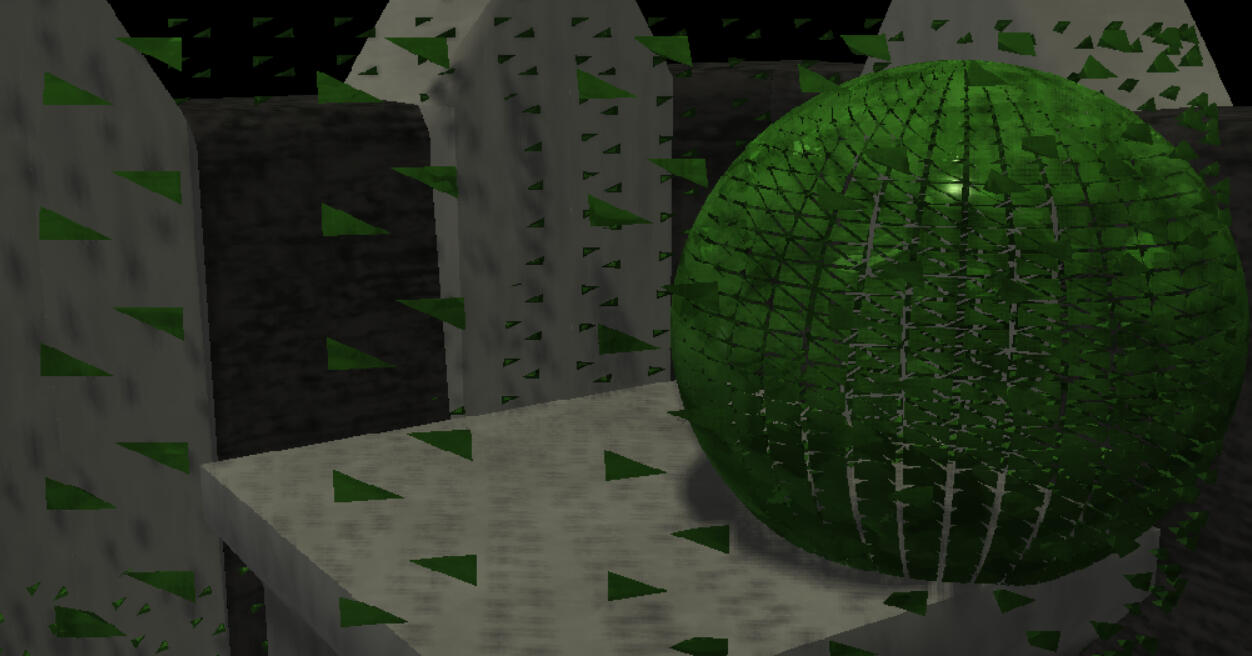
The sphere on the right has little force applied to it, making the shatter happen slowly. The sphere on the left has much force applied to it, making the shatter happen very fast.
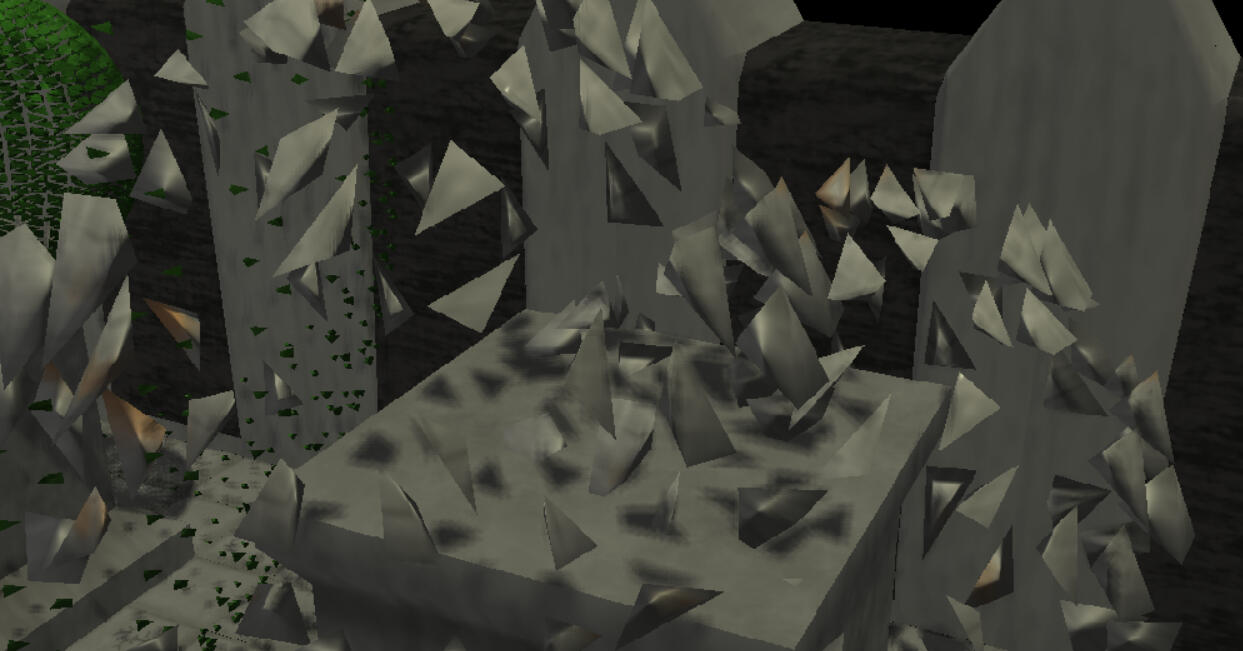
The stone on the right has gravity applied to it, making the triangles fall. The stone on the left has no gravity applied to it, making the triangles float.
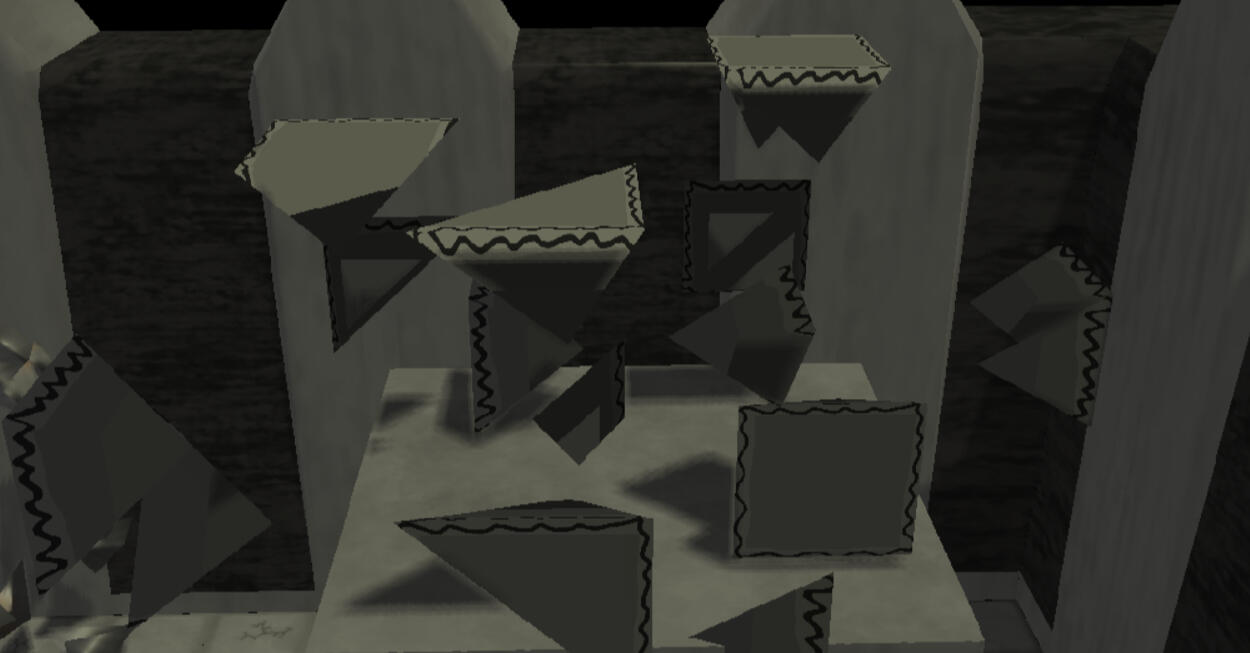
The cube on the right displaces along normals, keeping the faces together. The cube on the left displaces from the center of the cube, separating the faces.
Tesselation
All normal meshes in the scene will dynamically gain more polygons the closer the camera gets to them. This serves no real purpose in the scene and is merely done to try out the Hull and Domain shaders. To apply some work to the tessellated geometry, the displacement previously mentioned was implemented. As the meshes normally don't have the polygons to support the displacement, this makes it so that only the meshes closest to the camera will get displaced.The amount a mesh is tessellated is based on the distance from the object's middle to the camera, making the entire mesh tessellate equally. In the project the floor is made up of several meshes in the form of 4x4 tiles, which explains why there is a change in tessellation for every fourth tile in the images below.
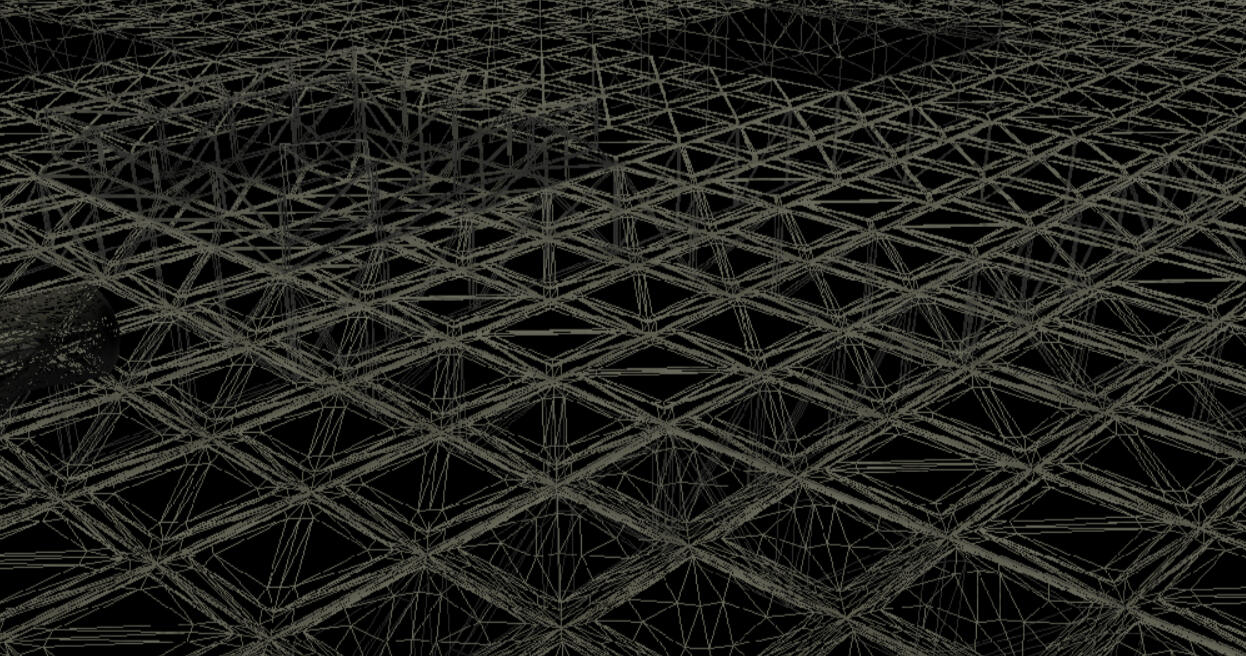
A look at the floor in wireframe.
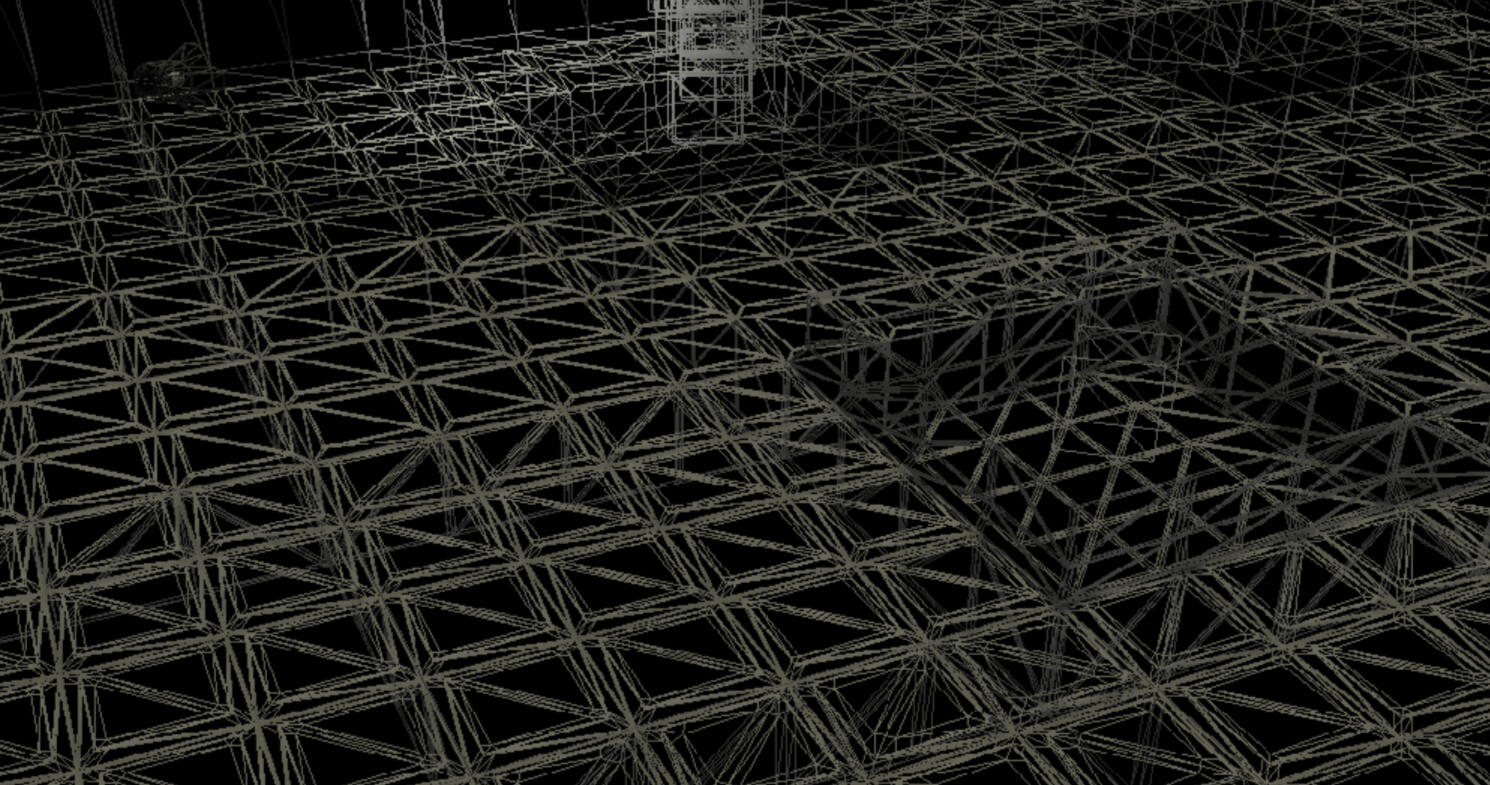
A look at the floor in wireframe from a different angle.
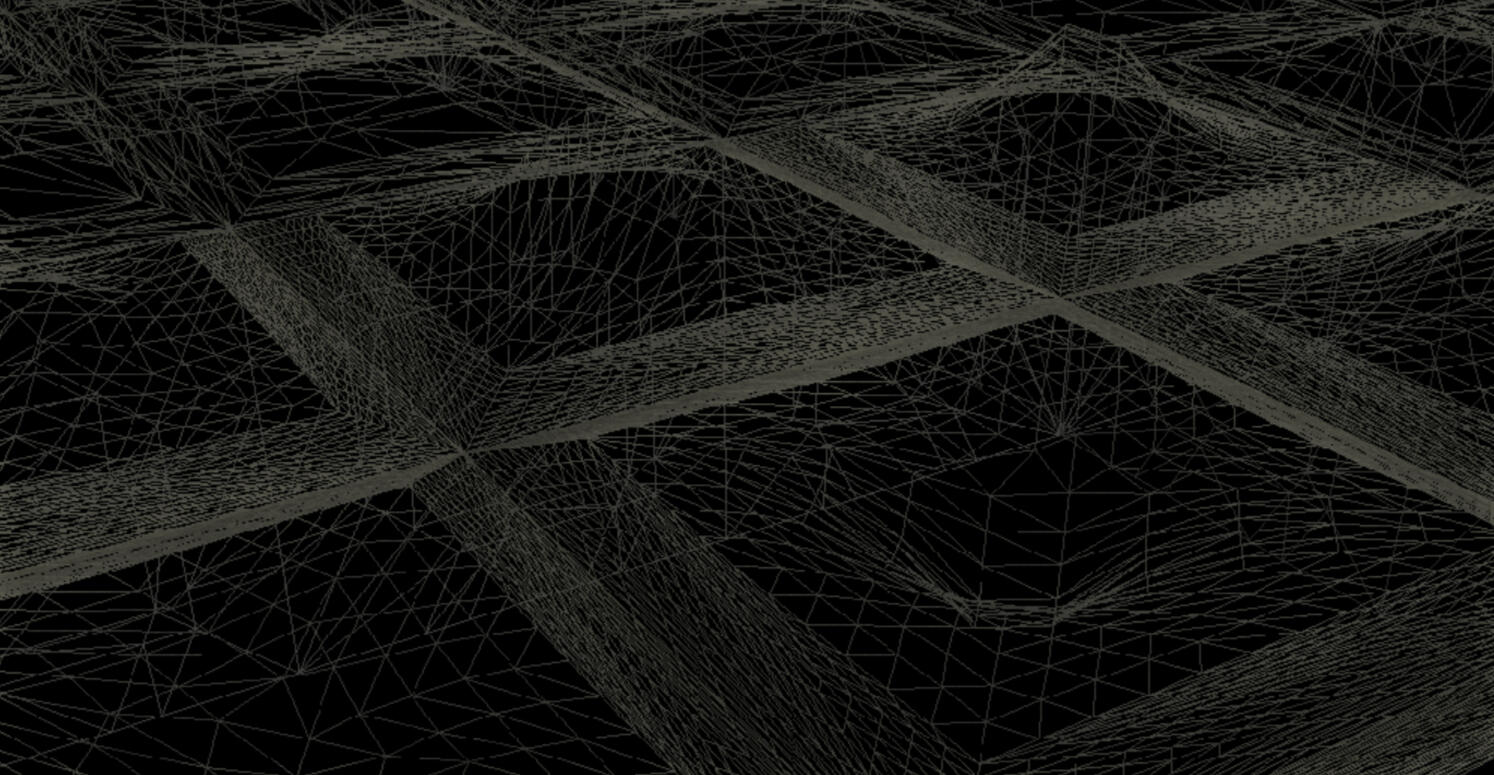
A close up of the floor in wireframe to show how much an object tessellates when the camera is close.


